UniMate is a desktop app for students to manage contacts and manage schedules optimized for use via a Command Line Interface (CLI) while still having the benefits of a Graphical User Interface (GUI). If you can type fast, UniMate can get your contact management tasks done faster than traditional GUI apps.
Quick start
Ensure you have Java
11or above installed in your Computer.Download the latest
UniMate.jarfrom here.Copy the file to the folder you want to use as the home folder for UniMate.
Open a command terminal,
cdinto the folder you put the jar file in, and use thejava -jar UniMate.jarcommand to run the application.
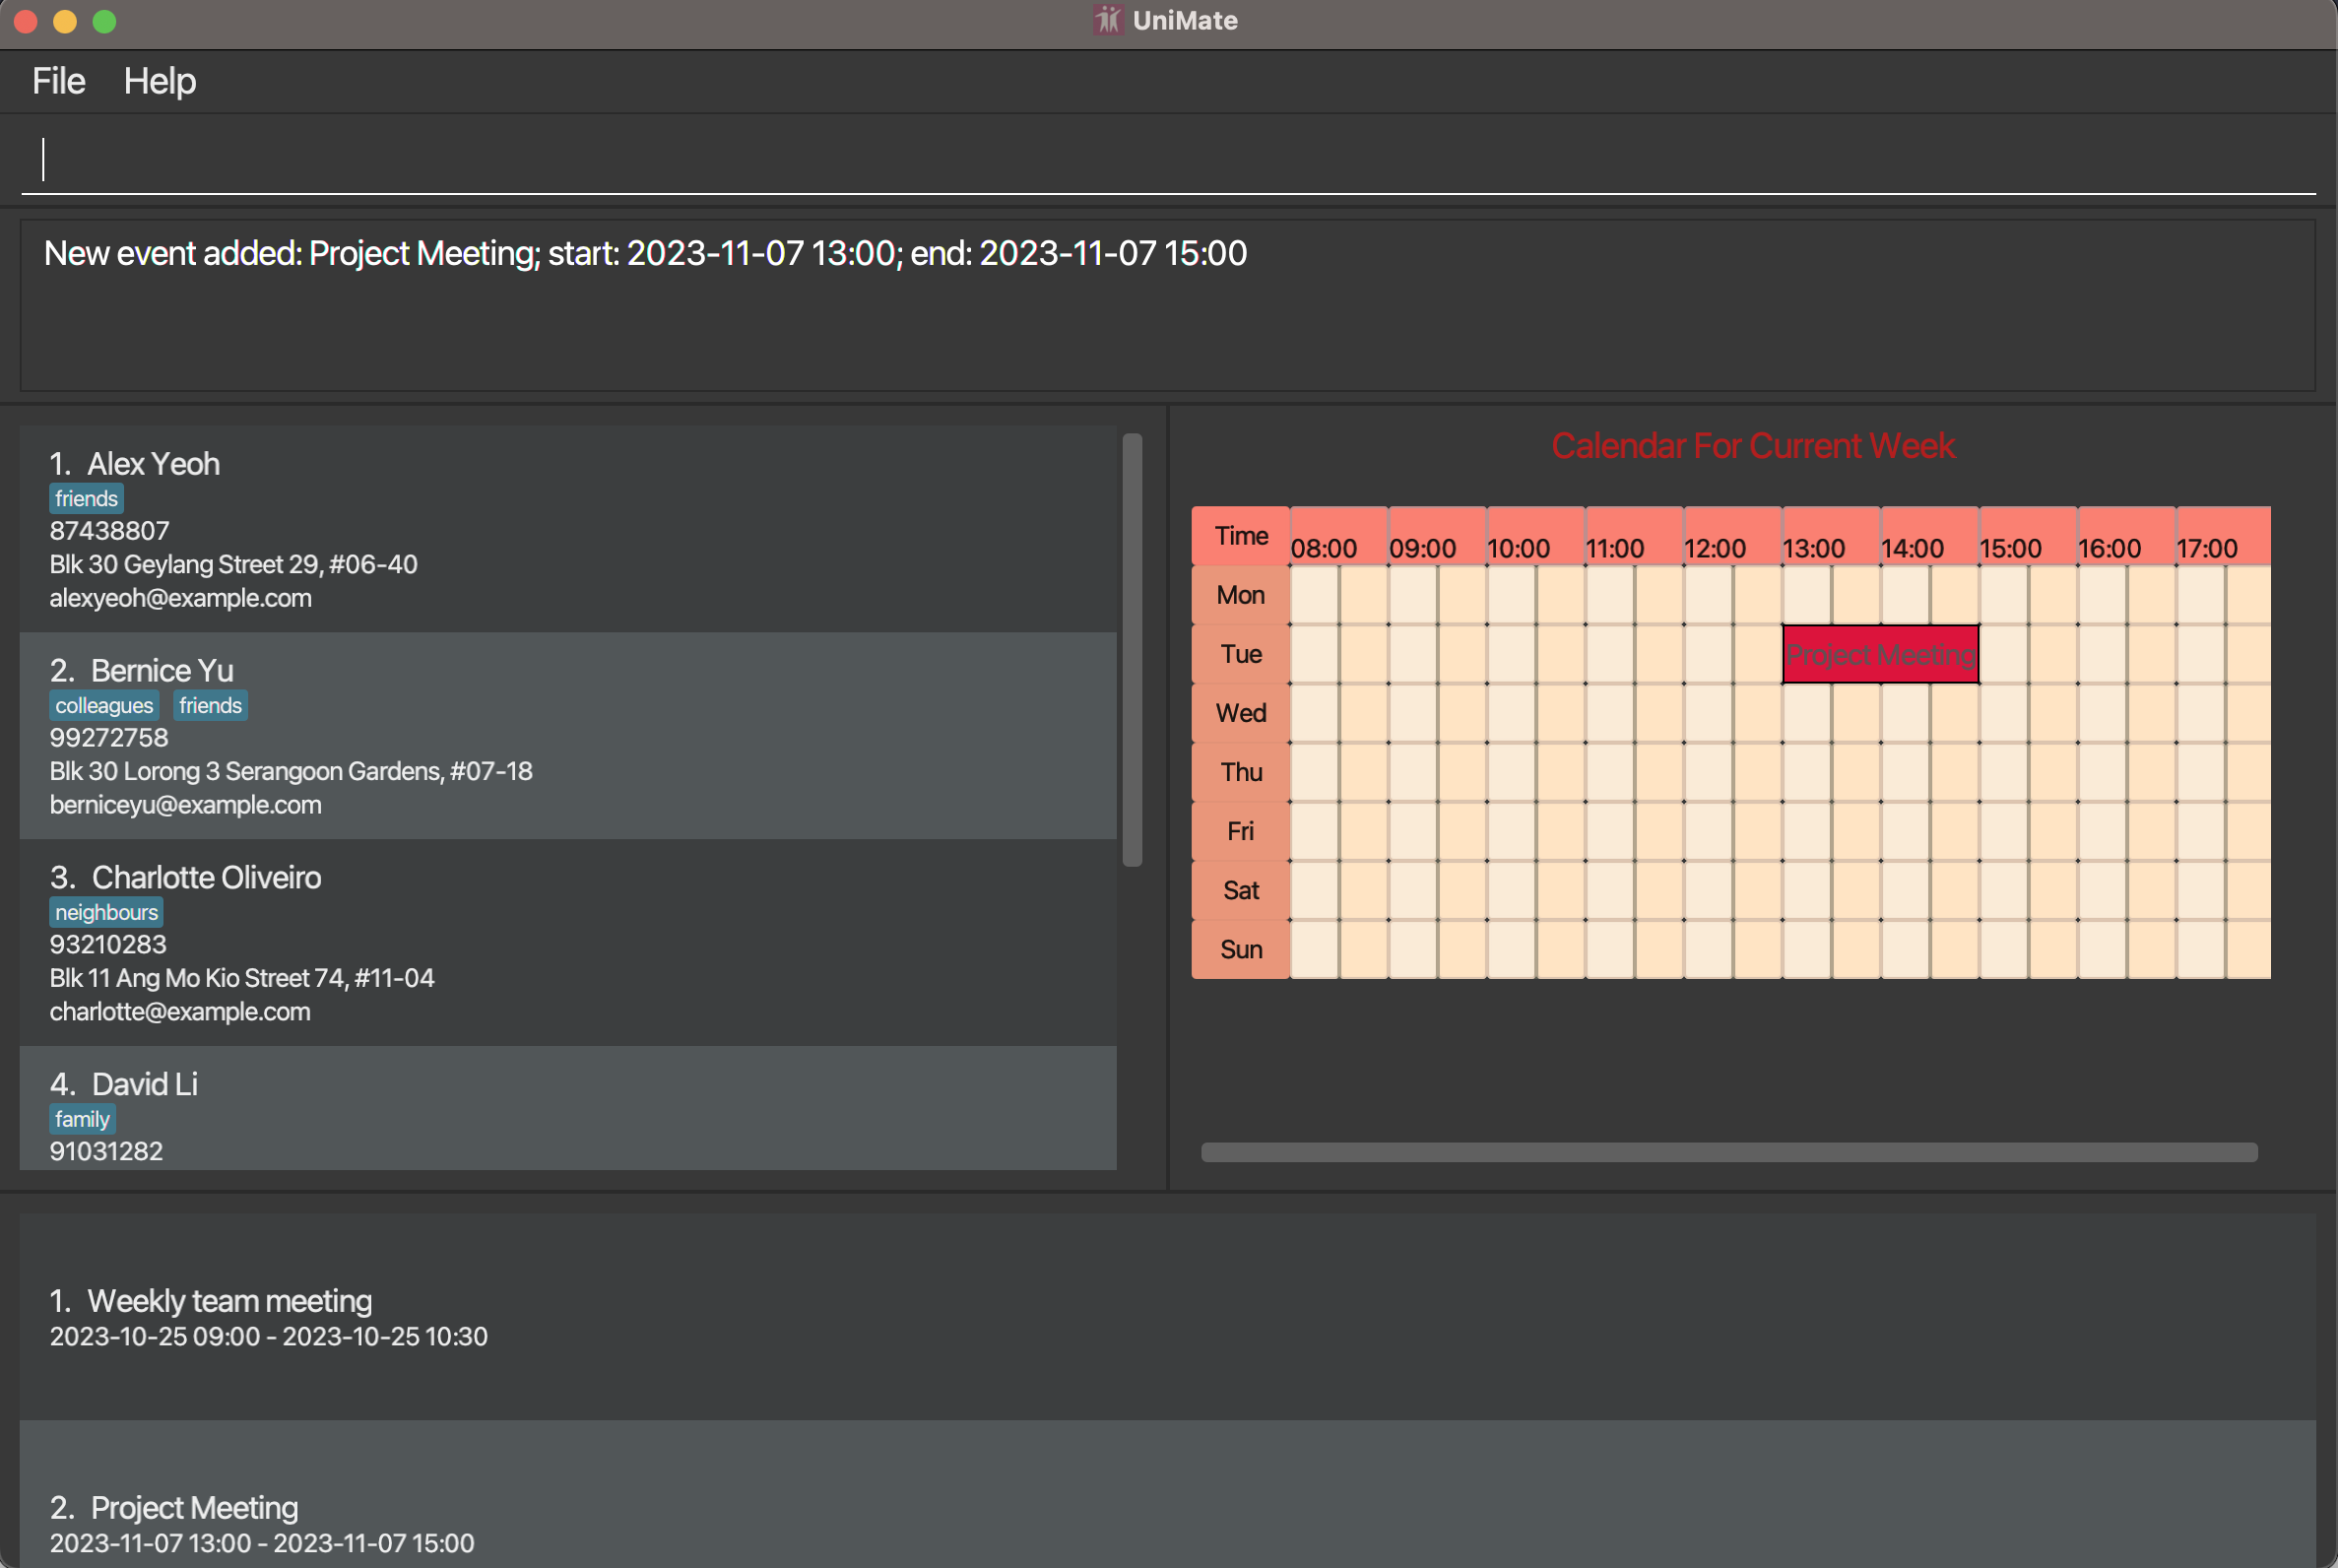
A GUI similar to the below should appear in a few seconds. Note that the app contains some sample data, which may differ from that of a fresh download.
Type the command in the command box and press Enter to execute it. e.g. typing
helpand pressing Enter will open the help window.
Some example commands you can try:list: Lists all contacts.add n/John Doe p/98765432 e/johnd@example.com a/John street, block 123, #01-01: Adds a contact namedJohn Doeto the AddressBook.delete 3: Deletes the 3rd contact shown in the current list.clear: Deletes all contacts.exit: Exits the app.
Refer to the Features below for details of each command.
Features Overview
UniMate has 3 core features, AddressBook, Calendar System and Task Management System. This section serves to provide you with an overview of what each component entails and the functionalities supporting them.
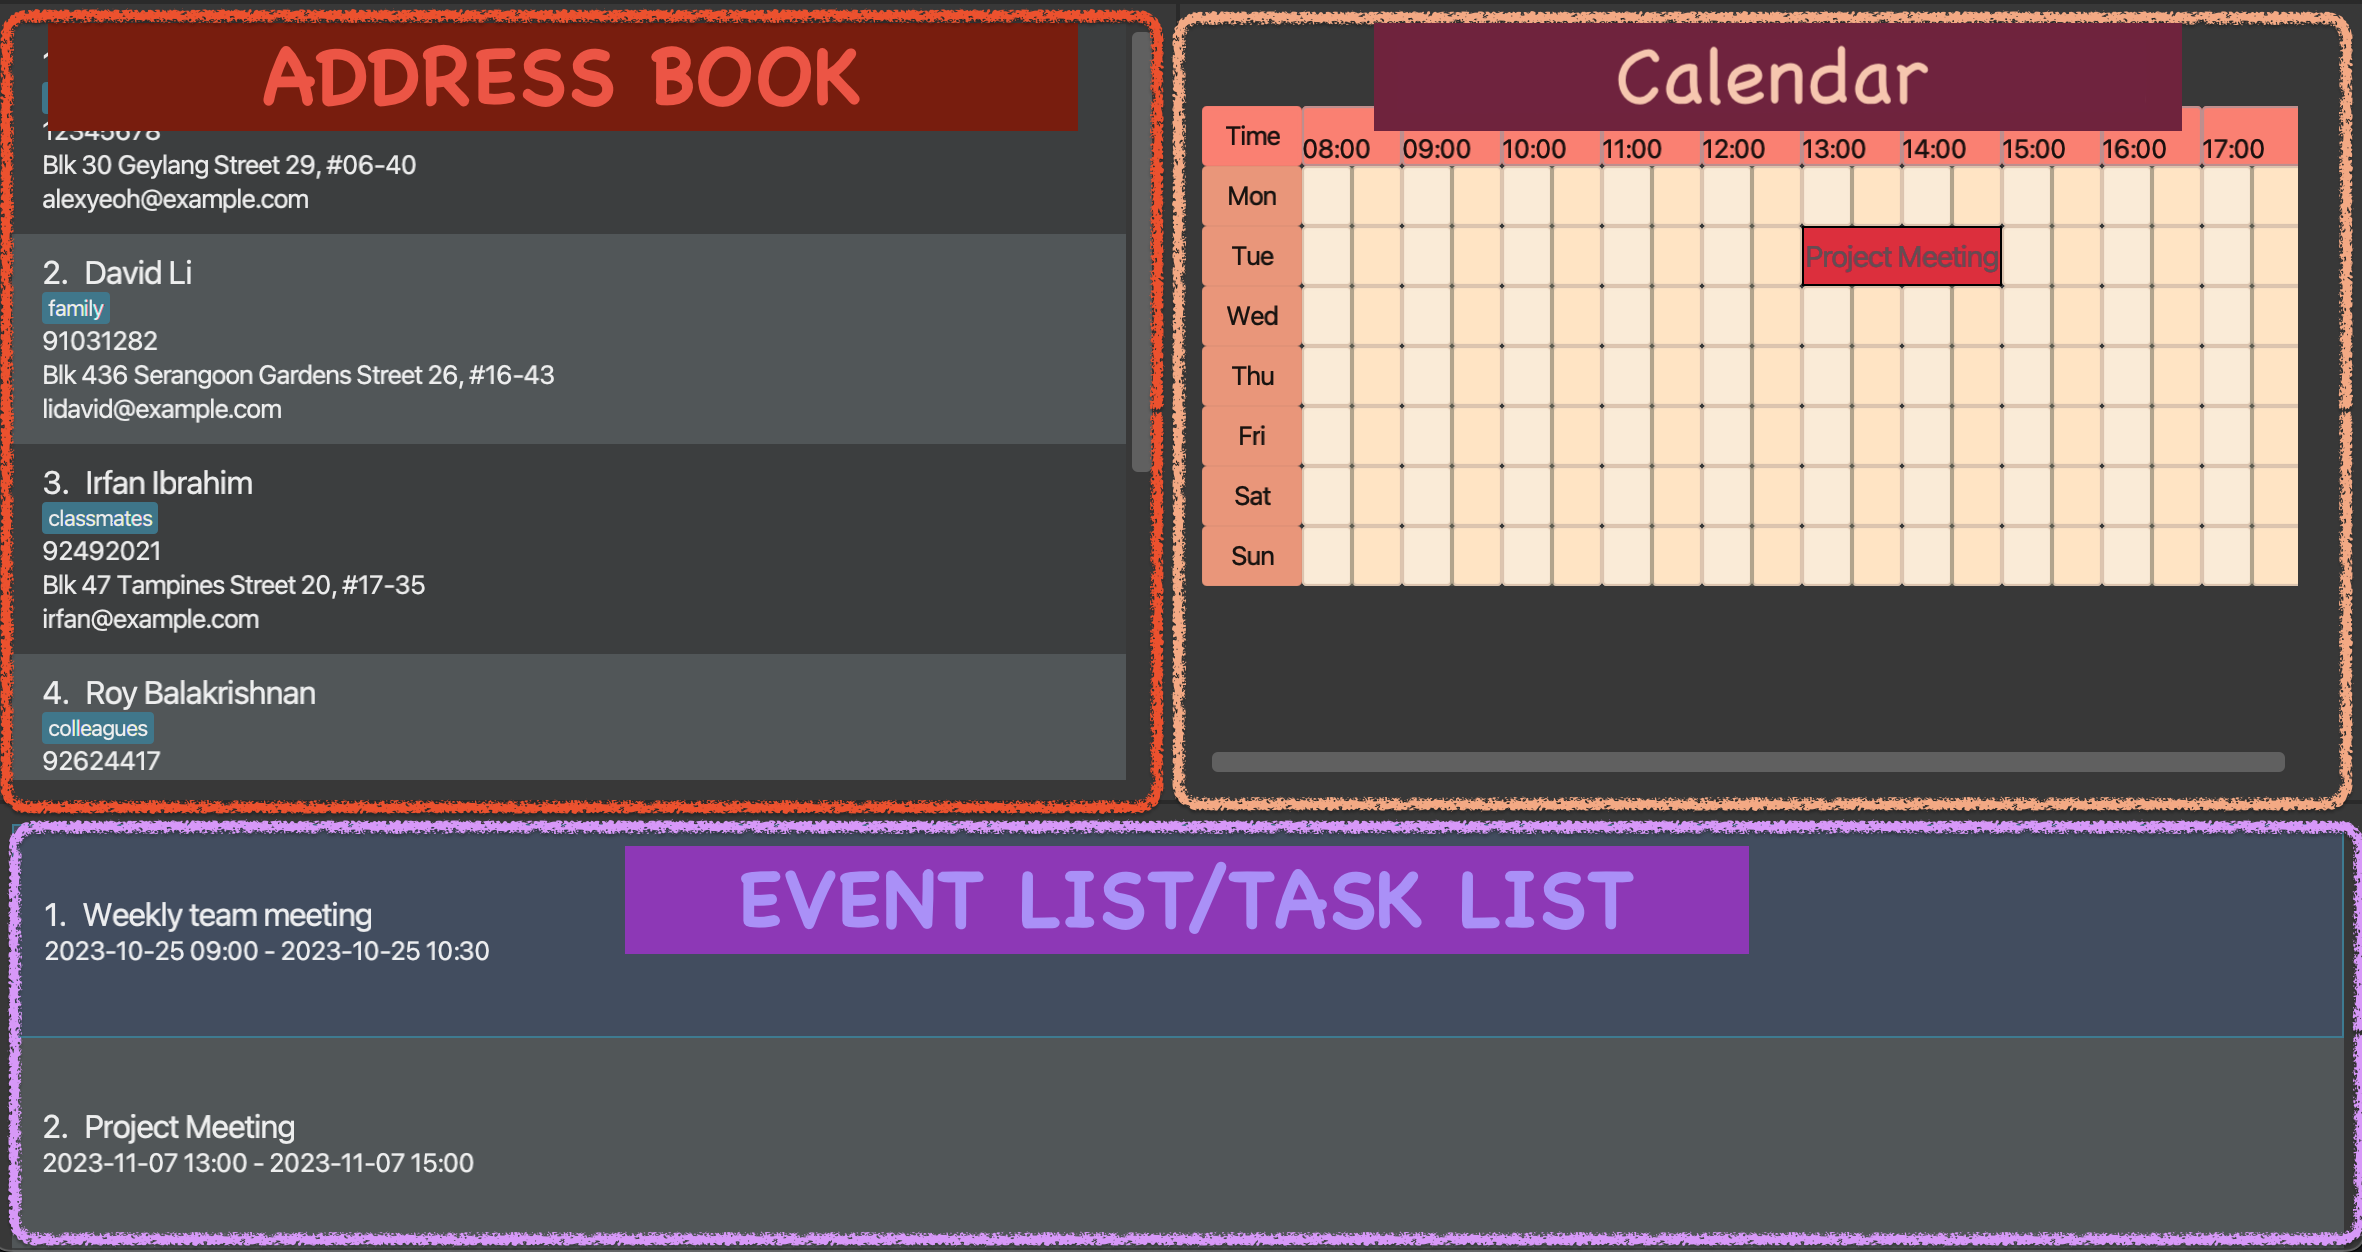
The screenshot above shows a cropped view of UniMate's GUI. AddressBook belongs to the AddressBook feature, CALENDAR belongs to the Calendar System feature and the EVENT LIST/TASK LIST portion is shared by both the Calendar System feature and Task Management System feature.
To switch between the Event List and Task List, we have a CLI-based command for that.
Main feature 1: AddressBook
The AddressBook serves to ease contact management.
Some major CLI-based functionalities to support this feature include:
- Adding, deleting and editing operations to manipulate contacts in the AddressBook
- Finding and filtering operations to search for and isolate contacts of interest
- Sorting operation to reorganise the view of the AddressBook when needed
Other functionalities can be found in the AddressBook Management subsection found in the Features section.
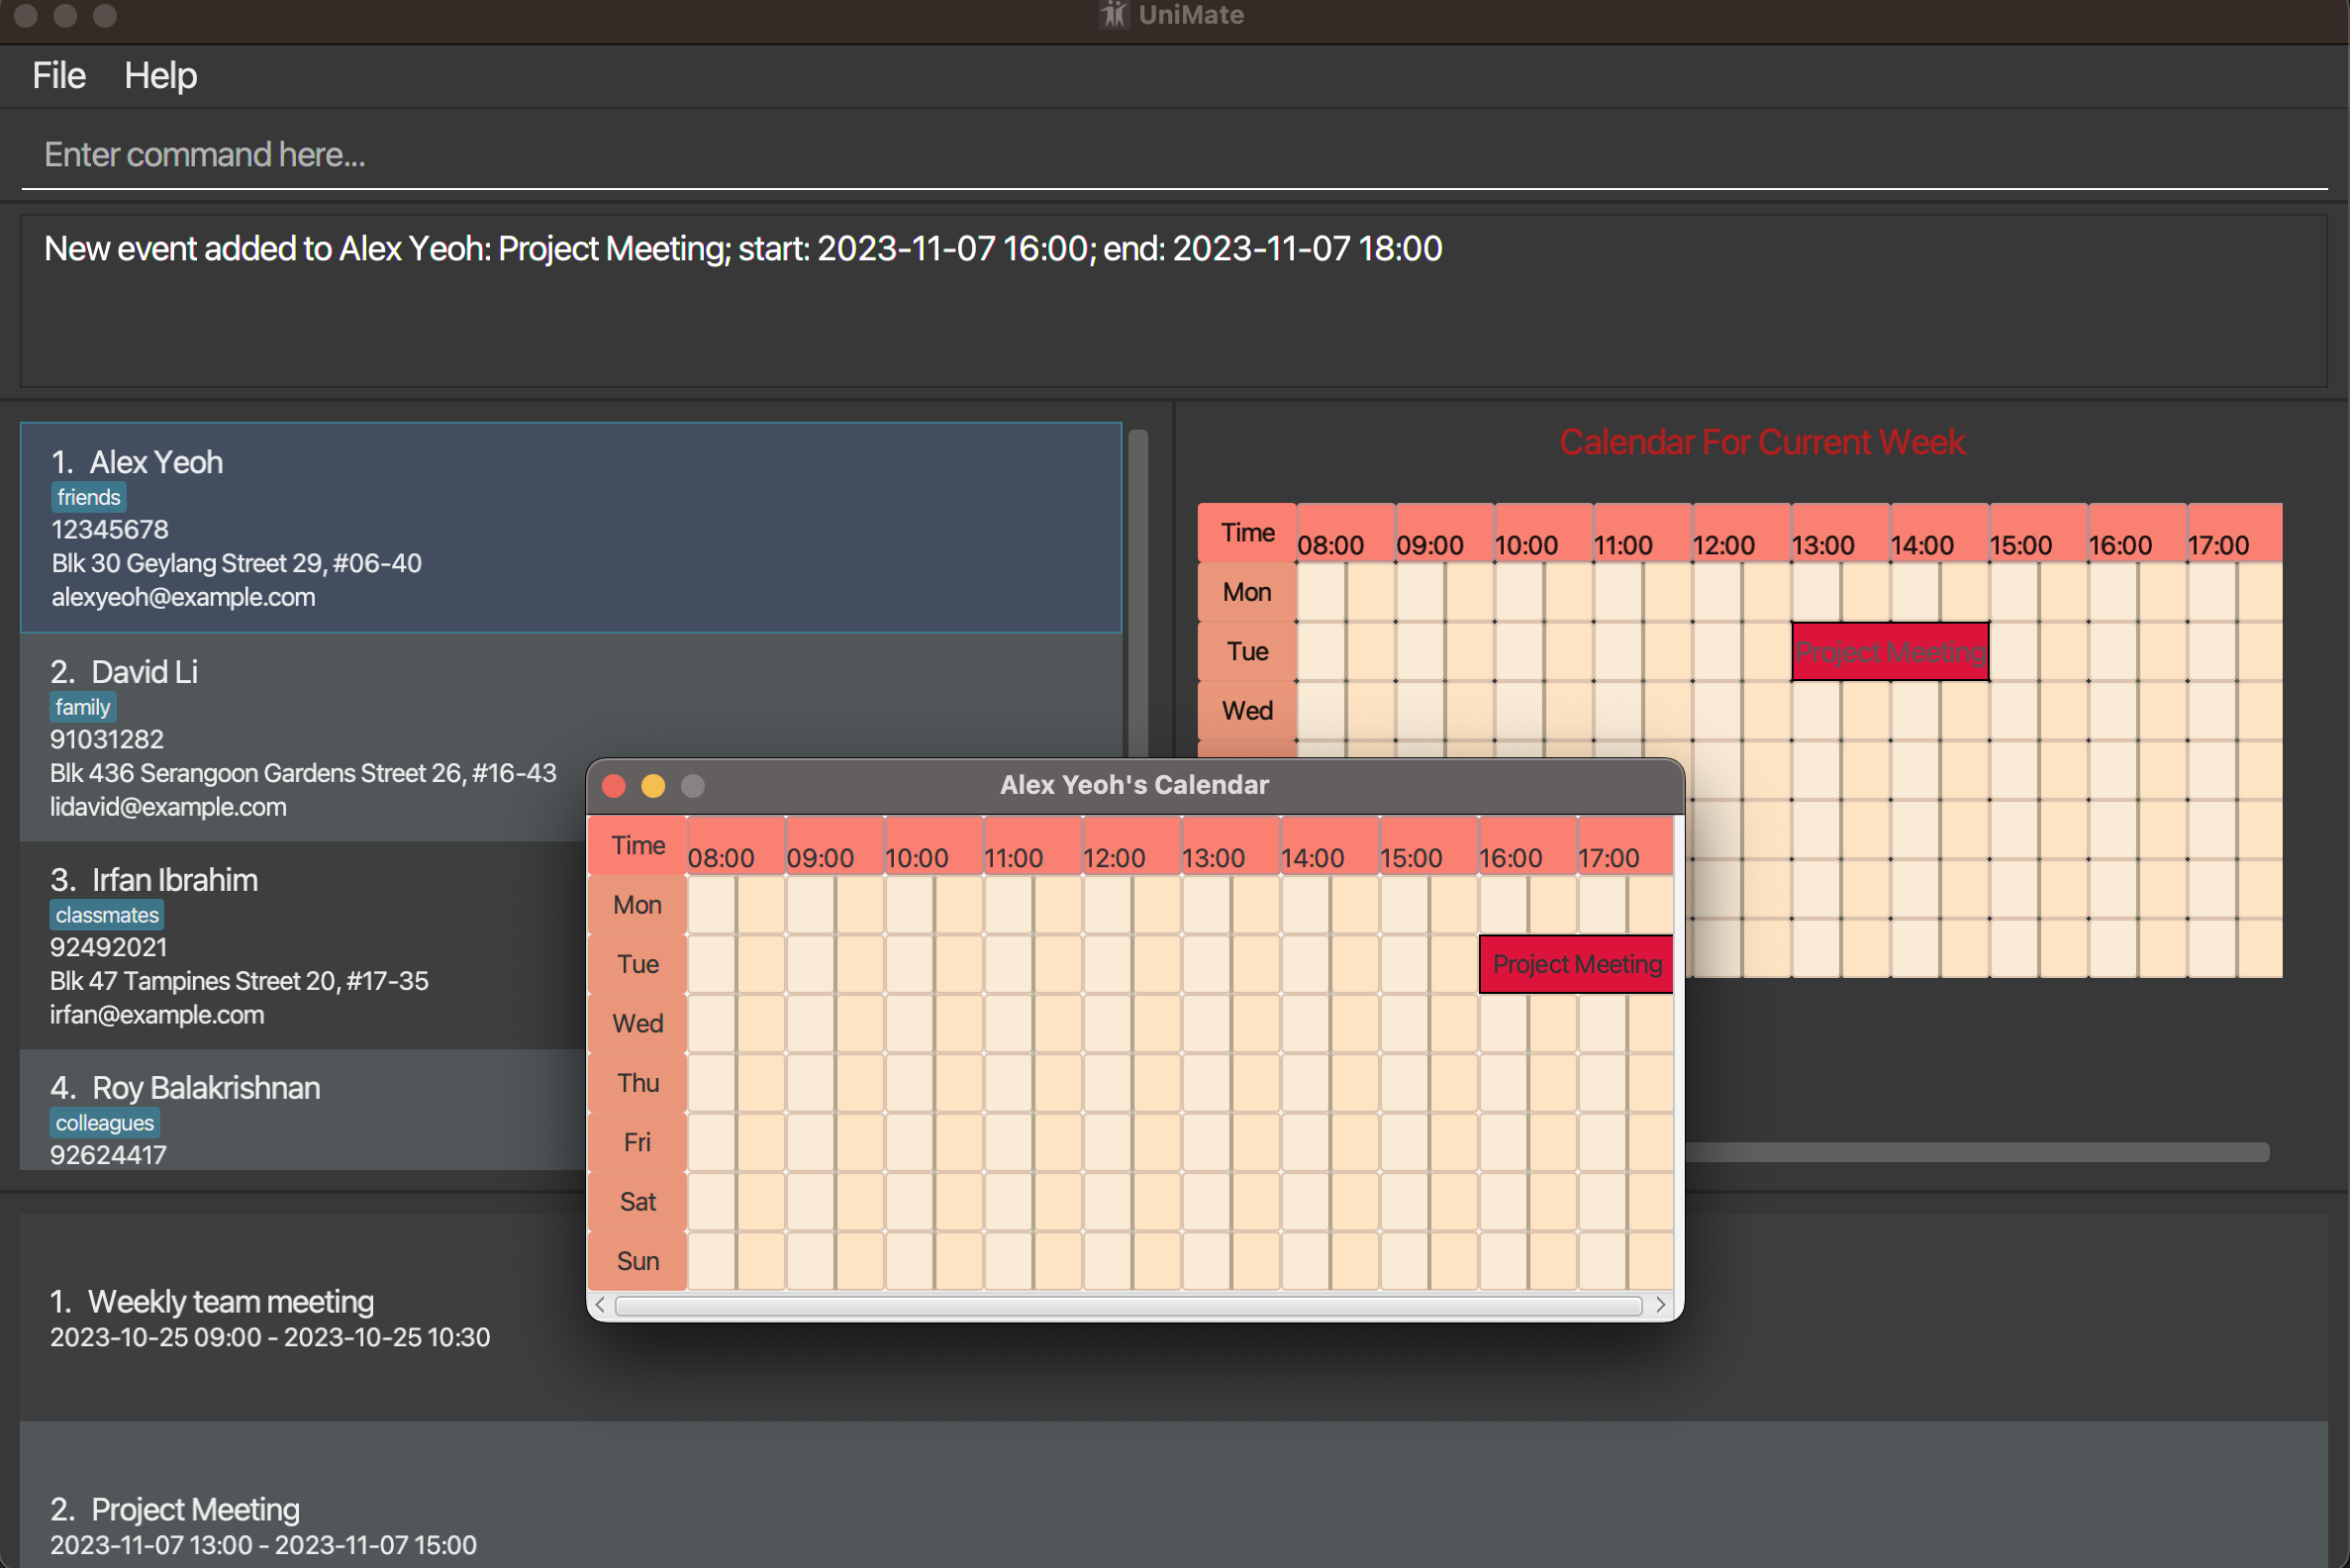
Additionally, each contact in the AddressBook has their own personal calendar, which can be accessed simply by double-clicking with the left mouse button on the contact's card in the AddressBook. This will create a pop-up displaying the contact's calendar as shown below.
Note: There is currently no CLI-based command to access this feature, but is planned for a future release.
Main feature 2: Calendar System
The calendar system seeks to improve the user's schedule planning experience, as well as simplify the synchronization of schedules among multiple people.
To achieve this, we have 2 supporting sub-features:
For the calendar system, we work solely with events, which differs from tasks used in the task list feature.
eventhas adescription,start date and timeandend date and timetaskonly has adescriptionand an optionalend date and time
Sub-feature 1: Calendar
The calendar allows the user to plan their timetable and compare it against their contacts' schedules. This will facilitate scheduling of meetings and events involving the user and their contacts.
By default, the calendar's GUI will only display the time period of 8am to 6pm, but will automatically extend when events that cannot be fit within this time period are added.
Additionally, the GUI for this sub-feature currently only supports viewing of events within the current week. Upcoming updates will allow the user to navigate beyond this chronological restriction. In the meantime, users can consider using the Event List to view events outside the current week.
For the user's calendar, some major CLI-based functionalities supporting this sub-feature includes:
For the contact's calendar, some major CLI-based functionalities supporting this sub-feature includes:
Other useful CLI-based functionalities not exclusive to the user/contact supporting this sub-feature includes:
- Comparison operations to compare the user's calendar with their contacts' calendars either by index or tag
Other functionalities can be found in the Calendar System subsection of the Features section
Sub-feature 2: Event List
The event list displays all the events for the user/contact. It serves as an overview of the collective events that the user or their contact have.
The event list shown on the main UniMate GUI is the user's event list. To view a specific contact's event list, we have a CLI-based command that will display the contact's event list in a popup window.
Main-feature 3: Task Management System
The task list stores a collection of tasks that the user might have. The primary difference between event and task is that a task does not have a starting date and time.
Some useful CLI-based functionalities supporting this feature includes:
- Adding and deleting operations to manipulate the tasks present in the task list
- Sorting operation to reorganise the view of the task list when needed
Features
Notes about the command format:
Words in
UPPER_CASEare the parameters to be supplied by the user.
e.g. inadd n/NAME,NAMEis a parameter which can be used asadd n/John Doe.Items in square brackets are optional.
e.g.n/NAME [t/TAG]can be used asn/John Doe t/friendor asn/John Doe.Items with
… after them can be used multiple times including zero times.
e.g.[t/TAG]…can be used as(i.e. 0 times),t/friend,t/friend t/familyetc.Parameters can be in any order.
e.g. if the command specifiesn/NAME p/PHONE_NUMBER,p/PHONE_NUMBER n/NAMEis also acceptable.Extraneous parameters for commands that do not take in parameters (such as
help,list,exitandclear) will be ignored.
e.g. if the command specifieshelp 123, it will be interpreted ashelp.Note that if the parameters are too lengthy, they may be truncated in the UI.
If you are using a PDF version of this document, be careful when copying and pasting commands that span multiple lines as space characters surrounding line-breaks may be omitted when copied over to the application.
General Commands
Viewing help : help
Shows a message explaining how to access the help page.

Format: help
Alternatively, the message can also be accessed by using the keyboard shortcut F1 or
through the menu bar (Help > Help).
Exiting the program : exit
Exits the program.
Format: exit
Alternatively, the user can also exit the application through the menu bar (File > Exit)
AddressBook Management
Adding a person: add
Adds a person to the AddressBook.
Format: add n/NAME p/PHONE_NUMBER e/EMAIL a/ADDRESS [t/TAG]…
Tip: A person can have any number of tags (including 0)
Examples:
add n/John Doe p/98765432 e/johnd@example.com a/John street, block 123, #01-01add n/Betsy Crowe t/friend e/betsycrowe@example.com a/Newgate Prison p/1234567 t/criminal
Note: Currently UniMate does not support the use of forward-slash in the name of contacts (e.g. s/o). The developers understand this, and we hope to add support for accepting forward-slashes in the contact's name in a future release.
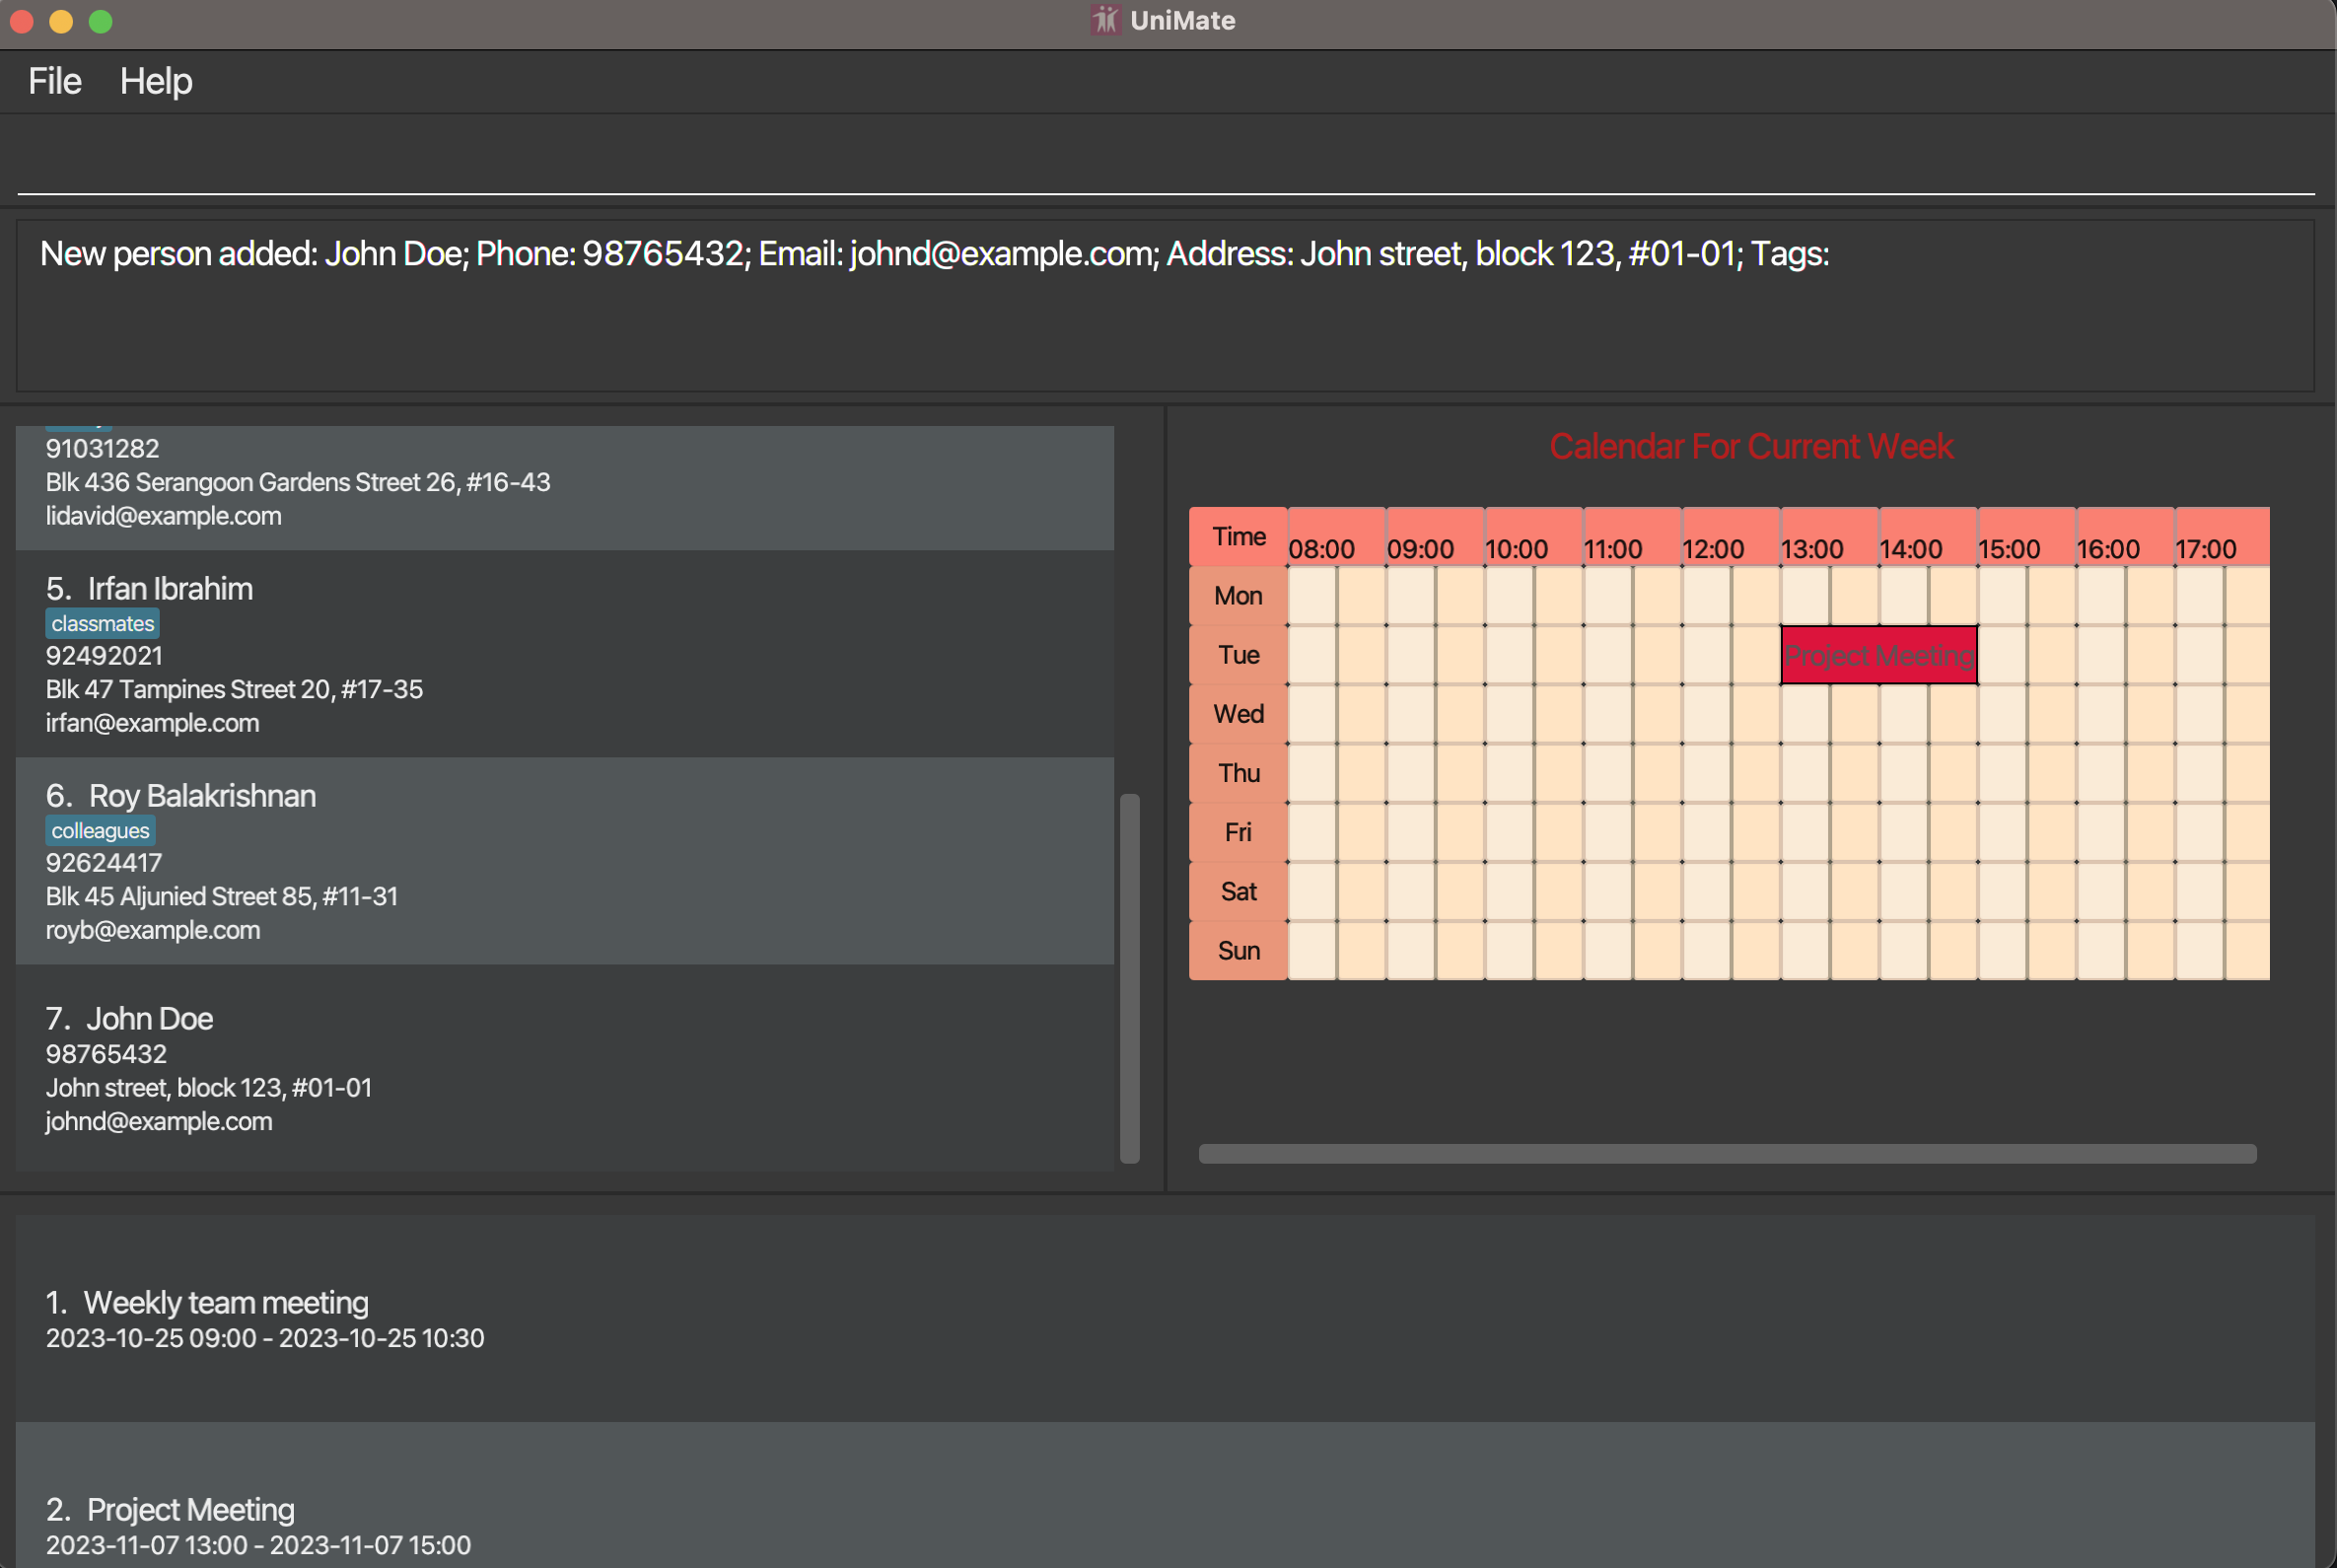
In the example, after executing
add n/John Doe p/98765432 e/johnd@example.com a/John street, block 123, #01-01, we see John Doe's
contact information stored in the AddressBook as the 7th contact on the left-hand side of the GUI.
Deleting a person: delete
Deletes the specified person from the AddressBook.
Format: delete INDEX
- Deletes the person at the specified
INDEX - The index refers to the index number shown in the displayed person list
- The index must be a positive integer (i.e. 1, 2, 3, …)
Examples:
listfollowed bydelete 2deletes the 2nd person in the AddressBookfind Betsyfollowed bydelete 1deletes the 1st person in the results of thefindcommand
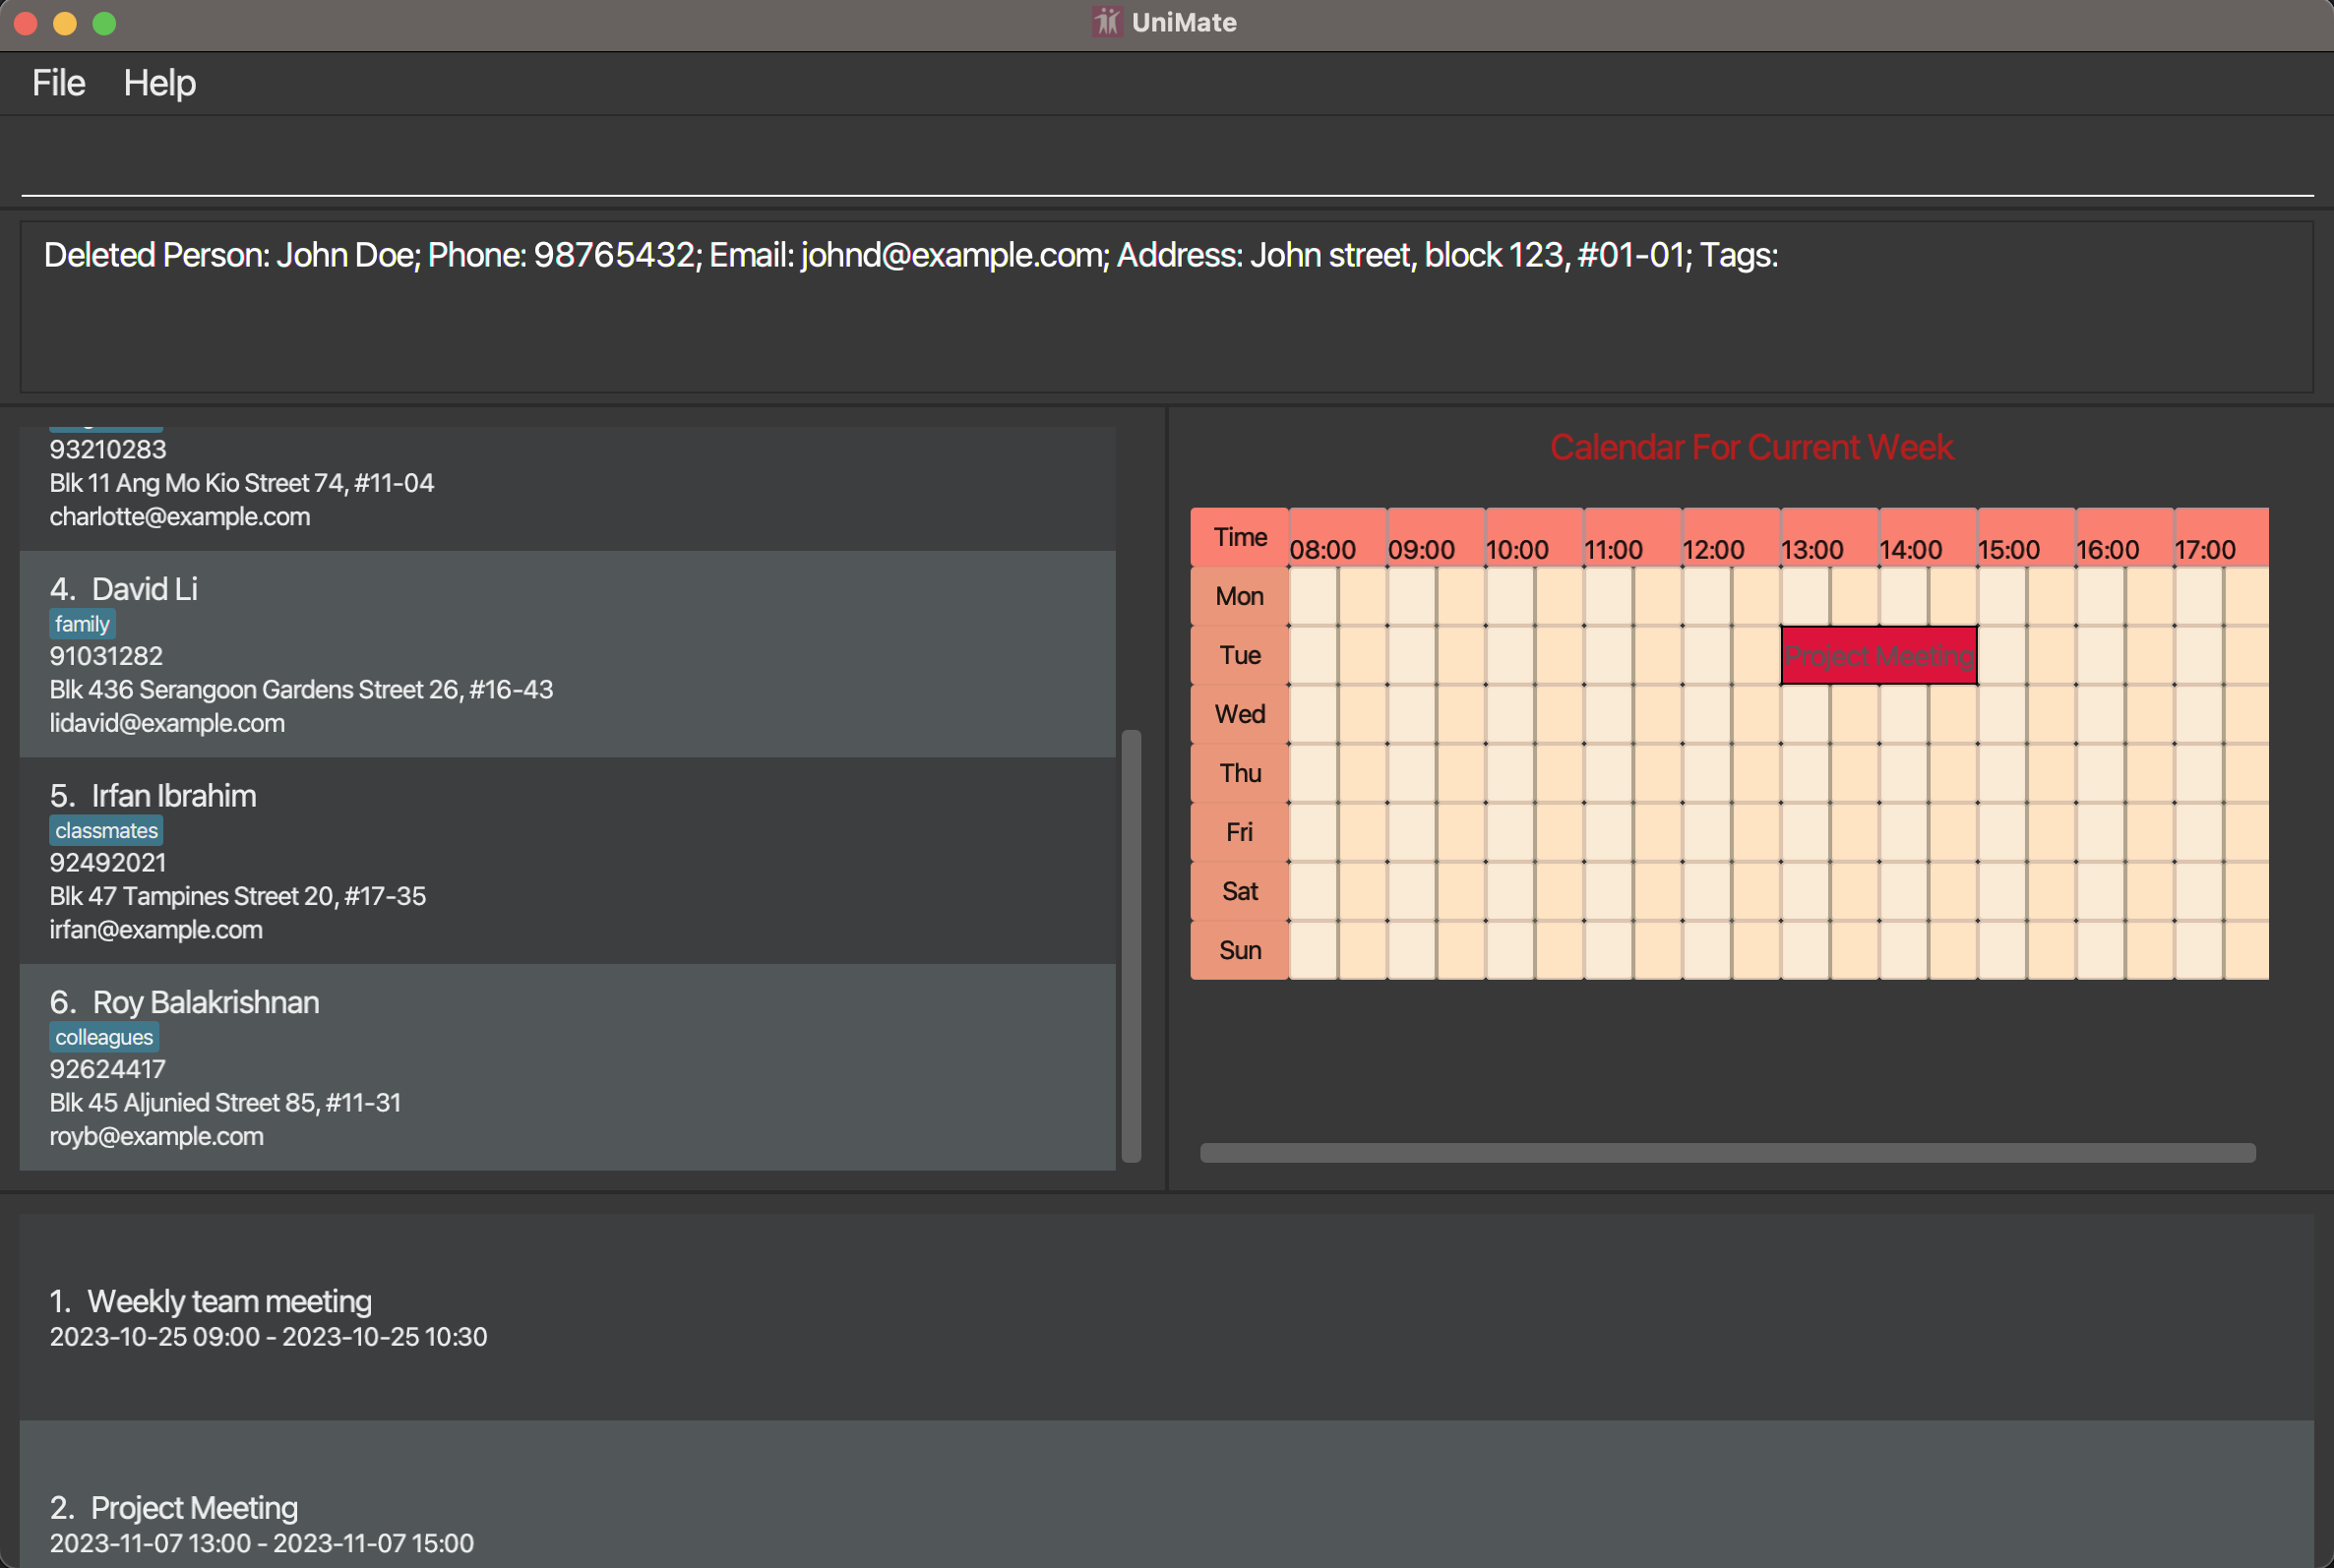
In this example, after executing list, followed by delete 7, John Doe, the person with index 7
is removed from the displayed AddressBook.
Editing a person: edit
Edits an existing person in the AddressBook.
Format: edit INDEX [n/NAME] [p/PHONE] [e/EMAIL] [a/ADDRESS] [t/TAG]…
- Edits the person at the specified
INDEX. The index refers to the index number shown in the displayed person list. The index must be a positive integer 1, 2, 3, … - At least one of the optional fields must be provided
- Existing values will be updated to the input values
- When editing tags, the existing tags of the person will be removed i.e. adding of tags is not cumulative.
- You can remove all the person’s tags by typing
t/without specifying any tags after it
Examples:
edit 1 p/91234567 e/johndoe@example.comEdits the phone number and email address of the 1st person to be91234567andjohndoe@example.comrespectively.edit 2 n/Betsy Crower t/Edits the name of the 2nd person to beBetsy Crowerand clears all existing tags.

In this example, after executing edit 1 p/12345678, Alex Yeoh the person with index 1 has his
phone number edited to 12345678.
Locating persons by name: find
Finds persons whose names contain any of the given keywords.
Tip: Multiple arguments passed into the
findcommand will be delimited by whitespaces, which means the argumentsJohn Doewill be parsed into 2 separate argumentsJohnandDoe. To circumvent this delimitation, consider the filter command.
Format: find KEYWORD [MORE_KEYWORDS]
- The search is case-insensitive. e.g.
hanswill matchHans - The order of the keywords does not matter. e.g.
Hans Bowill matchBo Hans - Only the name is searched
- Only full words will be matched e.g.
Hanwill not matchHans - Persons matching at least one keyword will be returned (i.e.
ORsearch) e.g.Hans Bowill returnHans Gruber,Bo Yang
Examples:
find JohnreturnsjohnandJohn Doefind alex davidreturnsAlex Yeoh,David Li

Filtering persons by attribute: filter
Filters out persons whose fields contain any of the given keywords. The keywords contained in each field will be treated as a single argument.
Format: filter [n/NAME] [p/PHONE] [e/EMAIL] [a/ADDRESS] [t/TAG]…
- Filter is case-insensitive. e.g.
cs2103will matchCS2103 - The order of the fields does not matter
- All provided fields are searched
- All tags containing the words or part-thereof will be matched (e.g.
Bawill returnBadmintonorBasketballorFootballorBackgammon) - Only persons matching all specified fields will be returned (i.e. logical
ANDsearch) - Arguments in a specific field are not delimited (i.e. the argument
John Doeinfilter n/John Doewill be treated as a single argument) - Indicating a field but leaving it blank e.g.
filter n/will show all contacts.
Examples:
filter t/CS2103- Displays all contacts with the CS2103 tag or tags containingCS2103e.g. CS2103Tfilter t/MA2116 t/CS1010S n/John e/@u.nus.edu- Displays all contacts with theMA2116andCS1010Stags as well as with a name containingJohnand an email address with the domainu.nus.edu
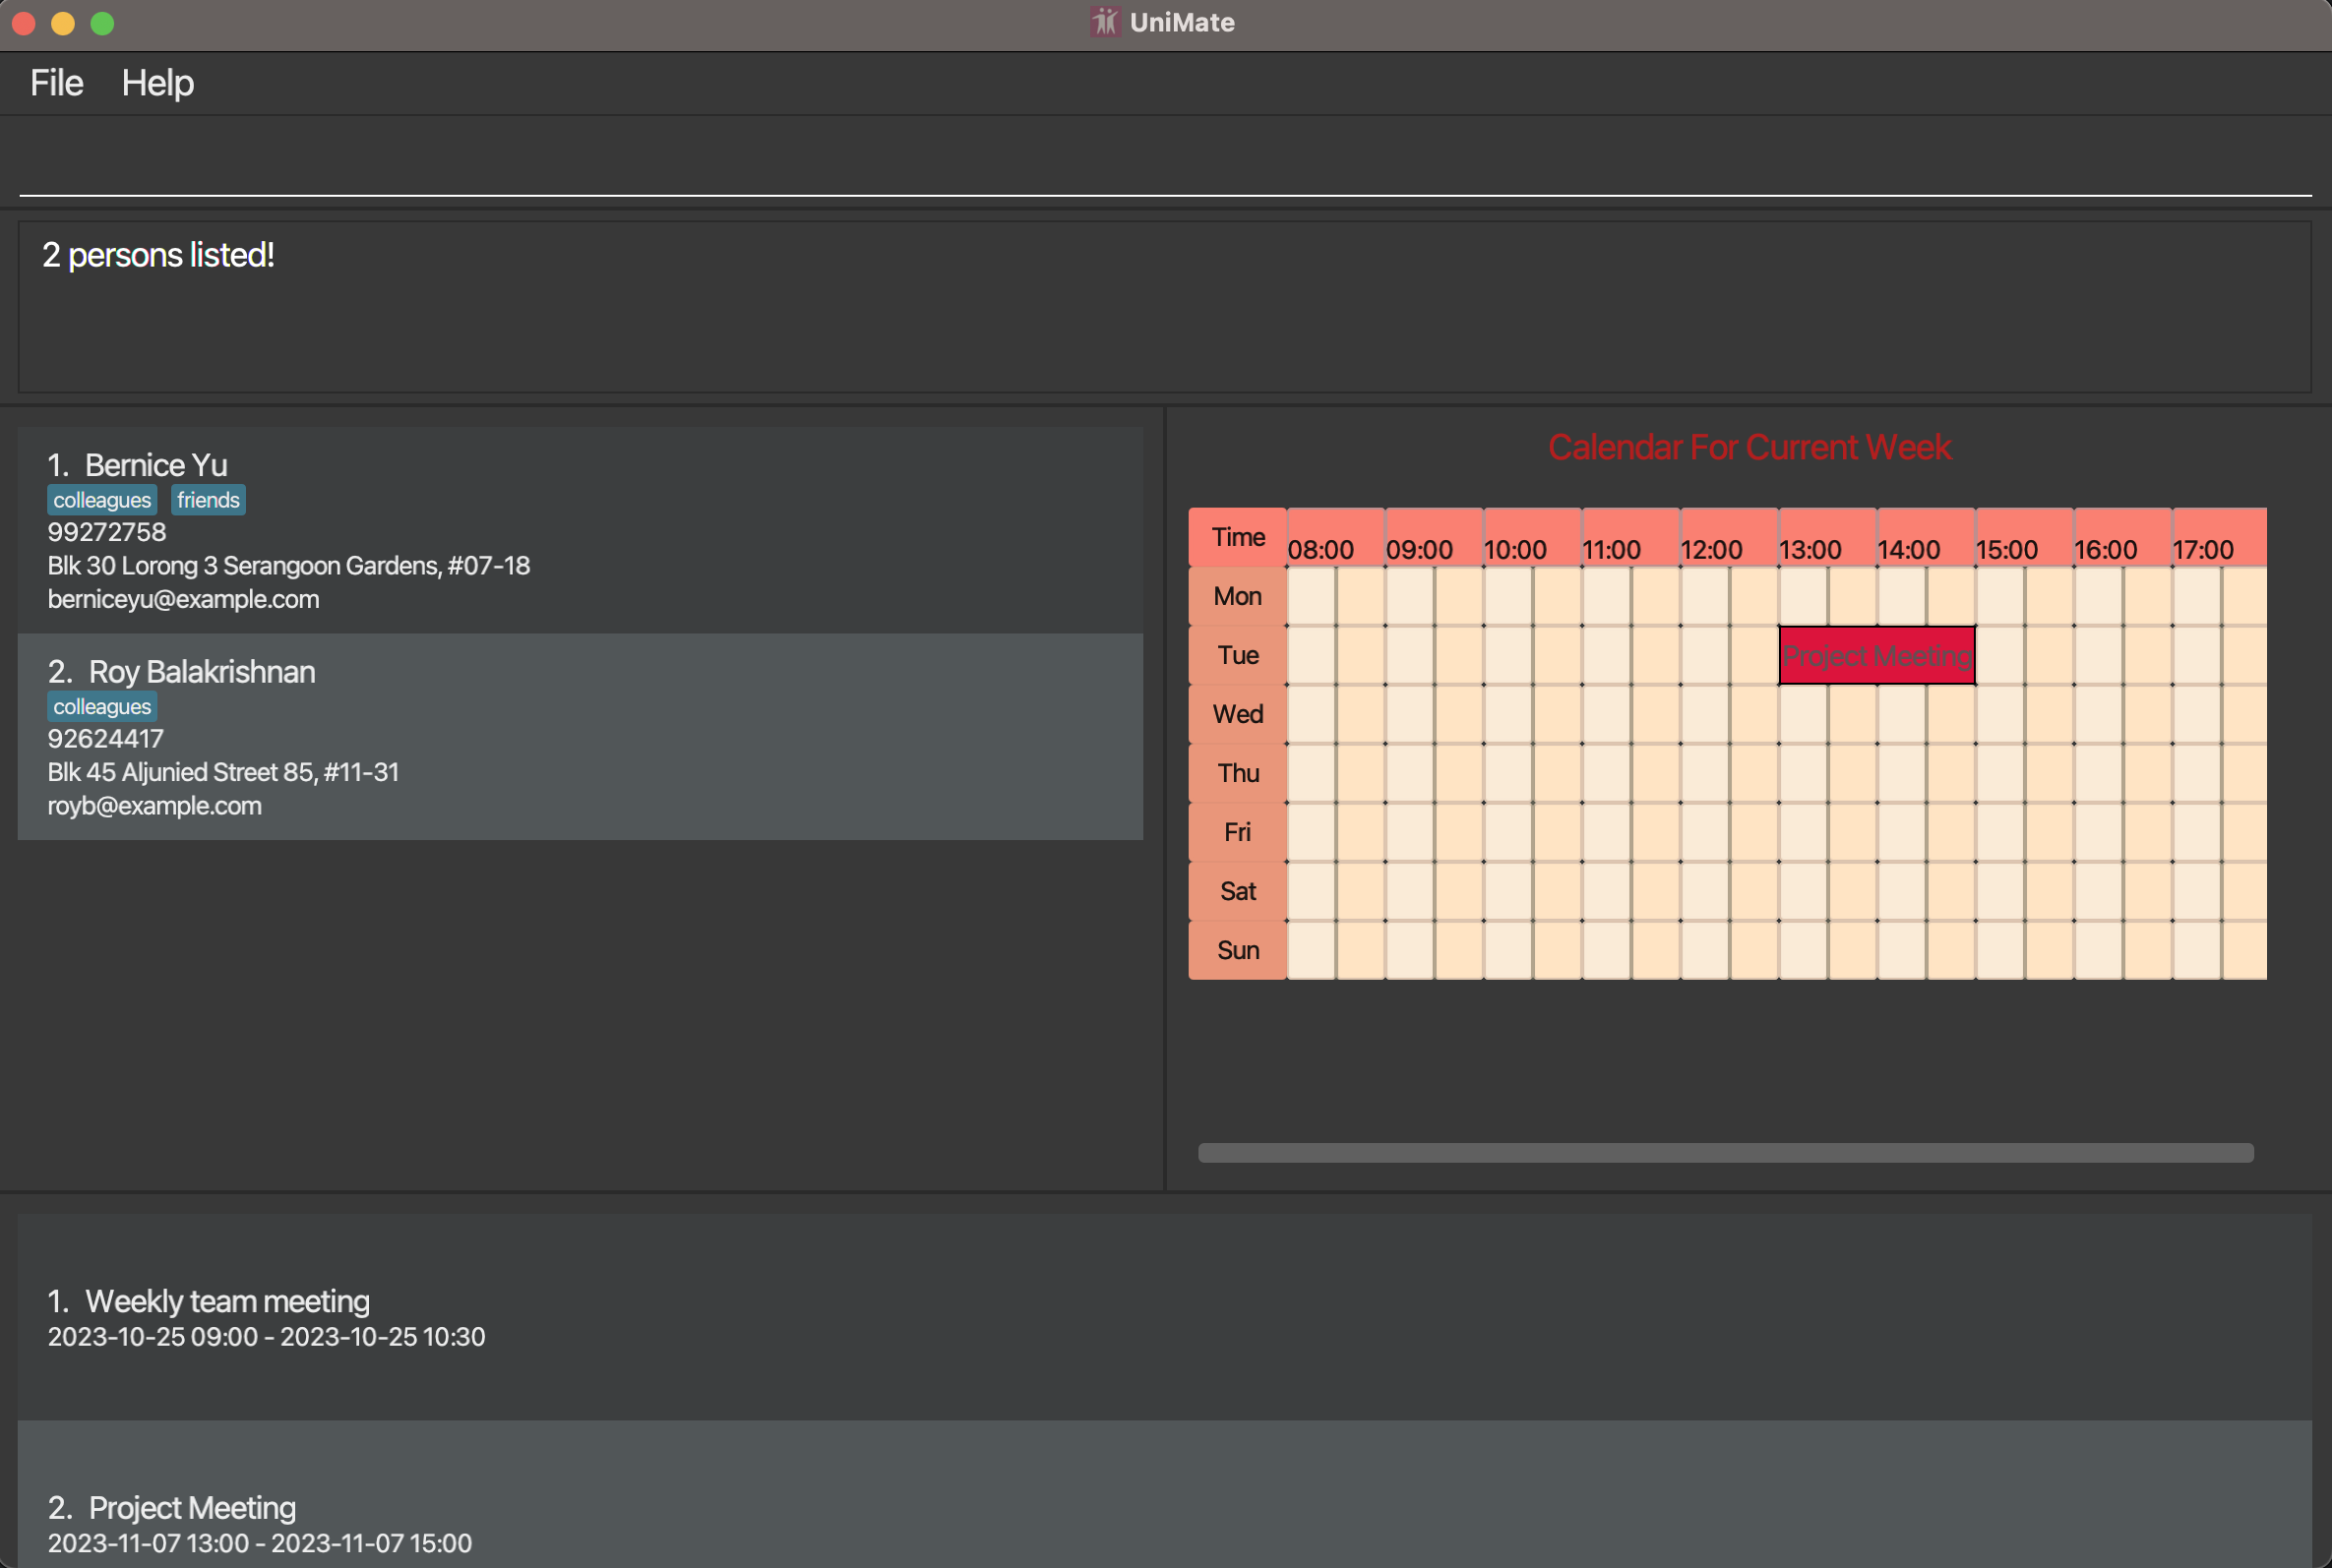
In this example, after executing filter t/colleagues, the AddressBook list displays all contacts
that have the colleagues tag.
Listing all persons : list
Shows a list of all persons in the AddressBook. This command is particularly useful to display all the contacts after using the find and filter commands.
Format: list
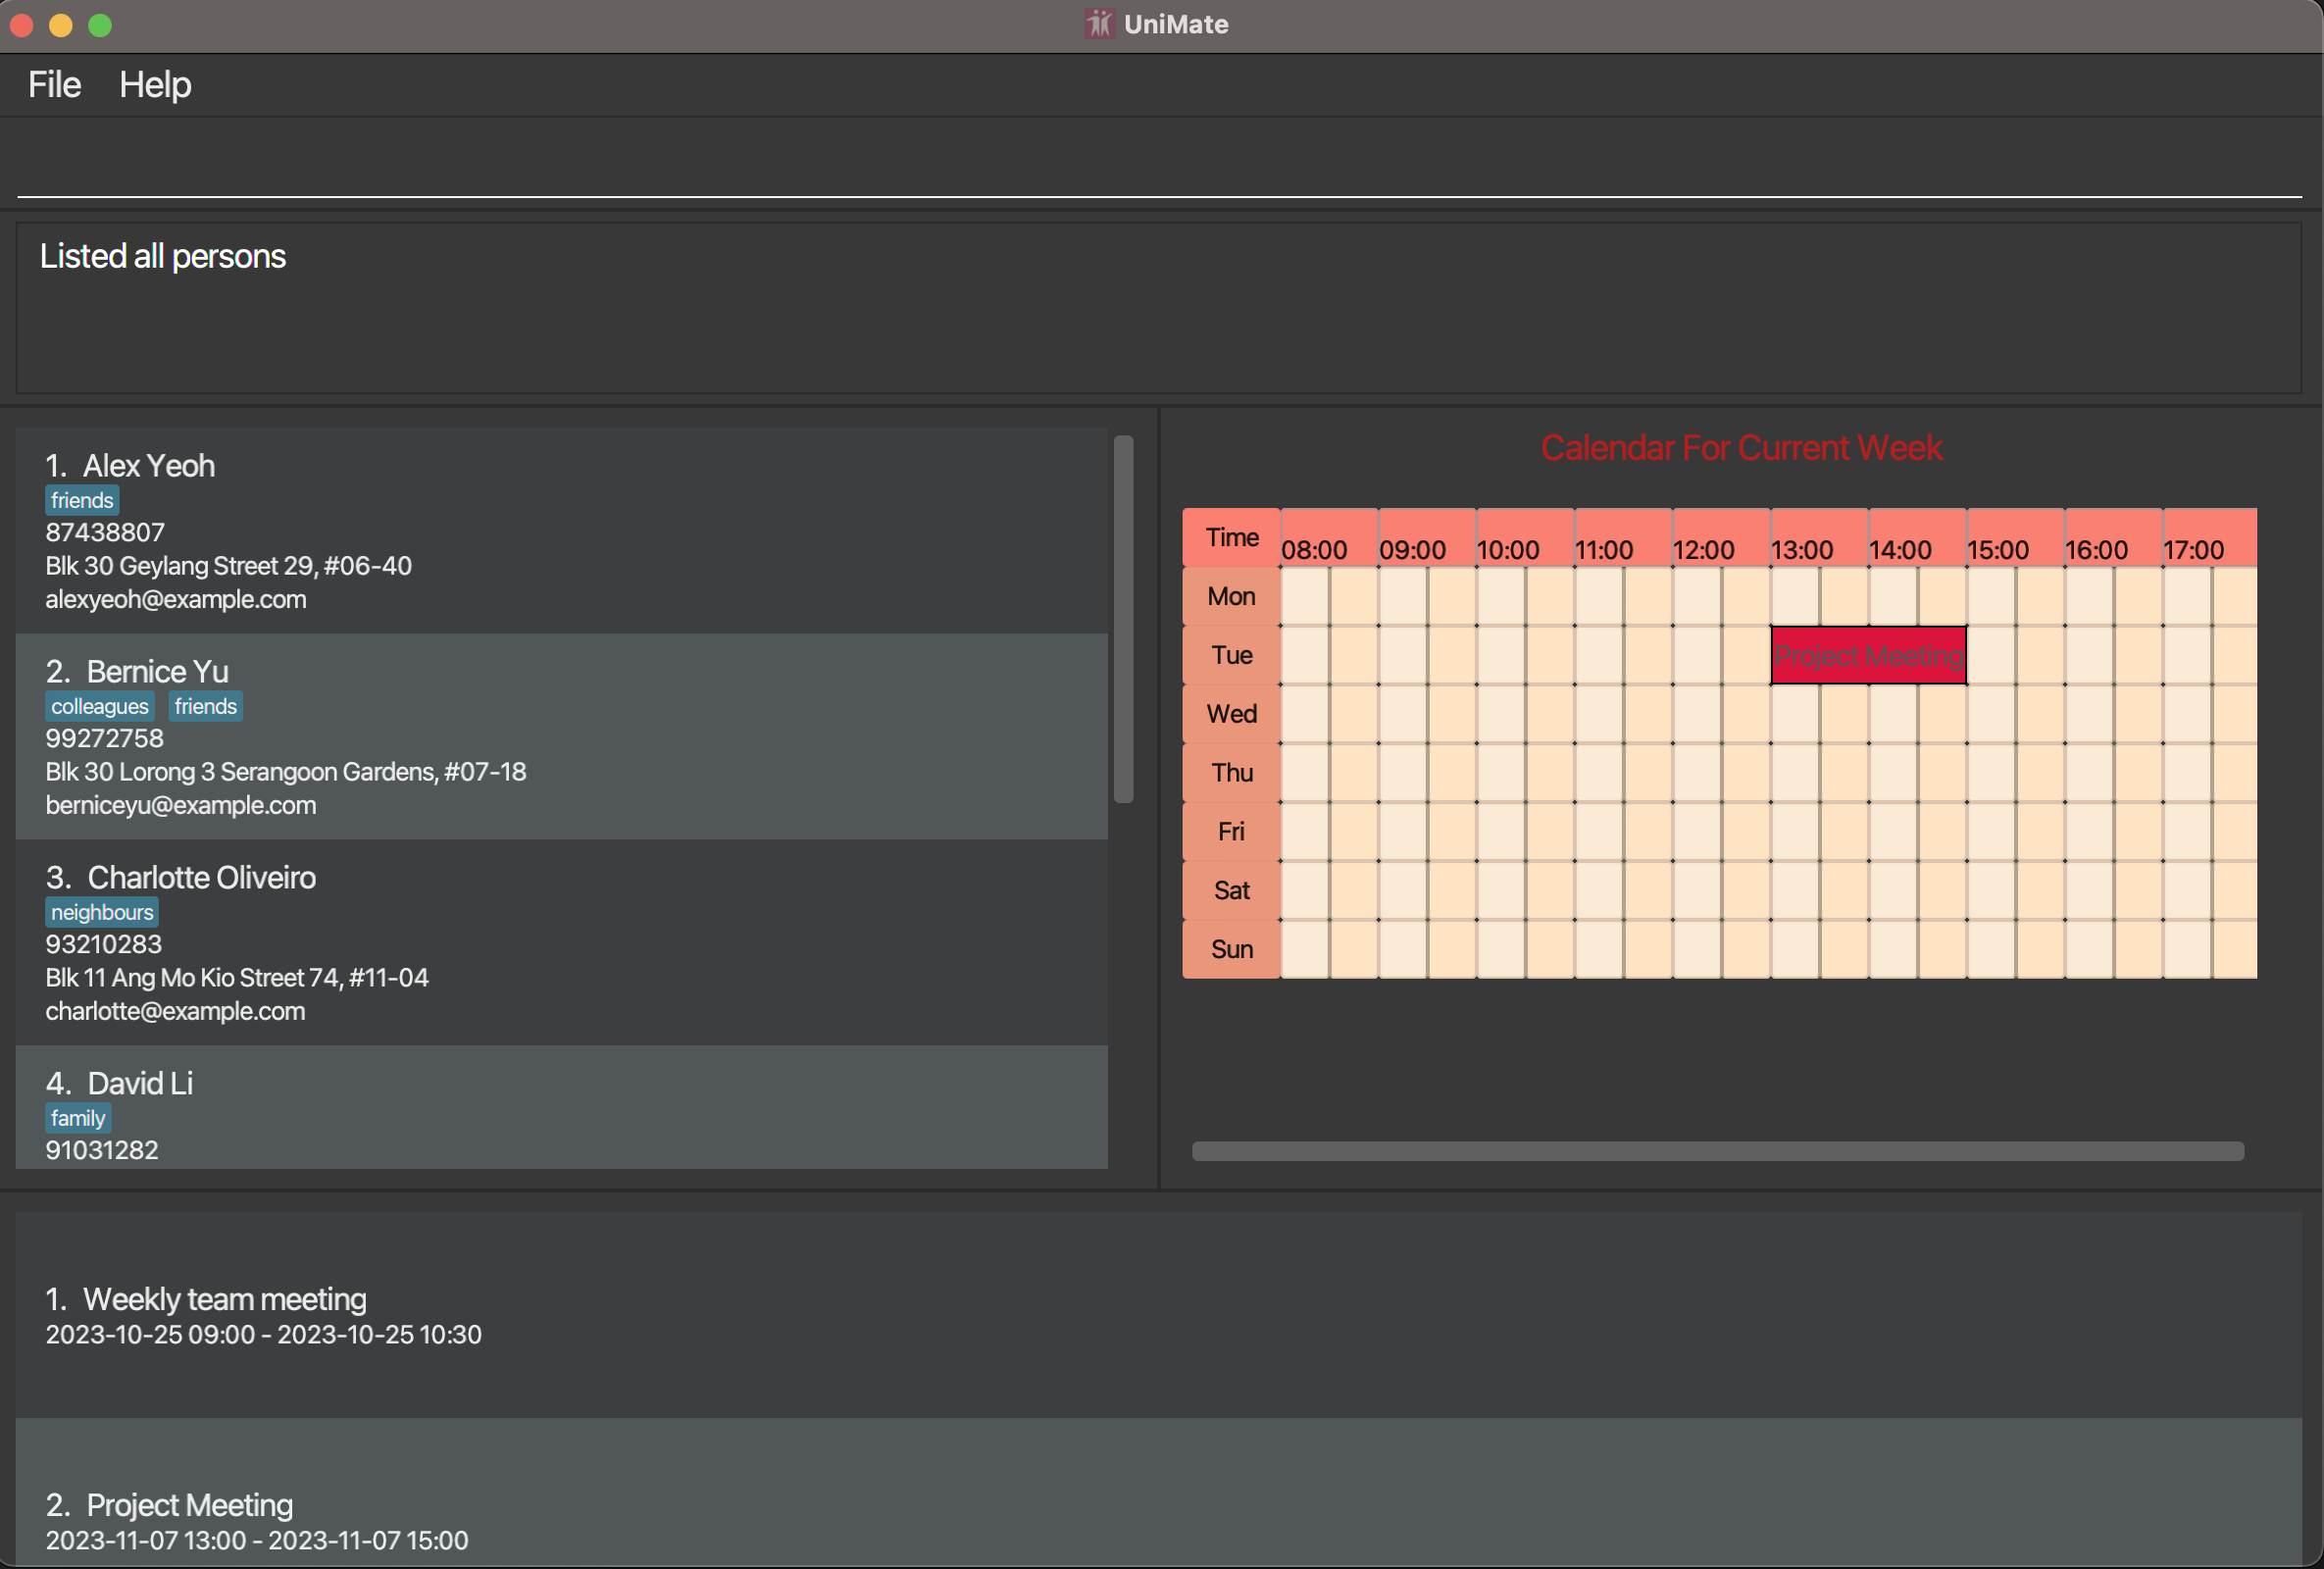
In this example, after executing the list command, we see the entire AddressBook again.
Sort persons: sort
Format: sort /COMPARATOR [/reverse]
- Sorts all persons by specified
COMPARATOR - Currently supported
COMPARATORinclude:bynamebyemailbyphonebyaddress
- The comparator refers to the attribute(s) provided for the basis to sort
- Only sorting by one attribute is allowed, due to the nature of most fields being unique (with the unlikely cases of name and address)
- The sorting is done according to ASCII sequence, but is case-insensitive (i.e.
adamhas precedence overBeatricewhen sorted in ascending order) - Sorting is done in ascending order by default. To sort by descending order, the field
/reversecan be added to the command (see Examples below)
Examples:
sort /bynamesorts all contacts in UniMate AddressBook by their full namesort /byaddress /reversesorts all contacts in UniMate AddressBook by their address
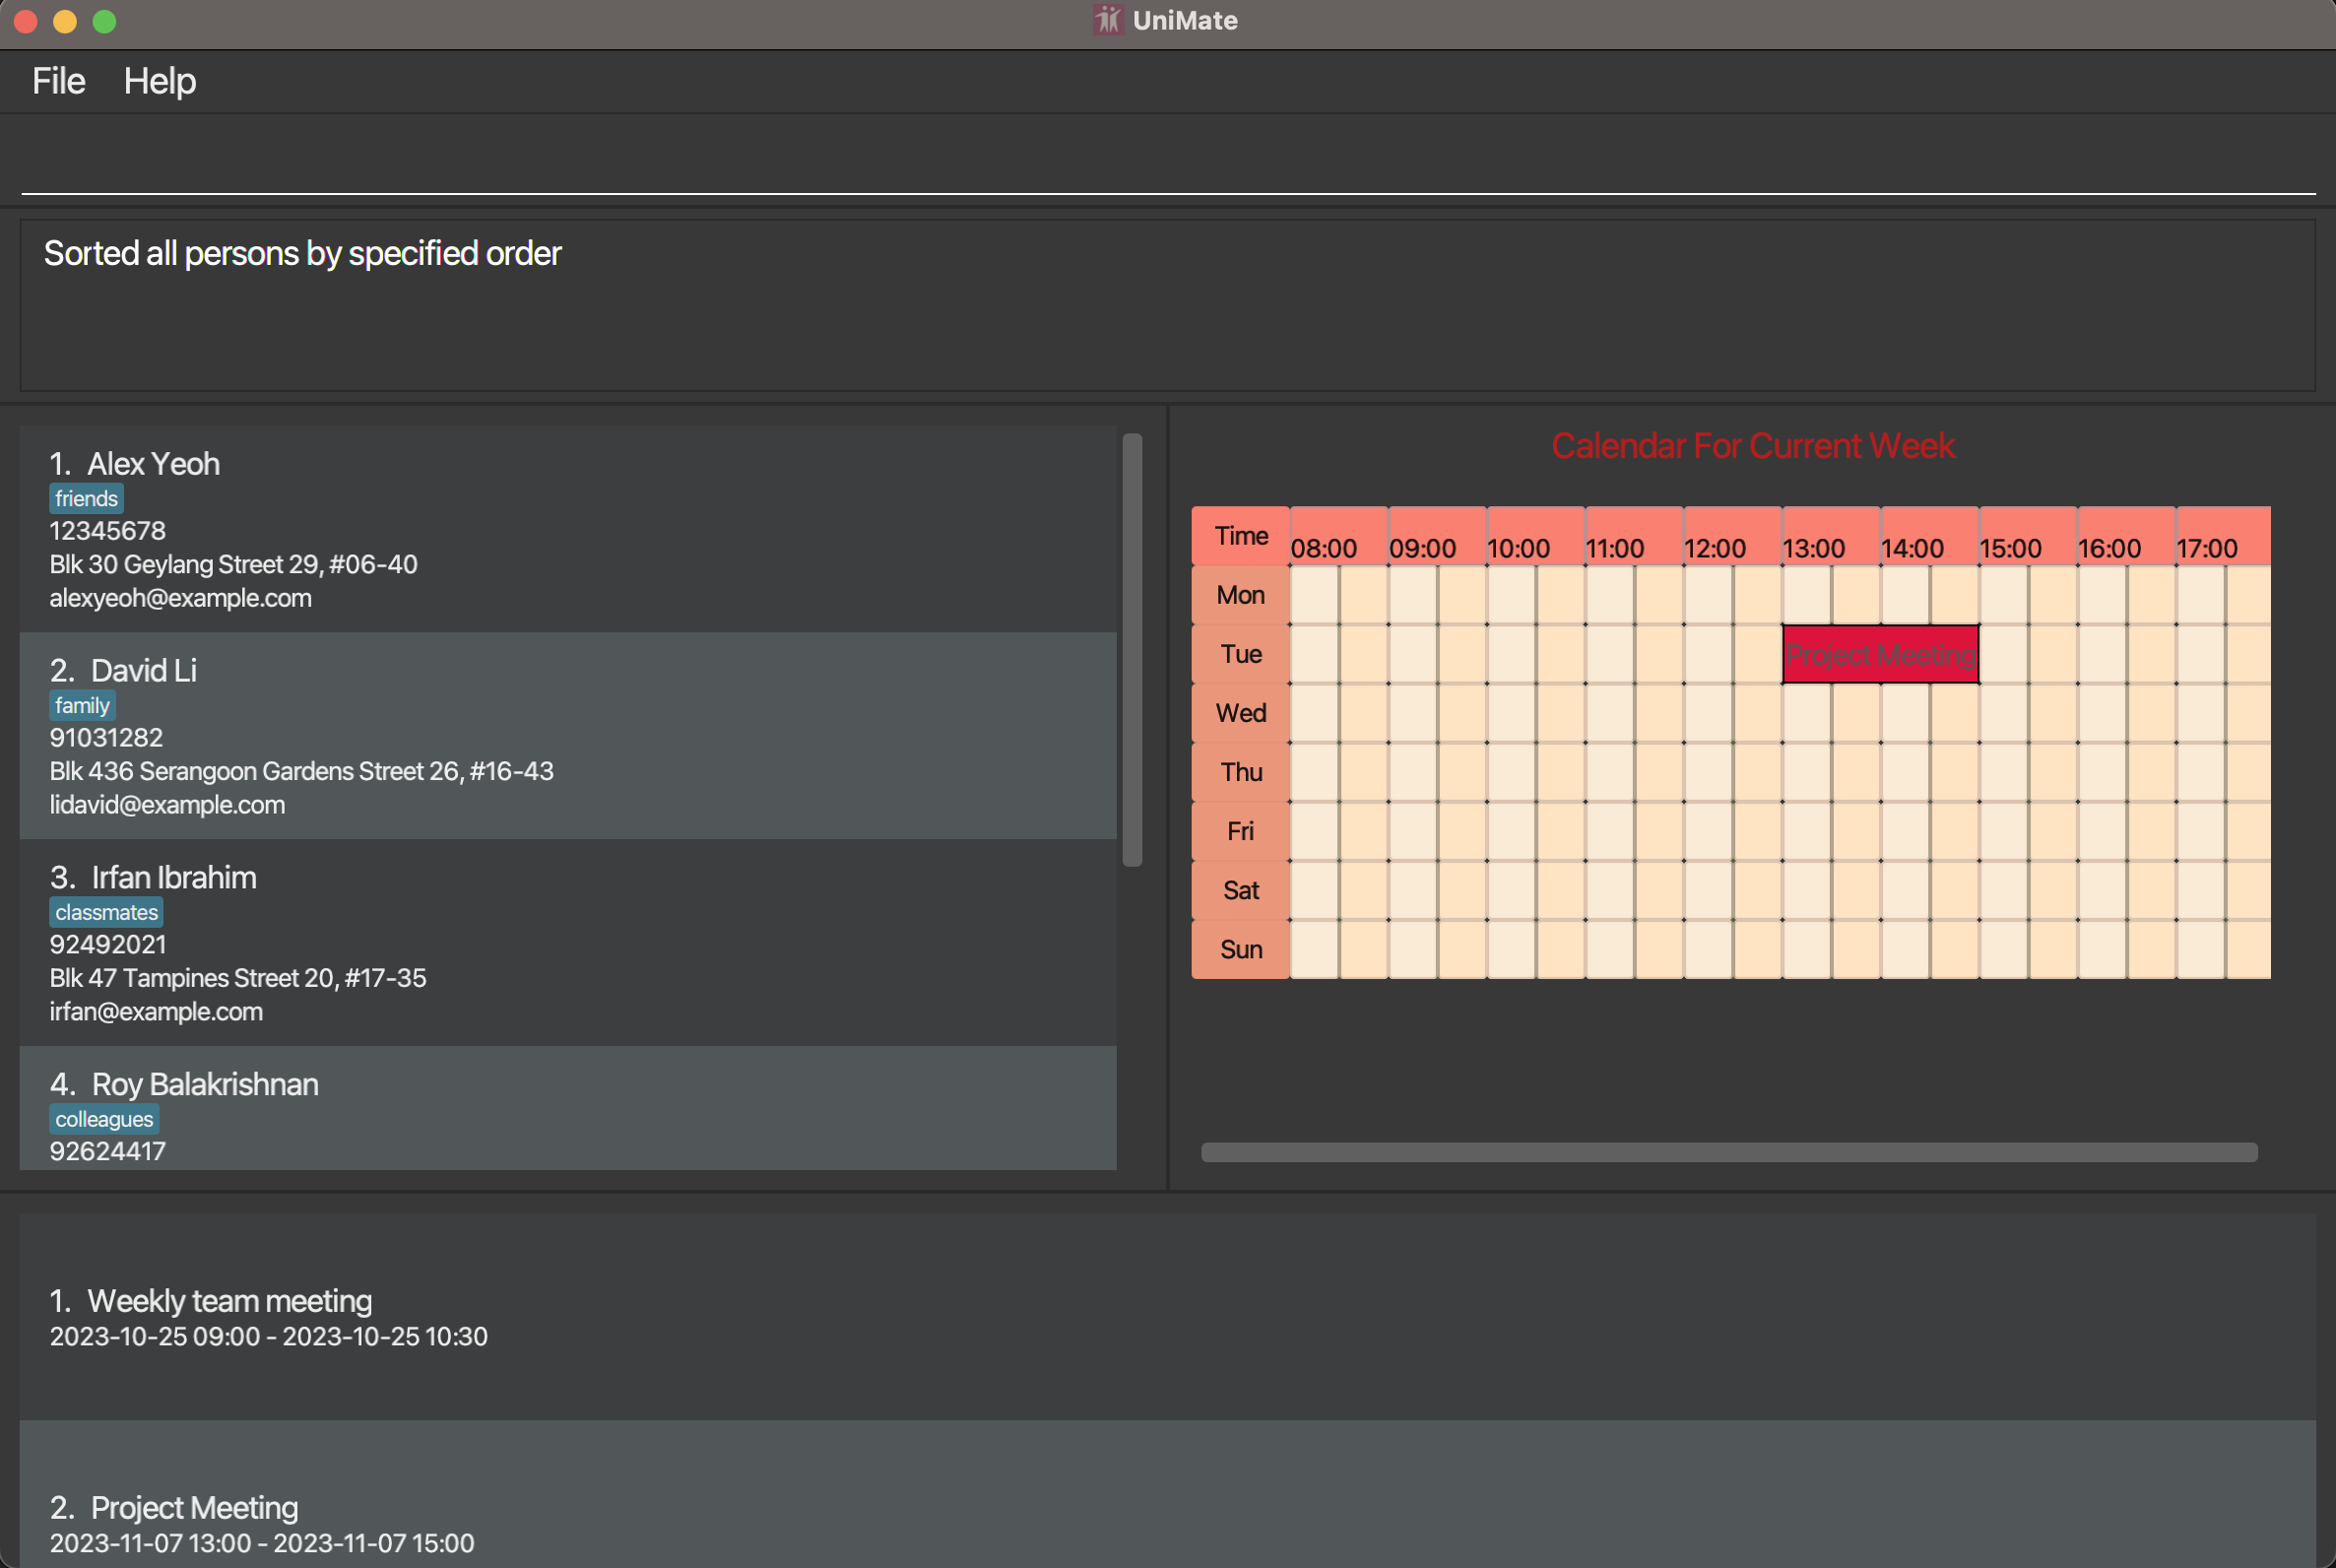
In this example, after executing sort /byphone, the AddressBook is now sorted according to the
contact's phone numbers, in ascending numerical order.
Clearing all entries : clear
Clears all entries from the AddressBook.
Format: clear
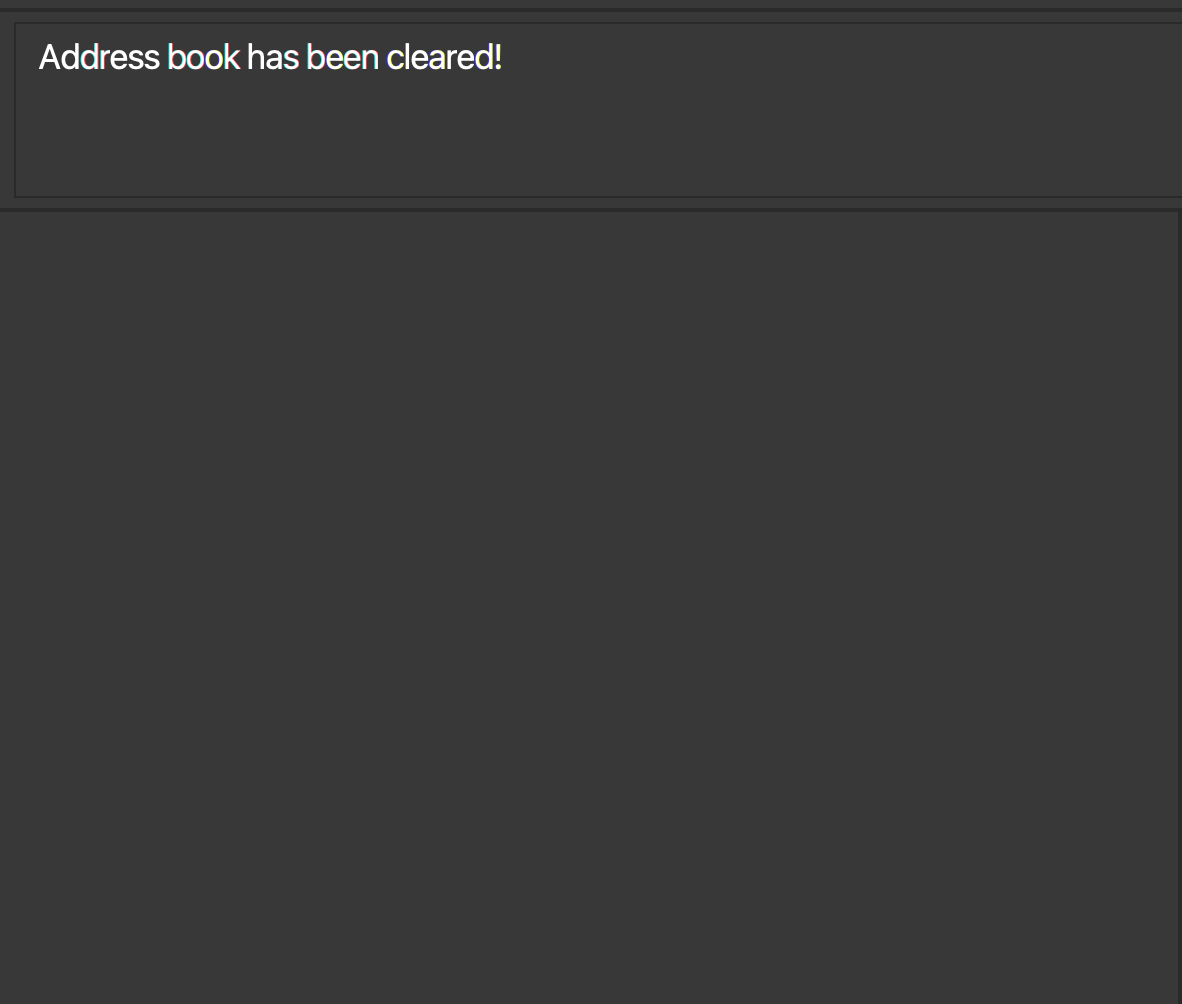
In this example, after executing clear, the AddressBook is now cleared of all contacts.
Calendar System
General Definitions
Date Time Format
- When inputting a date and time into a command, the following format is used:
yyyy-MM-dd HH:mmwhere *yyyyrepresents the year, *MMrepresents the month, *ddrepresents the day, *HHrepresents the hours and *mmrepresents the minutes.Event span
- The chronological span of the event is inclusive of the start date and time, but exclusive of the end date and time. This means that for 2 consecutive events, the later event can start at the same time the earlier event ends.
[USER CALENDAR] Adding an event: addEvent
Adds an event to the user's calendar.
Format: addEvent d/DESCRIPTION ts/START_DATE_TIME te/END_DATE_TIME
- Adds the event starting from
START_DATE_TIMEand ending atEND_DATE_TIME DESCRIPTIONmust be non-emptySTART_DATE_TIMEandEND_DATE_TIMEmust be inyyyy-MM-dd HH:mmformatSTART_DATE_TIMEmust be beforeEND_DATE_TIMEfor the command to be valid
Example:
addEvent d/Cry about deadlines ts/2023-01-01 13:00 te/2023-01-01 15:00
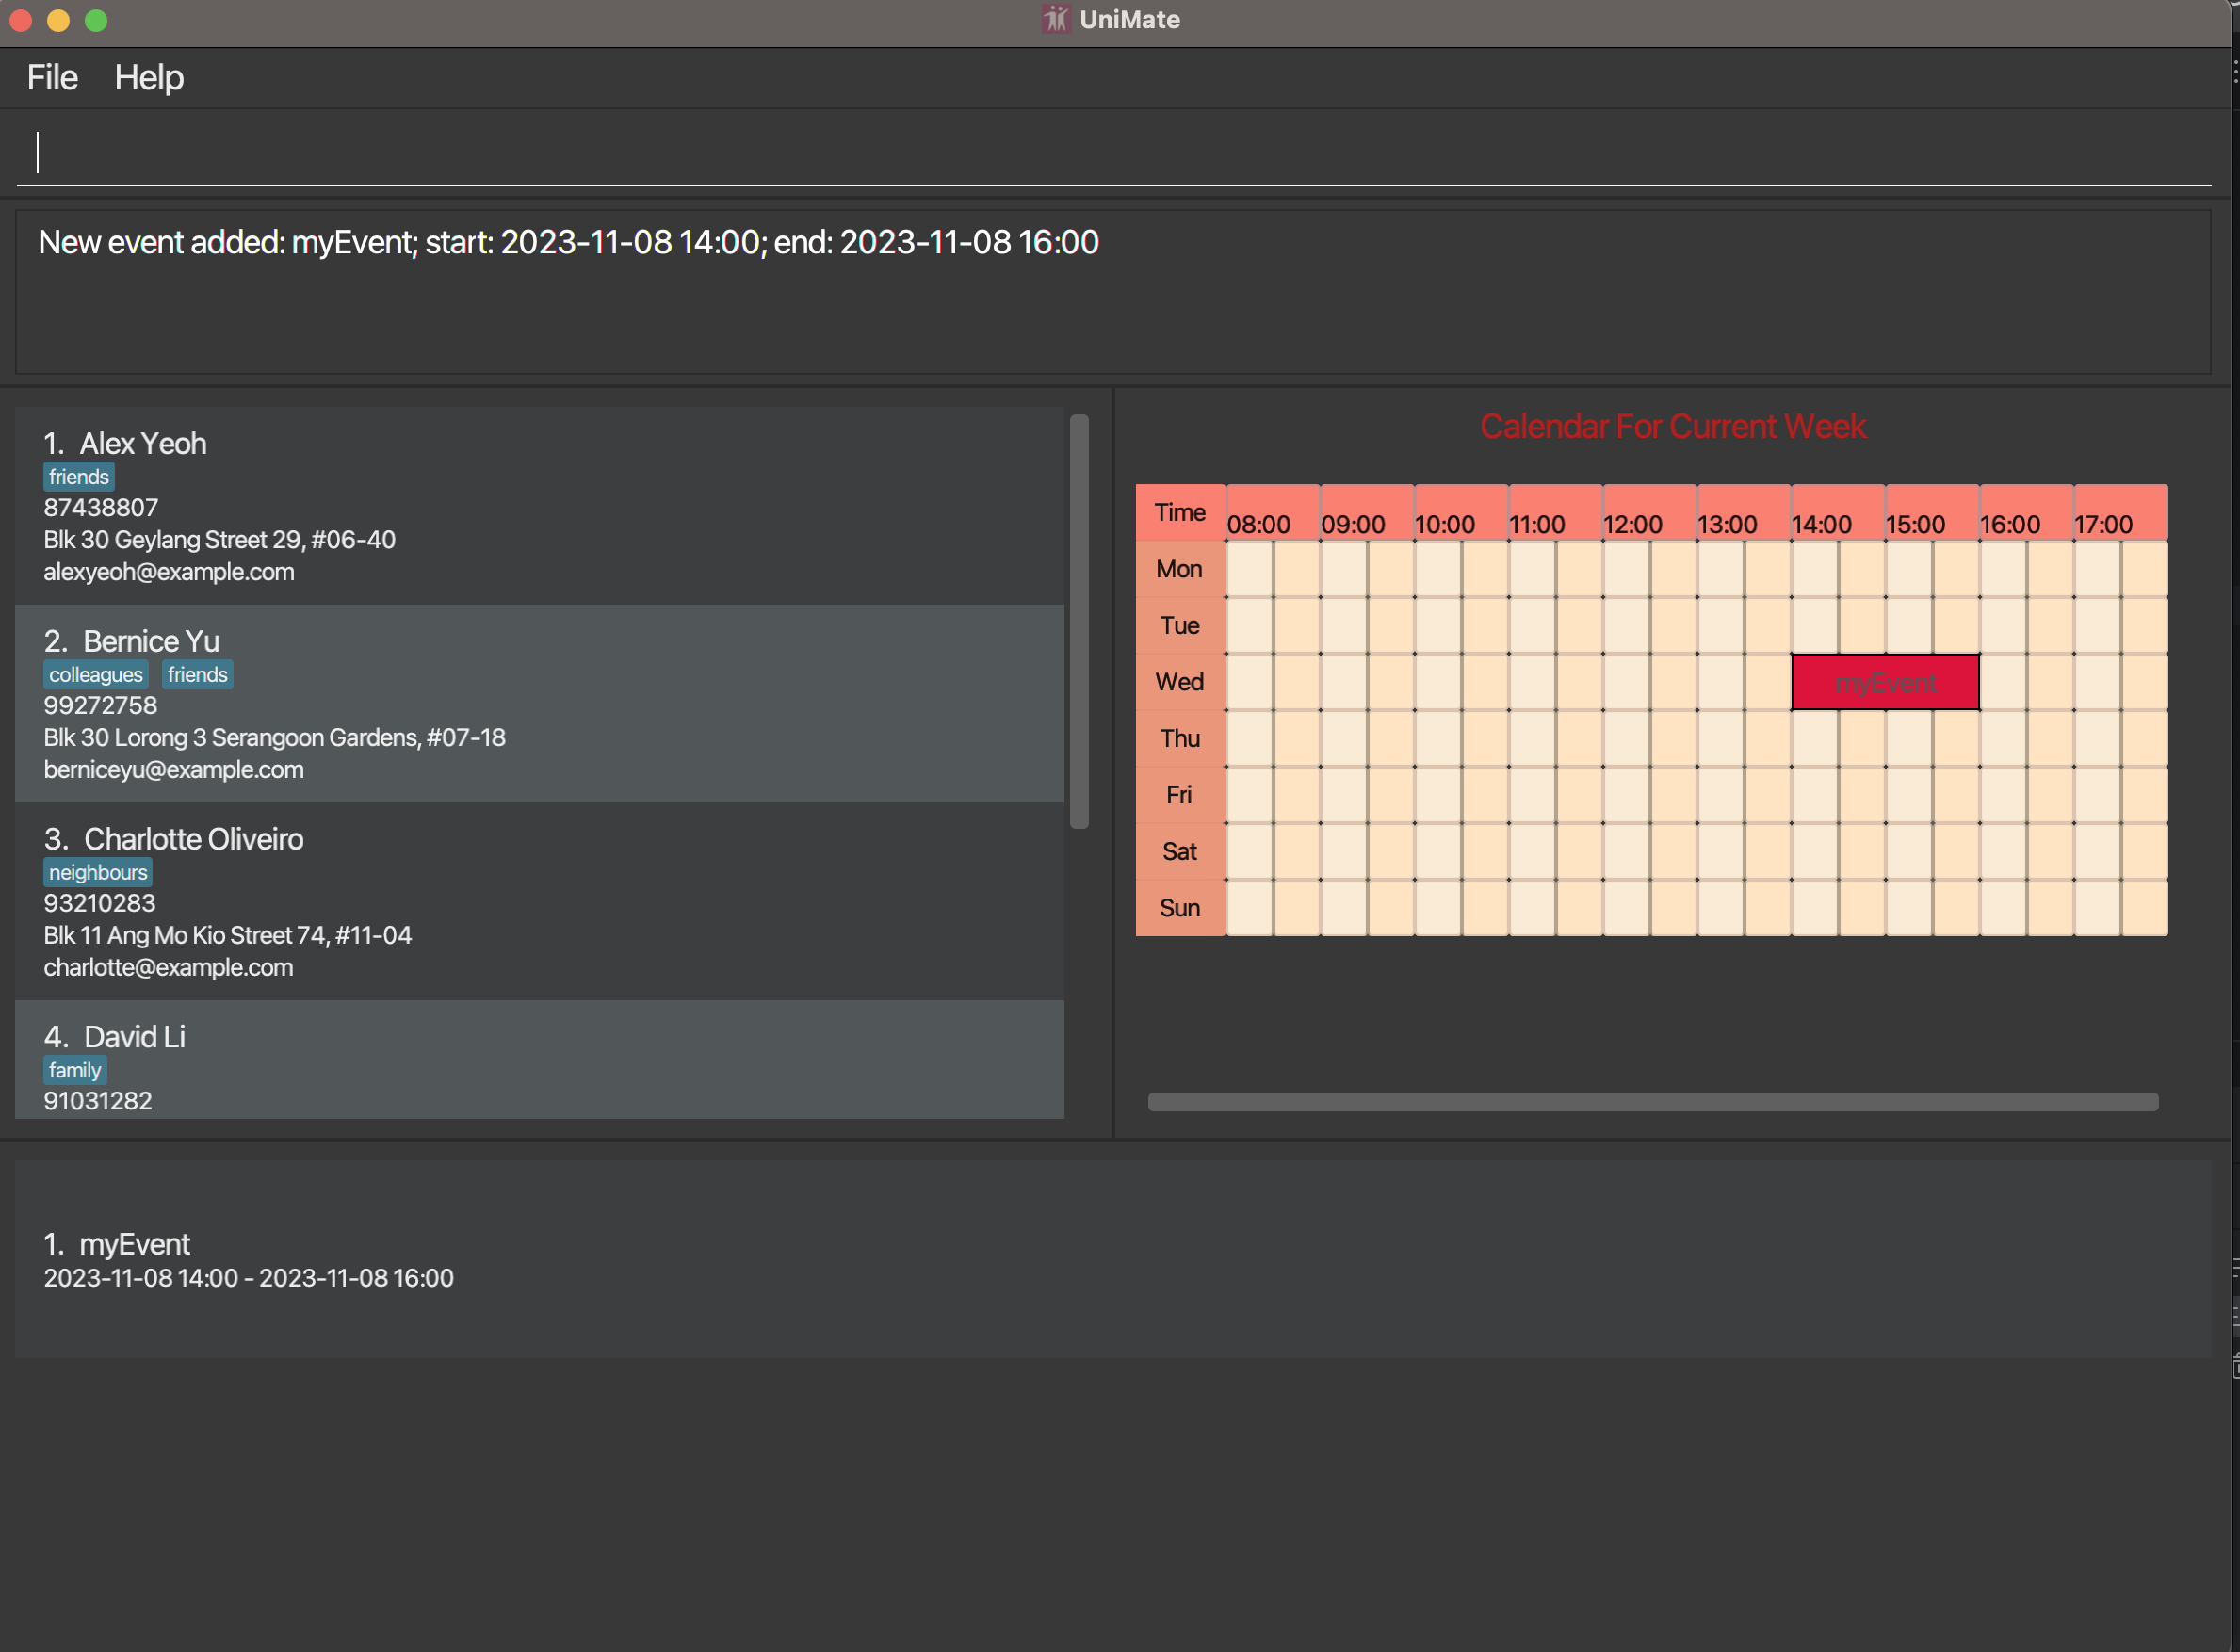
In this example, after executing the command addEvent d/myEvent ts/2023-11-08 14:00 te/2023-11-08 16:00,
the event myEvent is now visible in both the calendar on the right and the event list at the bottom, as
the date of myEvent coincides with the current week when the screenshot was taken.
In the case myEvent happens before/after the current week, it will not be displayed in the calendar, but will still
show in the event list.
[USER CALENDAR] Deleting an event: deleteEvent
Deletes an event from the user's calendar.
Format deleteEvent DATE_TIME_DURING_EVENT
- Deletes an event at the specified date and time.
- An event is considered to be at that date and time if the date time lies between the start time (inclusive) and the end time (exclusive).
- If there is no event during
DATE_TIME_DURING_EVENT, an error will be thrown.
Example:
deleteEvent 2023-11-01 12:00
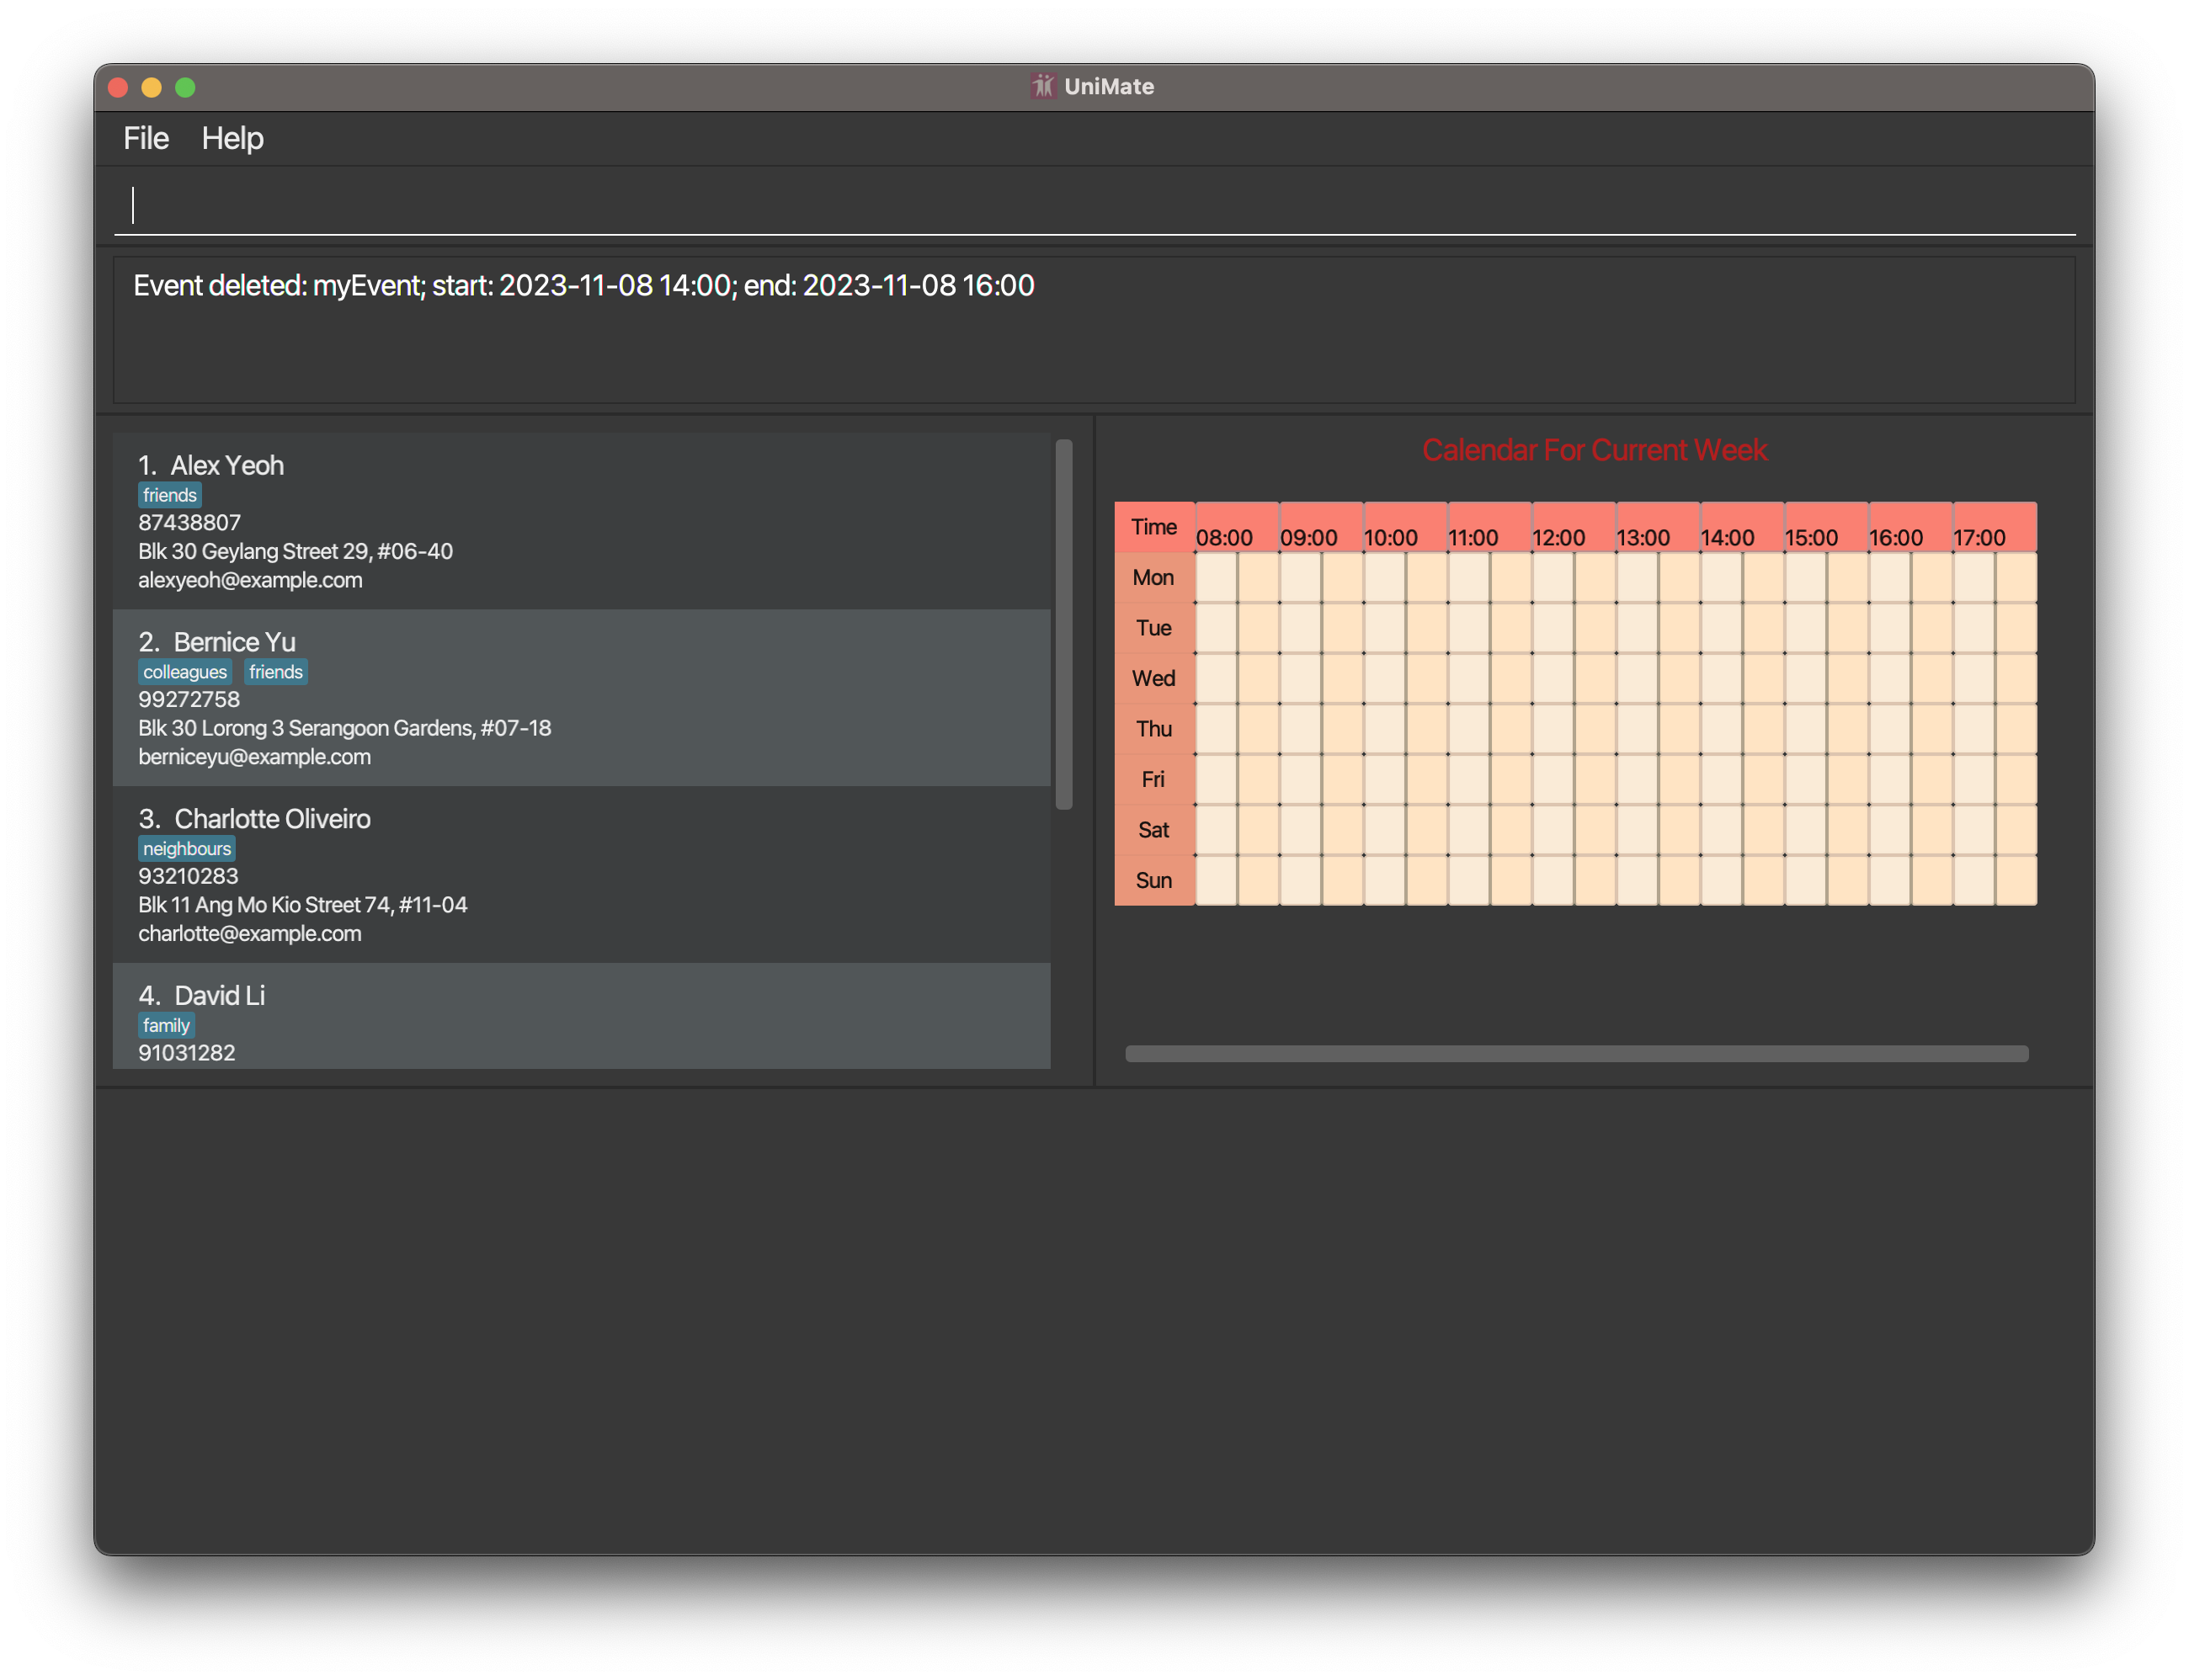
In this example, after executing the command deleteEvent 2023-11-08 15:00, myEvent(added in
the addEvent command example) that is happening during the
specified time was deleted, leaving an empty calendar and event list.
[USER CALENDAR] Deleting multiple events: clearEvents
Clears all events within a specified time range.
Note: In order to ensure the user does not make the mistake of deleting more events than intended, this command requires additional confirmation (refer to command format below) from the user to fully execute. Without the confirmation, the result box will instead display the list of events that will be deleted if the command were to fully execute, for the user's verification.
Format: clearEvents ts/START_DATE_TIME te/END_DATE_TIME c/CONFIRMATION
- Deletes all events from the specified start date and time to the specified end date and time
- An event is considered to be within the time range if overlaps with the time range for any period of time, inclusive of
START_DATE_TIMEbut exclusive ofEND_DATE_TIME - When the
CONFIRMATIONis absent, the command shows all events within the time range but does not delete them. The same command is then shown with the confirmation included that can be copied and pasted to execute the command - The
START_DATE_TIMEmust be beforeEND_DATE_TIME - If there is no
START_DATE_TIMEorEND_DATE_TIME, an error will be thrown
Example:
clearEvents ts/2023-01-01 00:00 te/2023-12-31 23:59 c/CONFIRMED
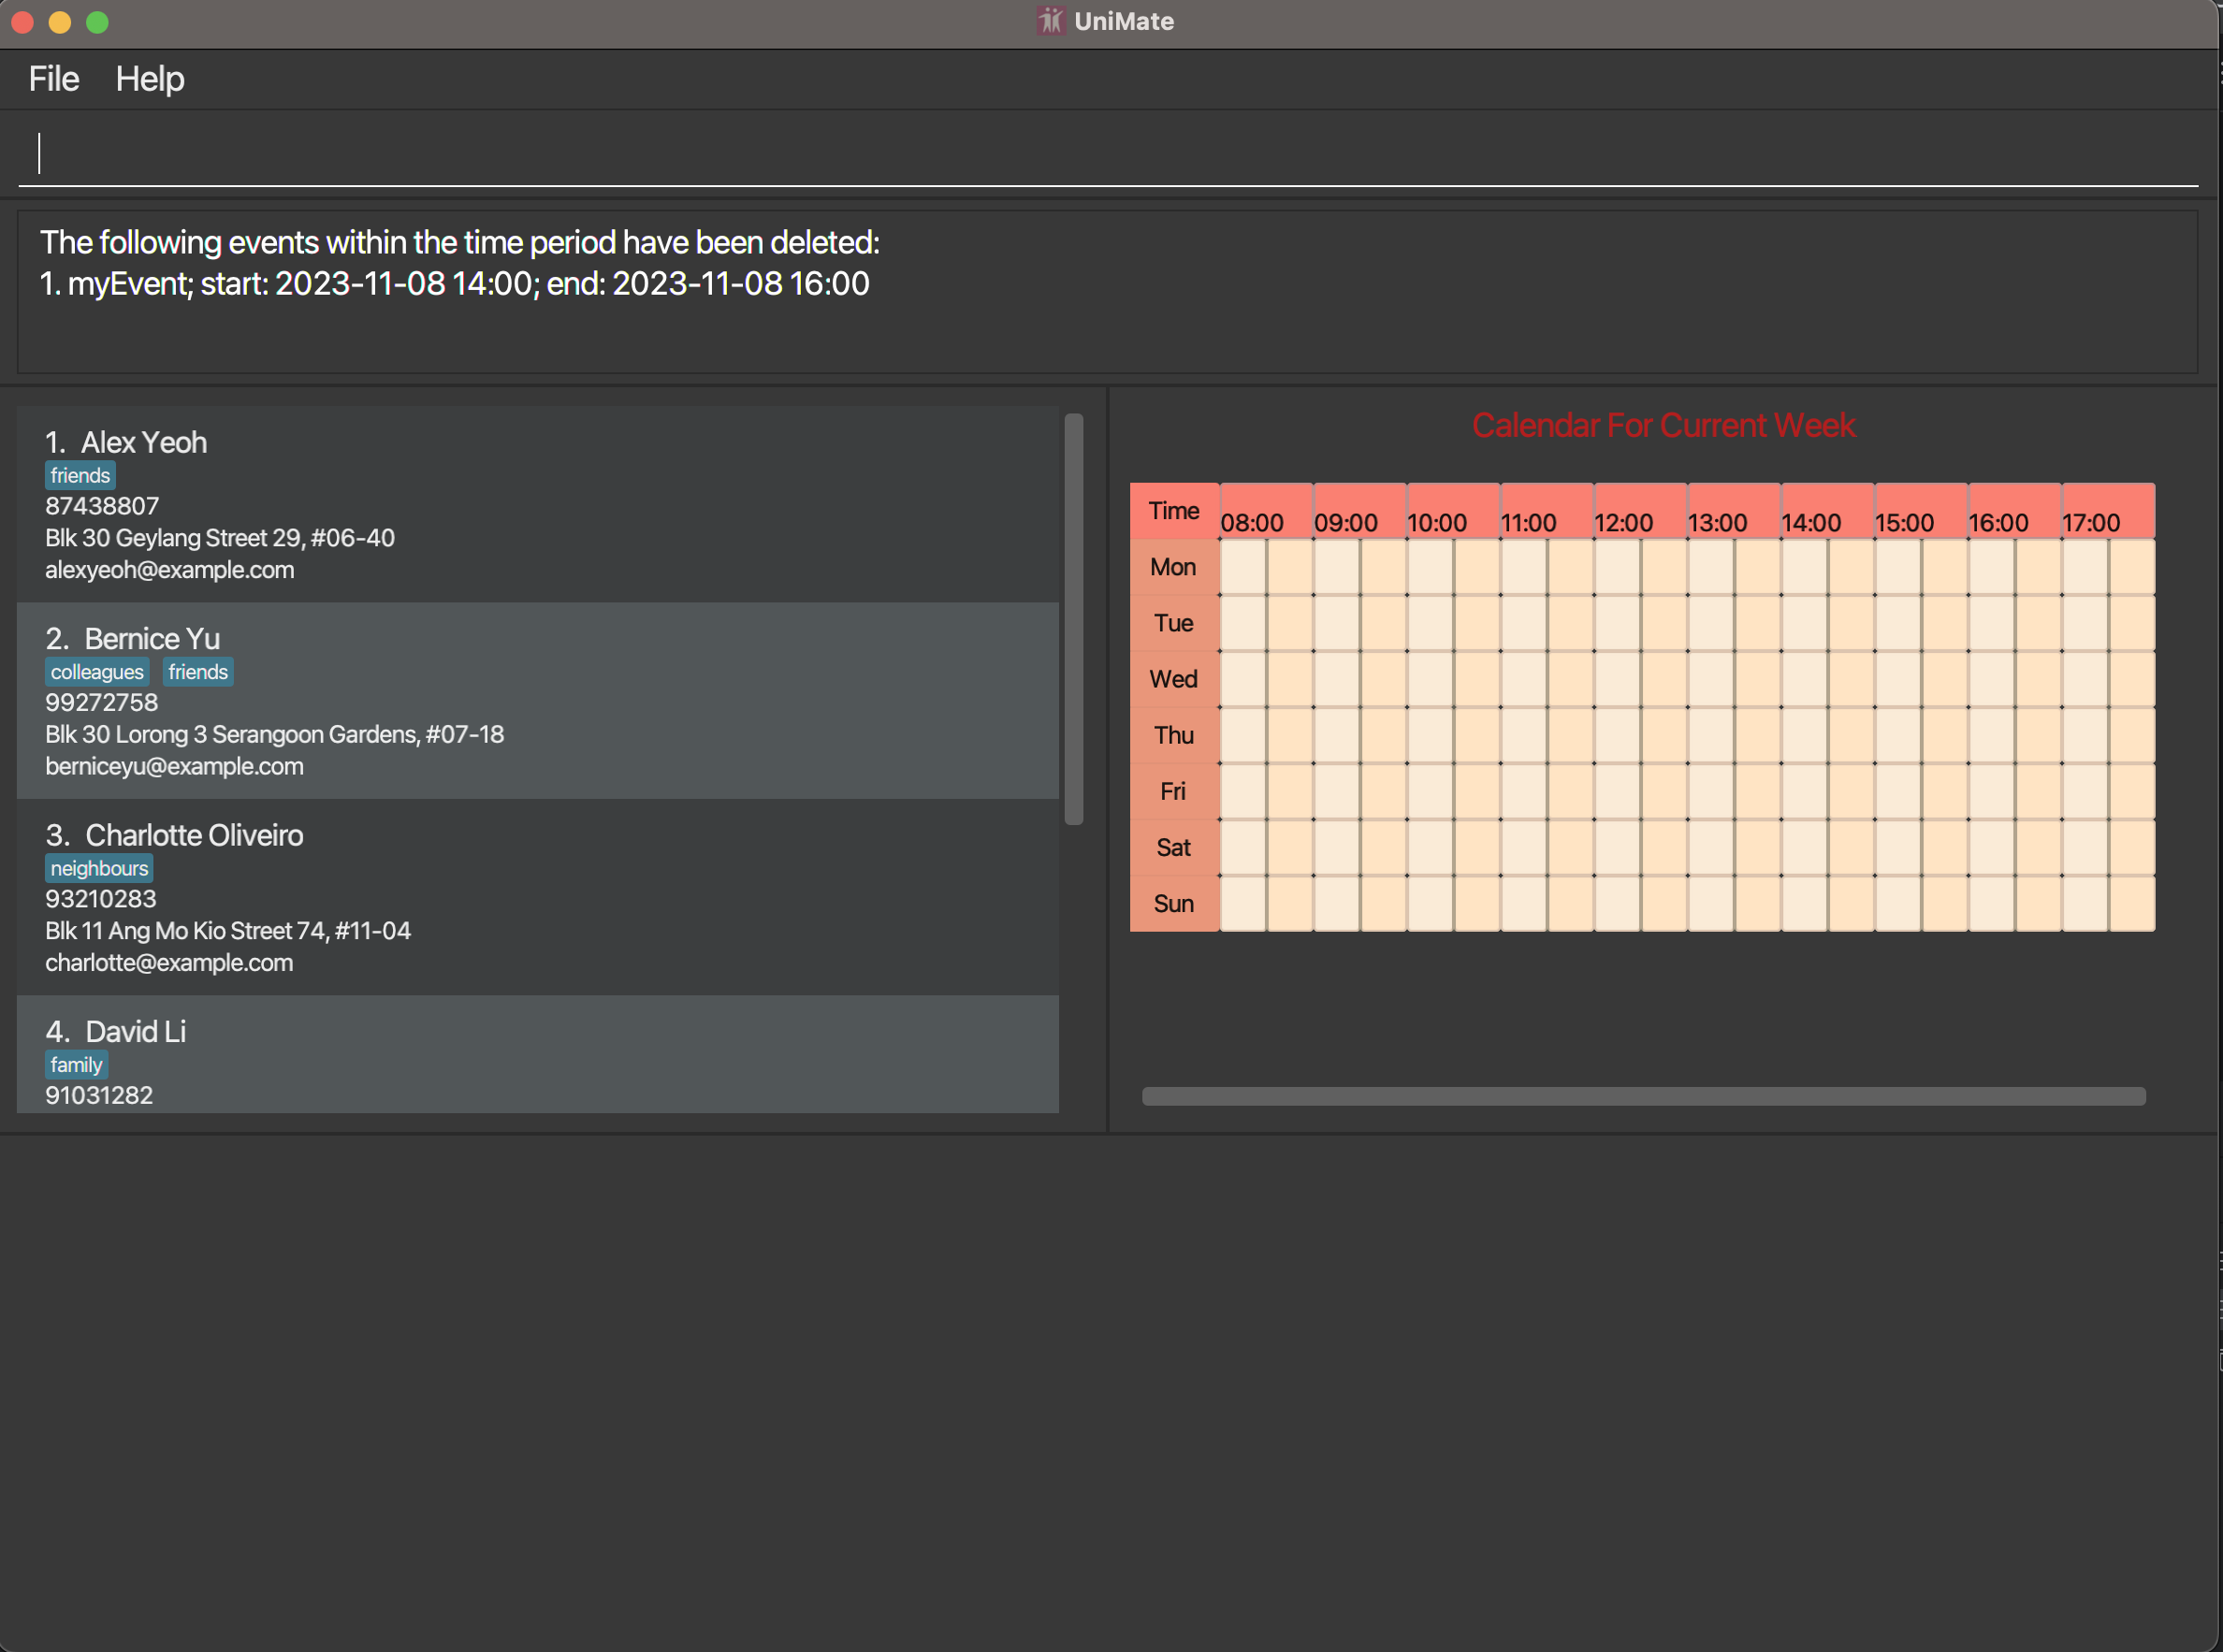
In this example, after executing clearEvents ts/2023-11-08 14:00 te/2023-11-08 16:00 c/CONFIRMED, myEvent(added in
the addEvent command example) that is happening during the duration of the
specified time was deleted, leaving an empty calendar and event list.
Event List/Task List switch: switchList
Events can be viewed from the calendar GUI that appears on the right.
Additionally, a list of all events are displayed by default at the bottom. This list at the bottom can be switched to a
task list with the switchList command. More information can be found under at Viewing all Tasks.
[CONTACT CALENDAR] Adding an event to a contact: addContactEvent
Adds an event to a contact's calendar at the specified index.
Format: addContactEvent INDEX d/DESCRIPTION ts/START_DATE_TIME ts/END_DATE_TIME
- Adds the event starting from
START_DATE_TIMEand ending atEND_DATE_TIME START_DATE_TIMEandEND_DATE_TIMEmust be inyyyy-MM-dd HH:mmformatSTART_DATE_TIMEmust be beforeEND_DATE_TIMEfor the command to be valid
Example:
addContactEvent 1 d/Team Meeting ts/2024-01-01 09:00 te/2024-01-01 11:00
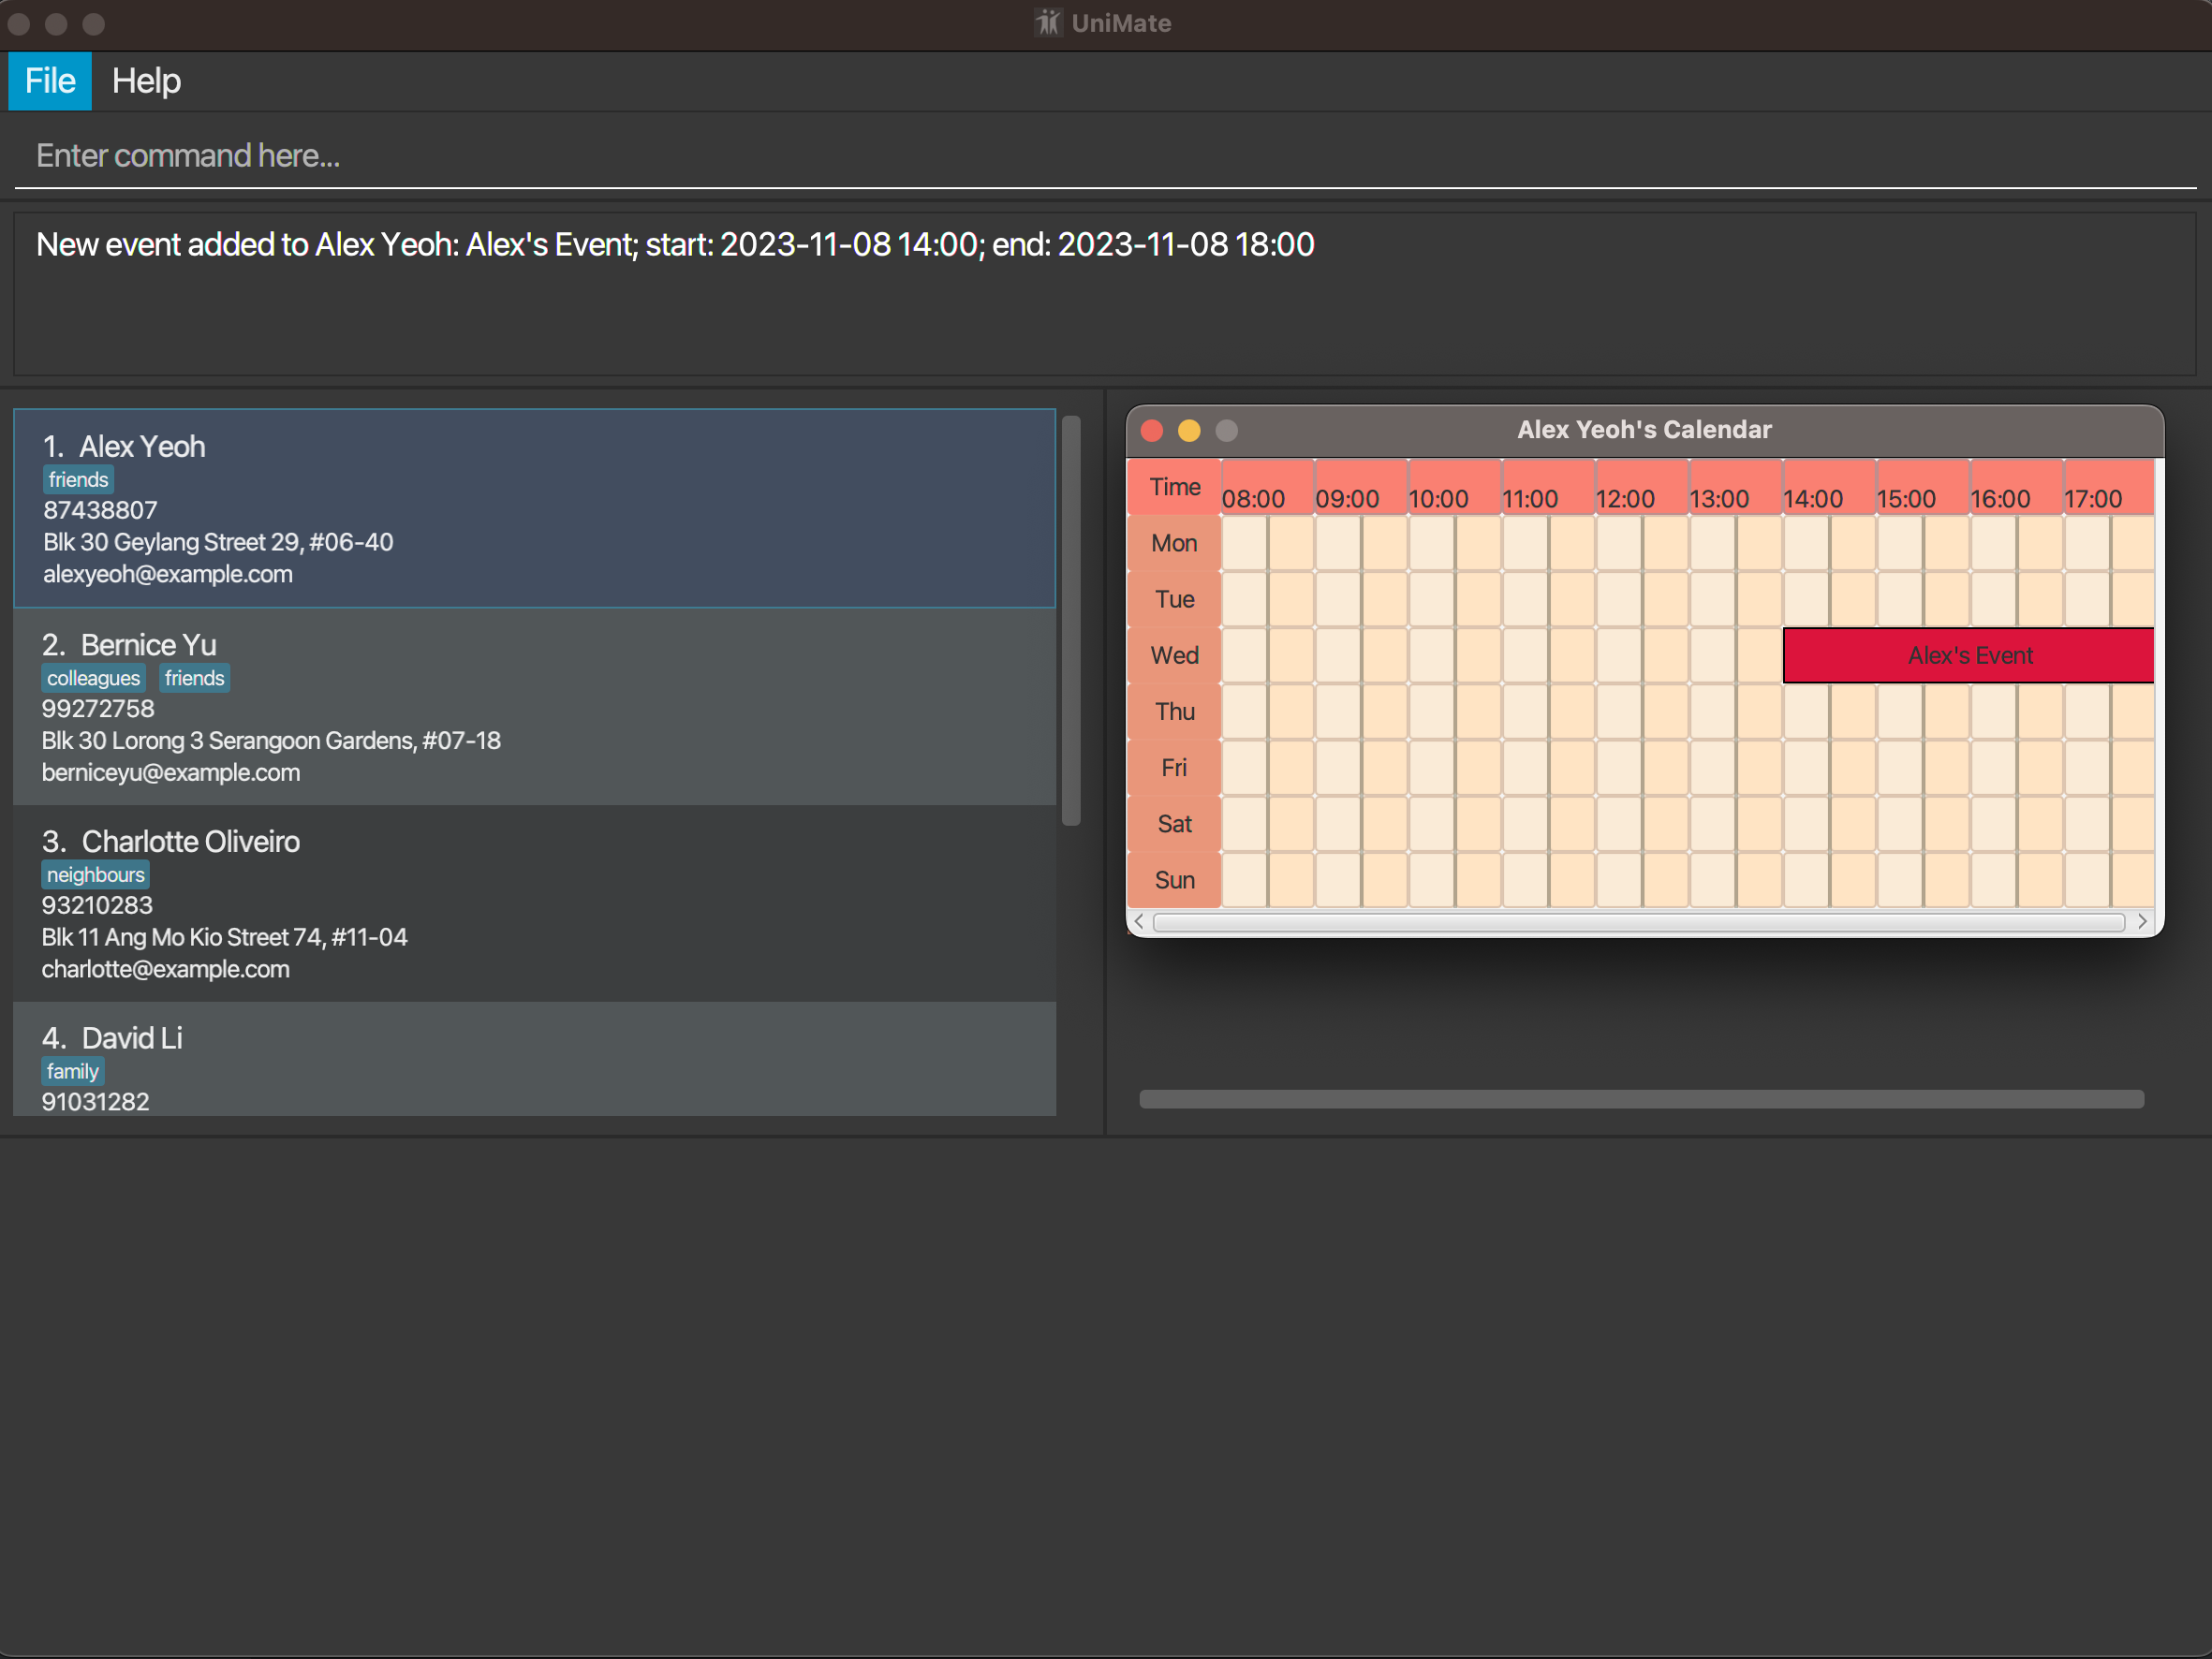
In this example, after executing addContactEvent 1 d/Alex's Event ts/2023-11-08 14:00 te/2023-11-08 18:00 and
double-clicking on the person card of index 1 in the AddressBook, the
contact's calendar pops up, revealing Alex's Event. In the case that the event happens before/after
the current week, it will not be shown in the calendar, but will still be displayed in the
contact's event list.
[CONTACT CALENDAR] Deleting an event from a contact: deleteContactEvent
Deletes an event from a contact's calendar at the specified index.
Format deleteContactEvent INDEX ts/DATE_TIME
- Deletes an event that contains the
DATE_TIMEfrom the contact
Example:
deleteContactEvent 1 ts/2024-01-01 09:00
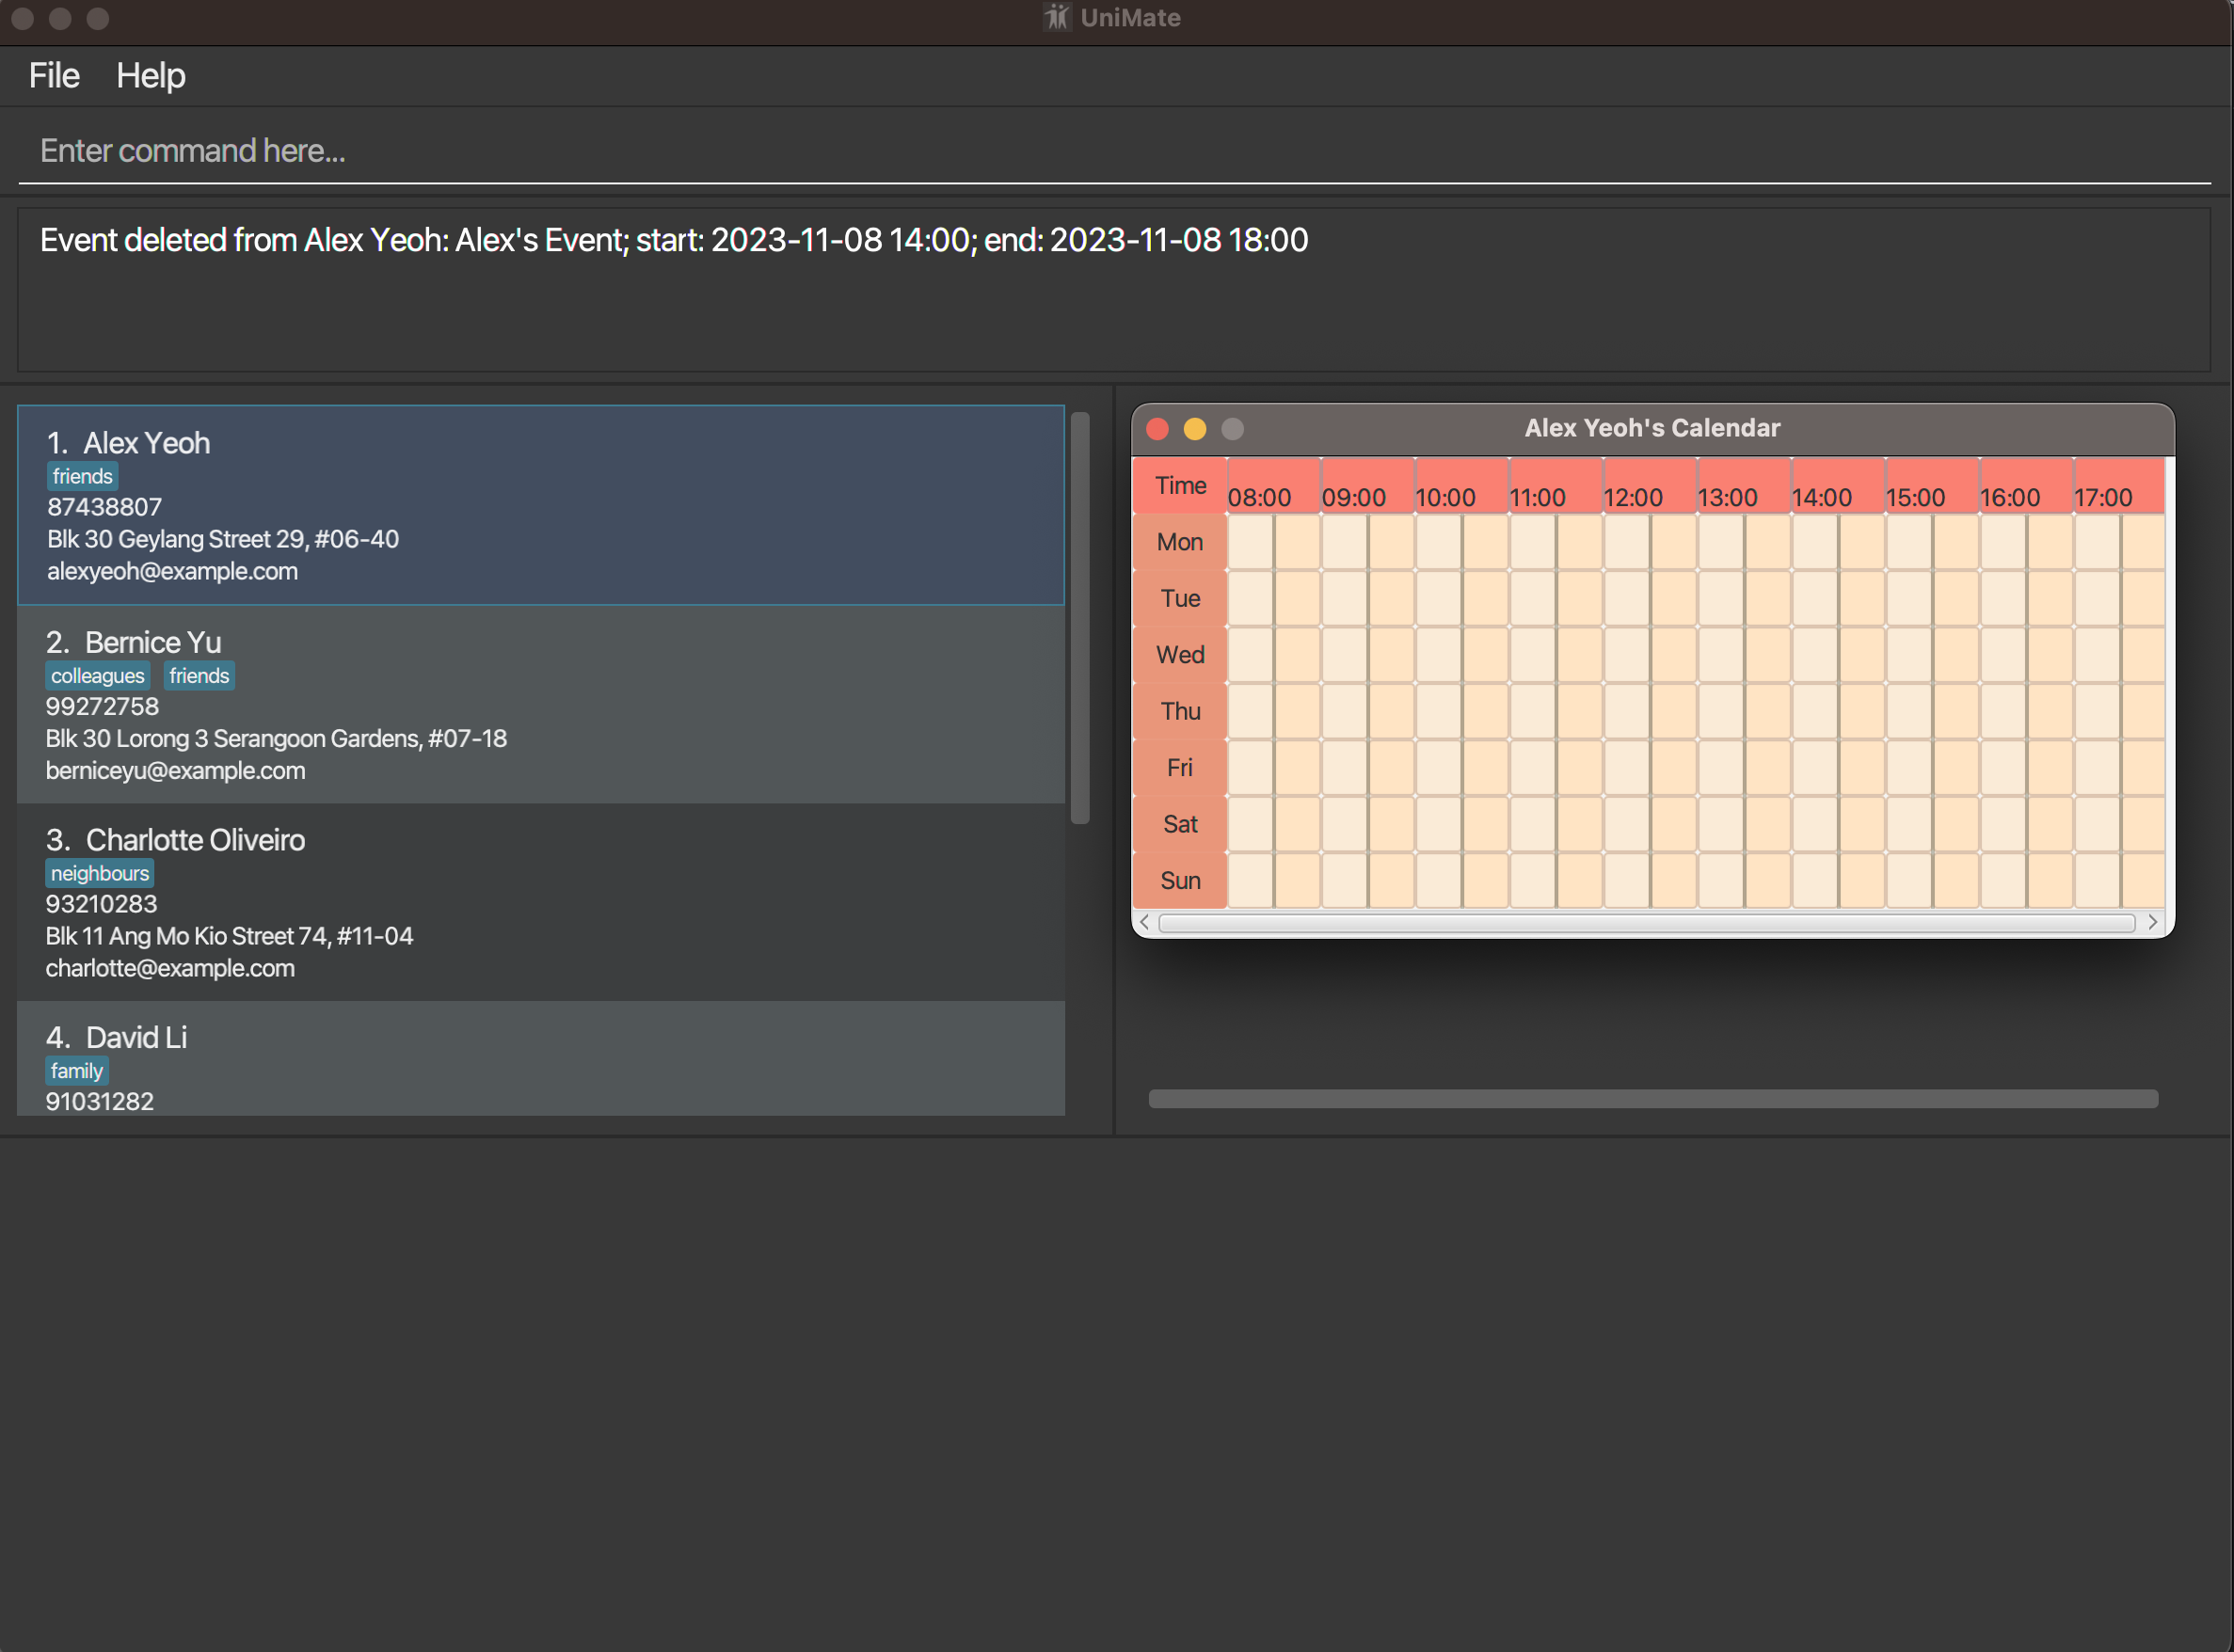
In this example, after executing deleteContactEvent 1 ts/2023-11-08 14:00 and
double-clicking on the person card of index 1 in the AddressBook,
the contact's calendar pops up, revealing an empty calendar as Alex's Event (added in the
example in addContactEvent),
occurring at the specified time, has been removed.
[CONTACT CALENDAR] Edit Contact Calendar Event: editContactEvent
Edits the details of an event in a contact's calendar.
Note: If this command is executed while the event list of the contact of interest is open, the event list will not be updated until the tab is closed and open again.
Format: editContactEvent PERSON_INDEX EVENT_INDEX [d/DESCRIPTION] [ts/NEW_START_DATE_TIME][te/NEW_END_DATE_TIME]
- Edits
EVENT_INDEXevent of thePERSON_INDEXperson in the AddressBook with the given fields.
Example: editContactEvent 1 1 d/Nap, editContactEvent 2 3 ts/2023-10-10 10:00 te/2023-10-12 15:00
- Note that all edited fields are optional, but there must be at least 1 edited field.
In this example, we see this is the state of the calendar of Alex Yeoh, the person with index 1
in the AddressBook.
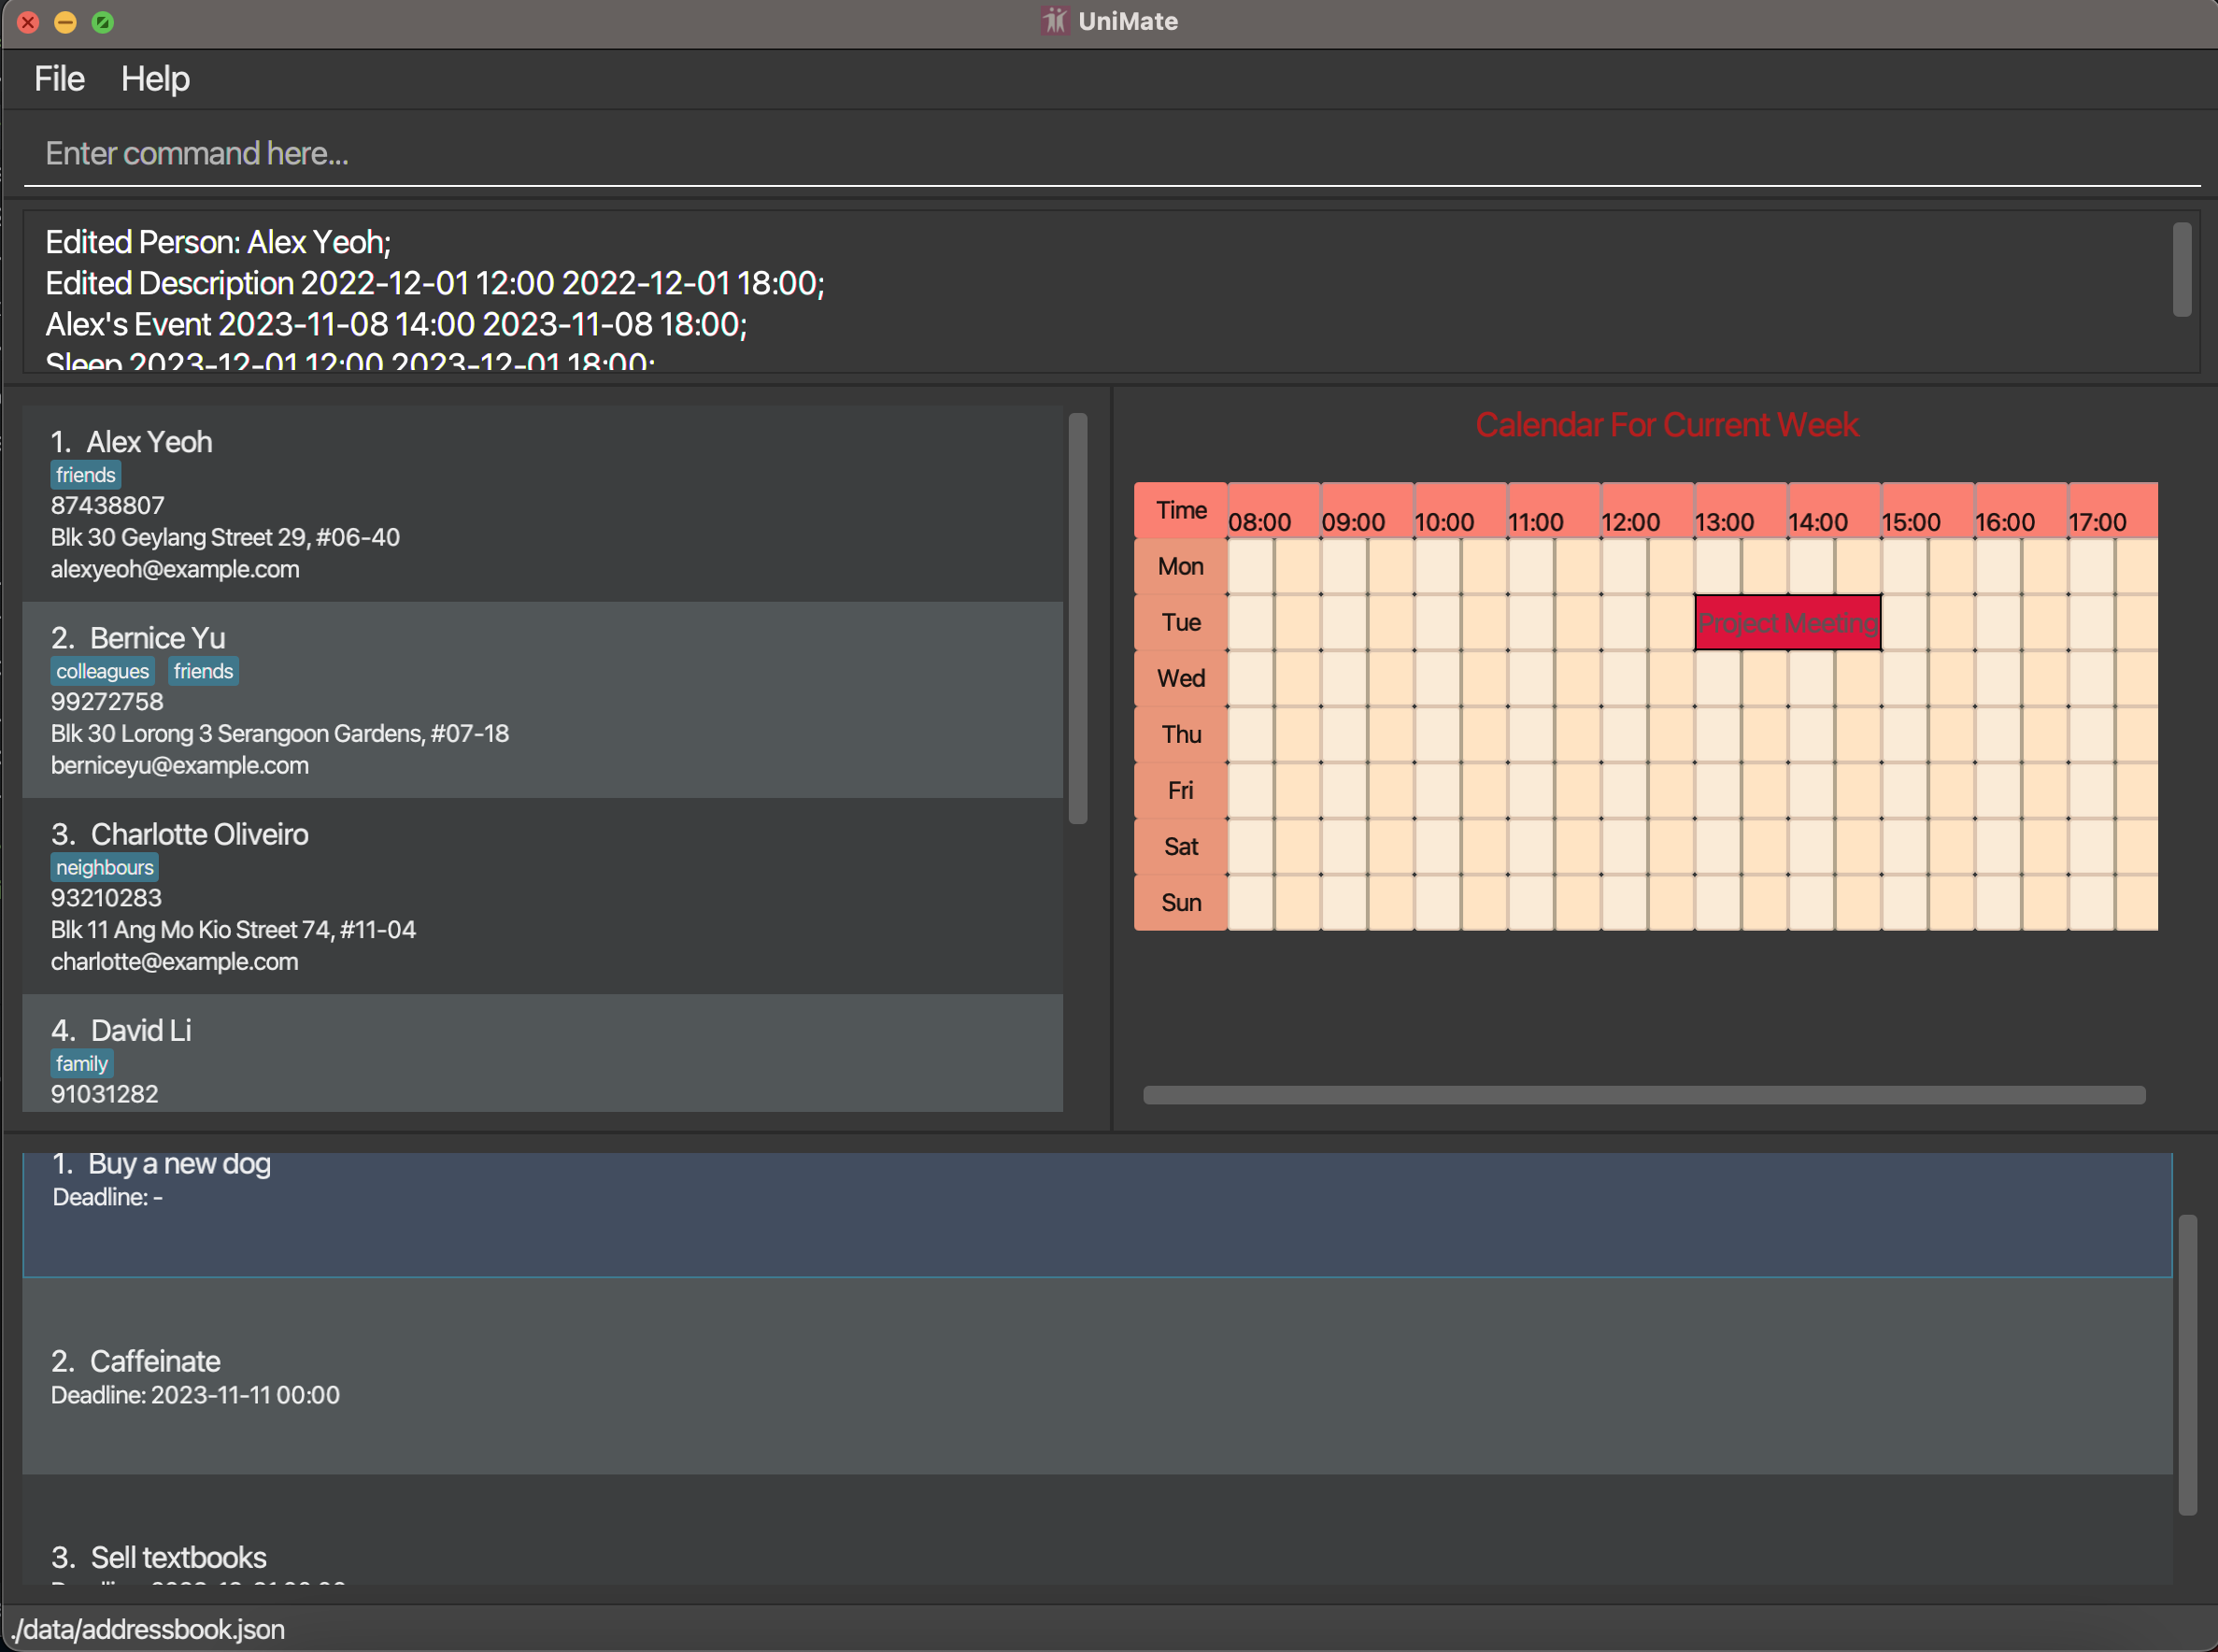
After executing editContactEvent 1 1 d/Edited Description, we get this confirmation message
We can see that the event Nap has its description changed to Edited Description.
Viewing contact event list: viewContactEvents
Creates a pop-up that displays a list of all events of a calendar belonging to a person in the AddressBook.
Format: viewContactEvents INDEX
- Views the event list of the person at
INDEXas displayed.
Example:
viewContactEvents 1

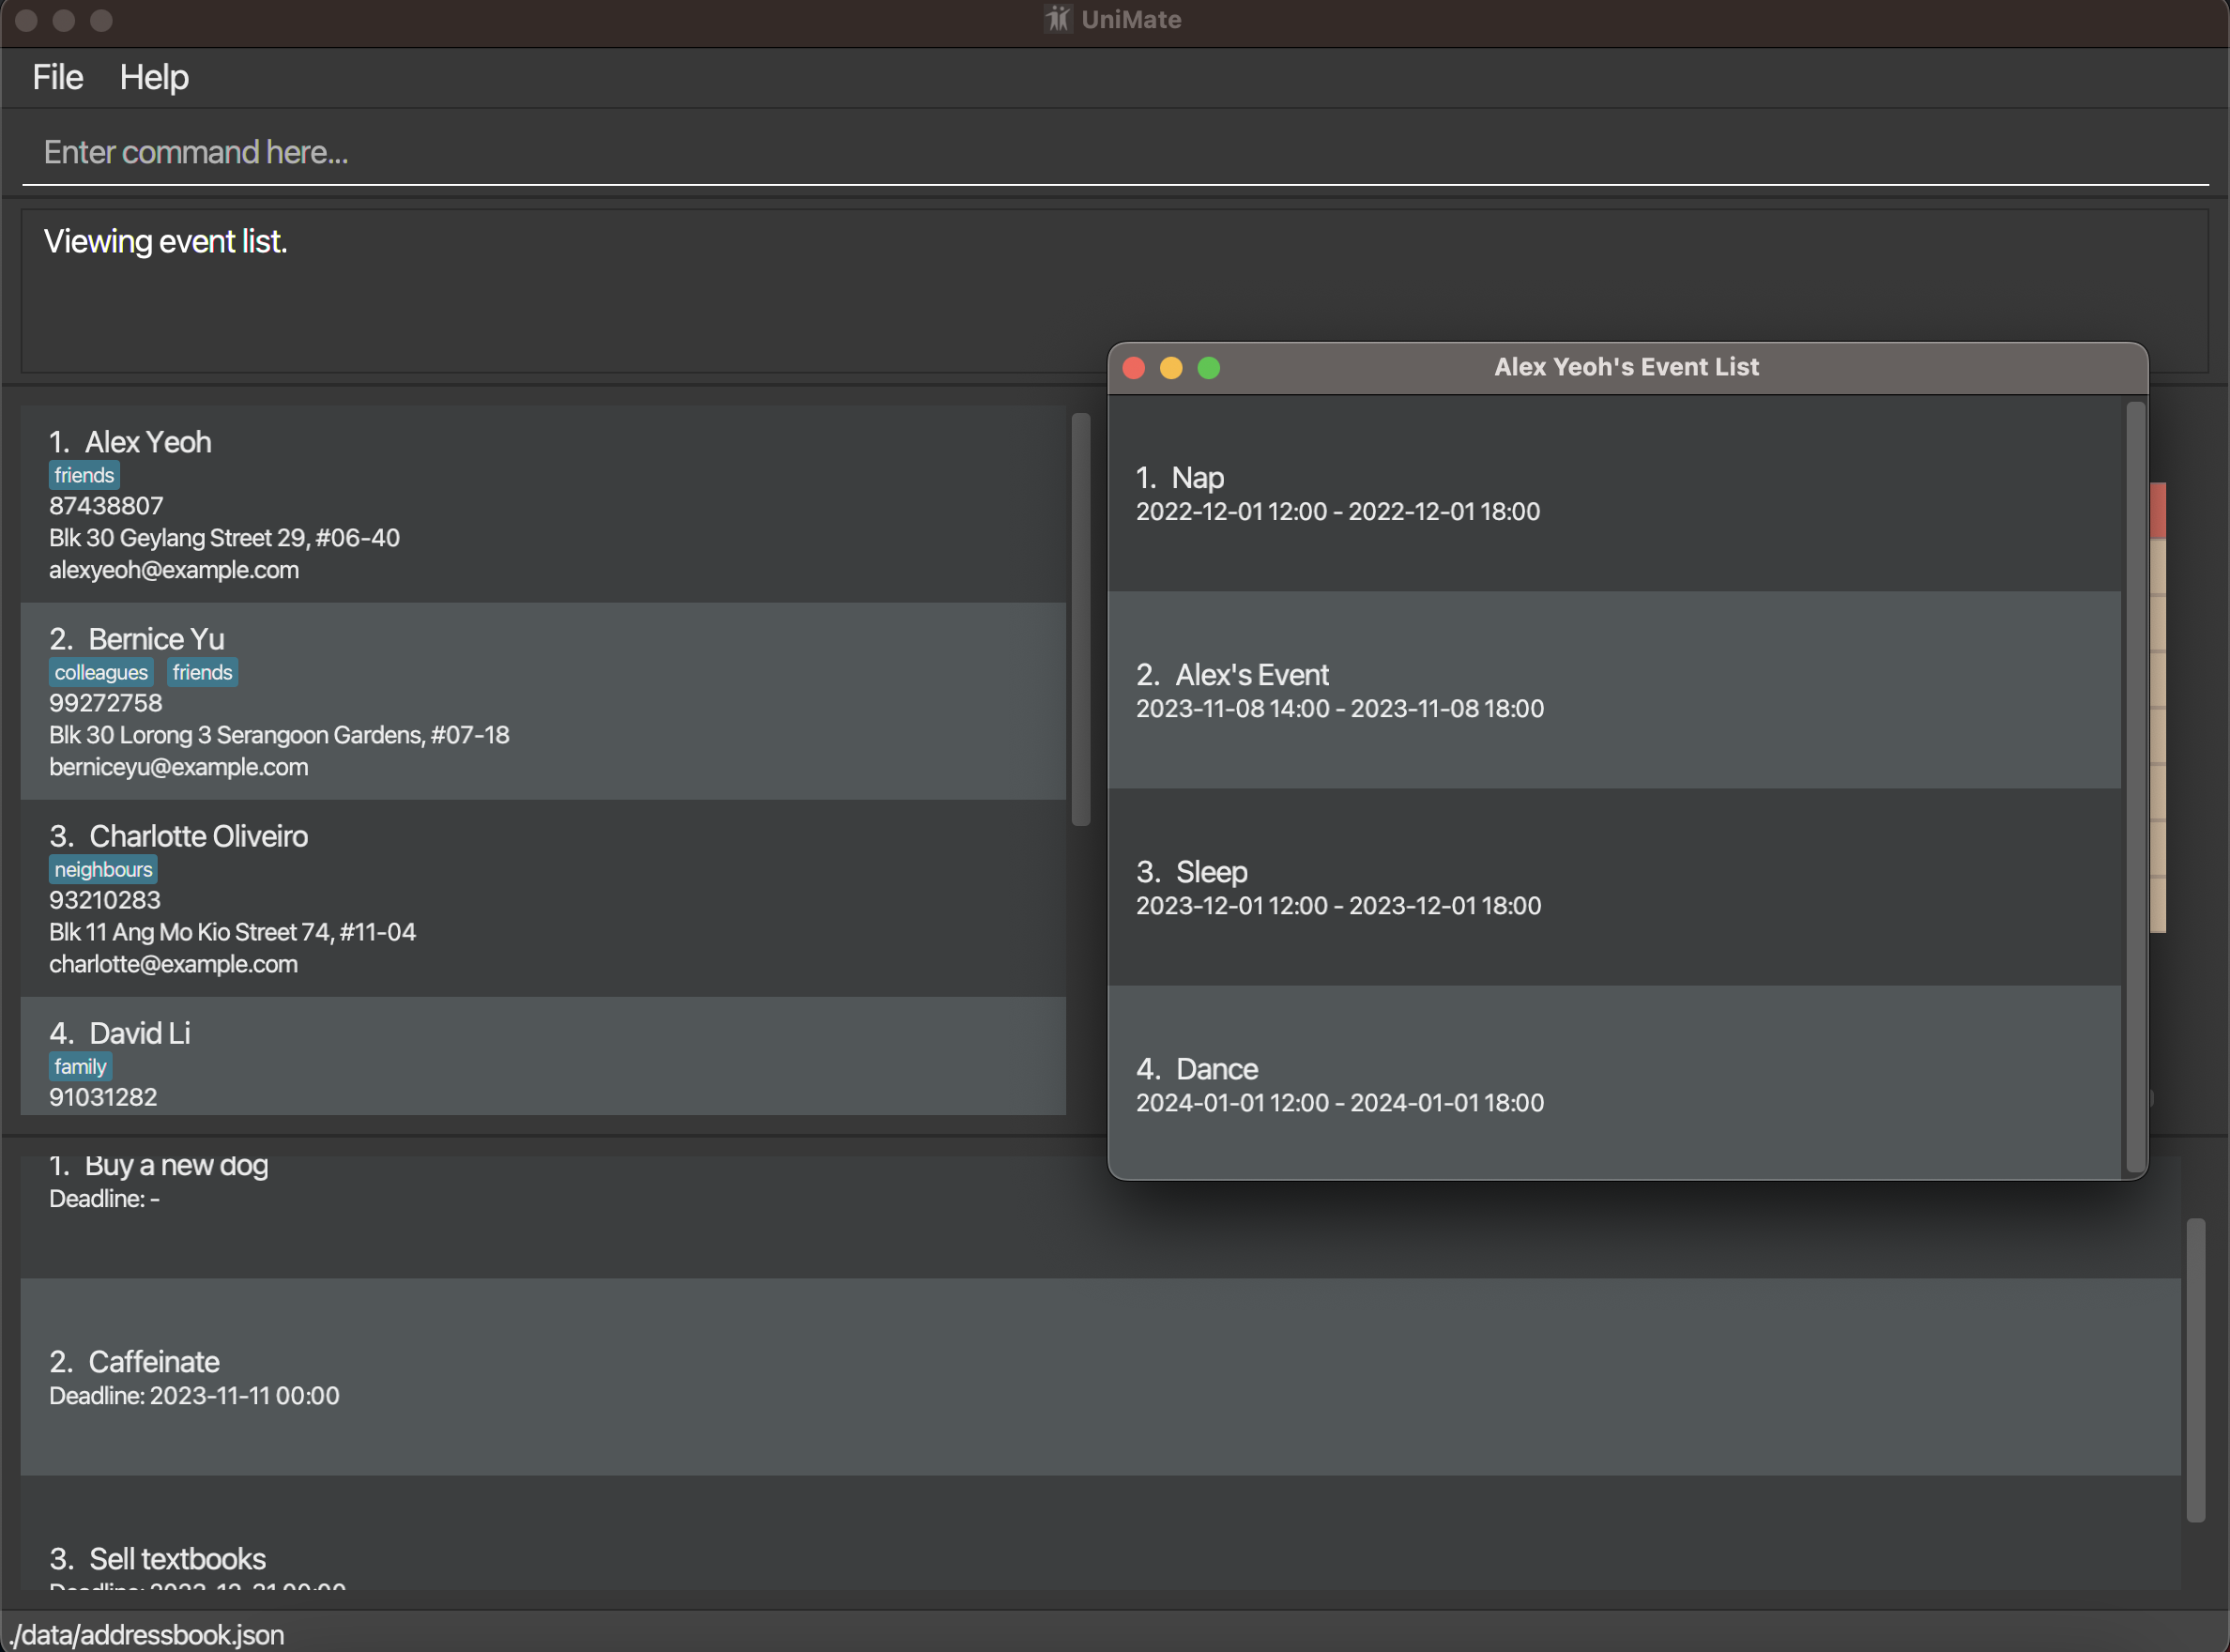
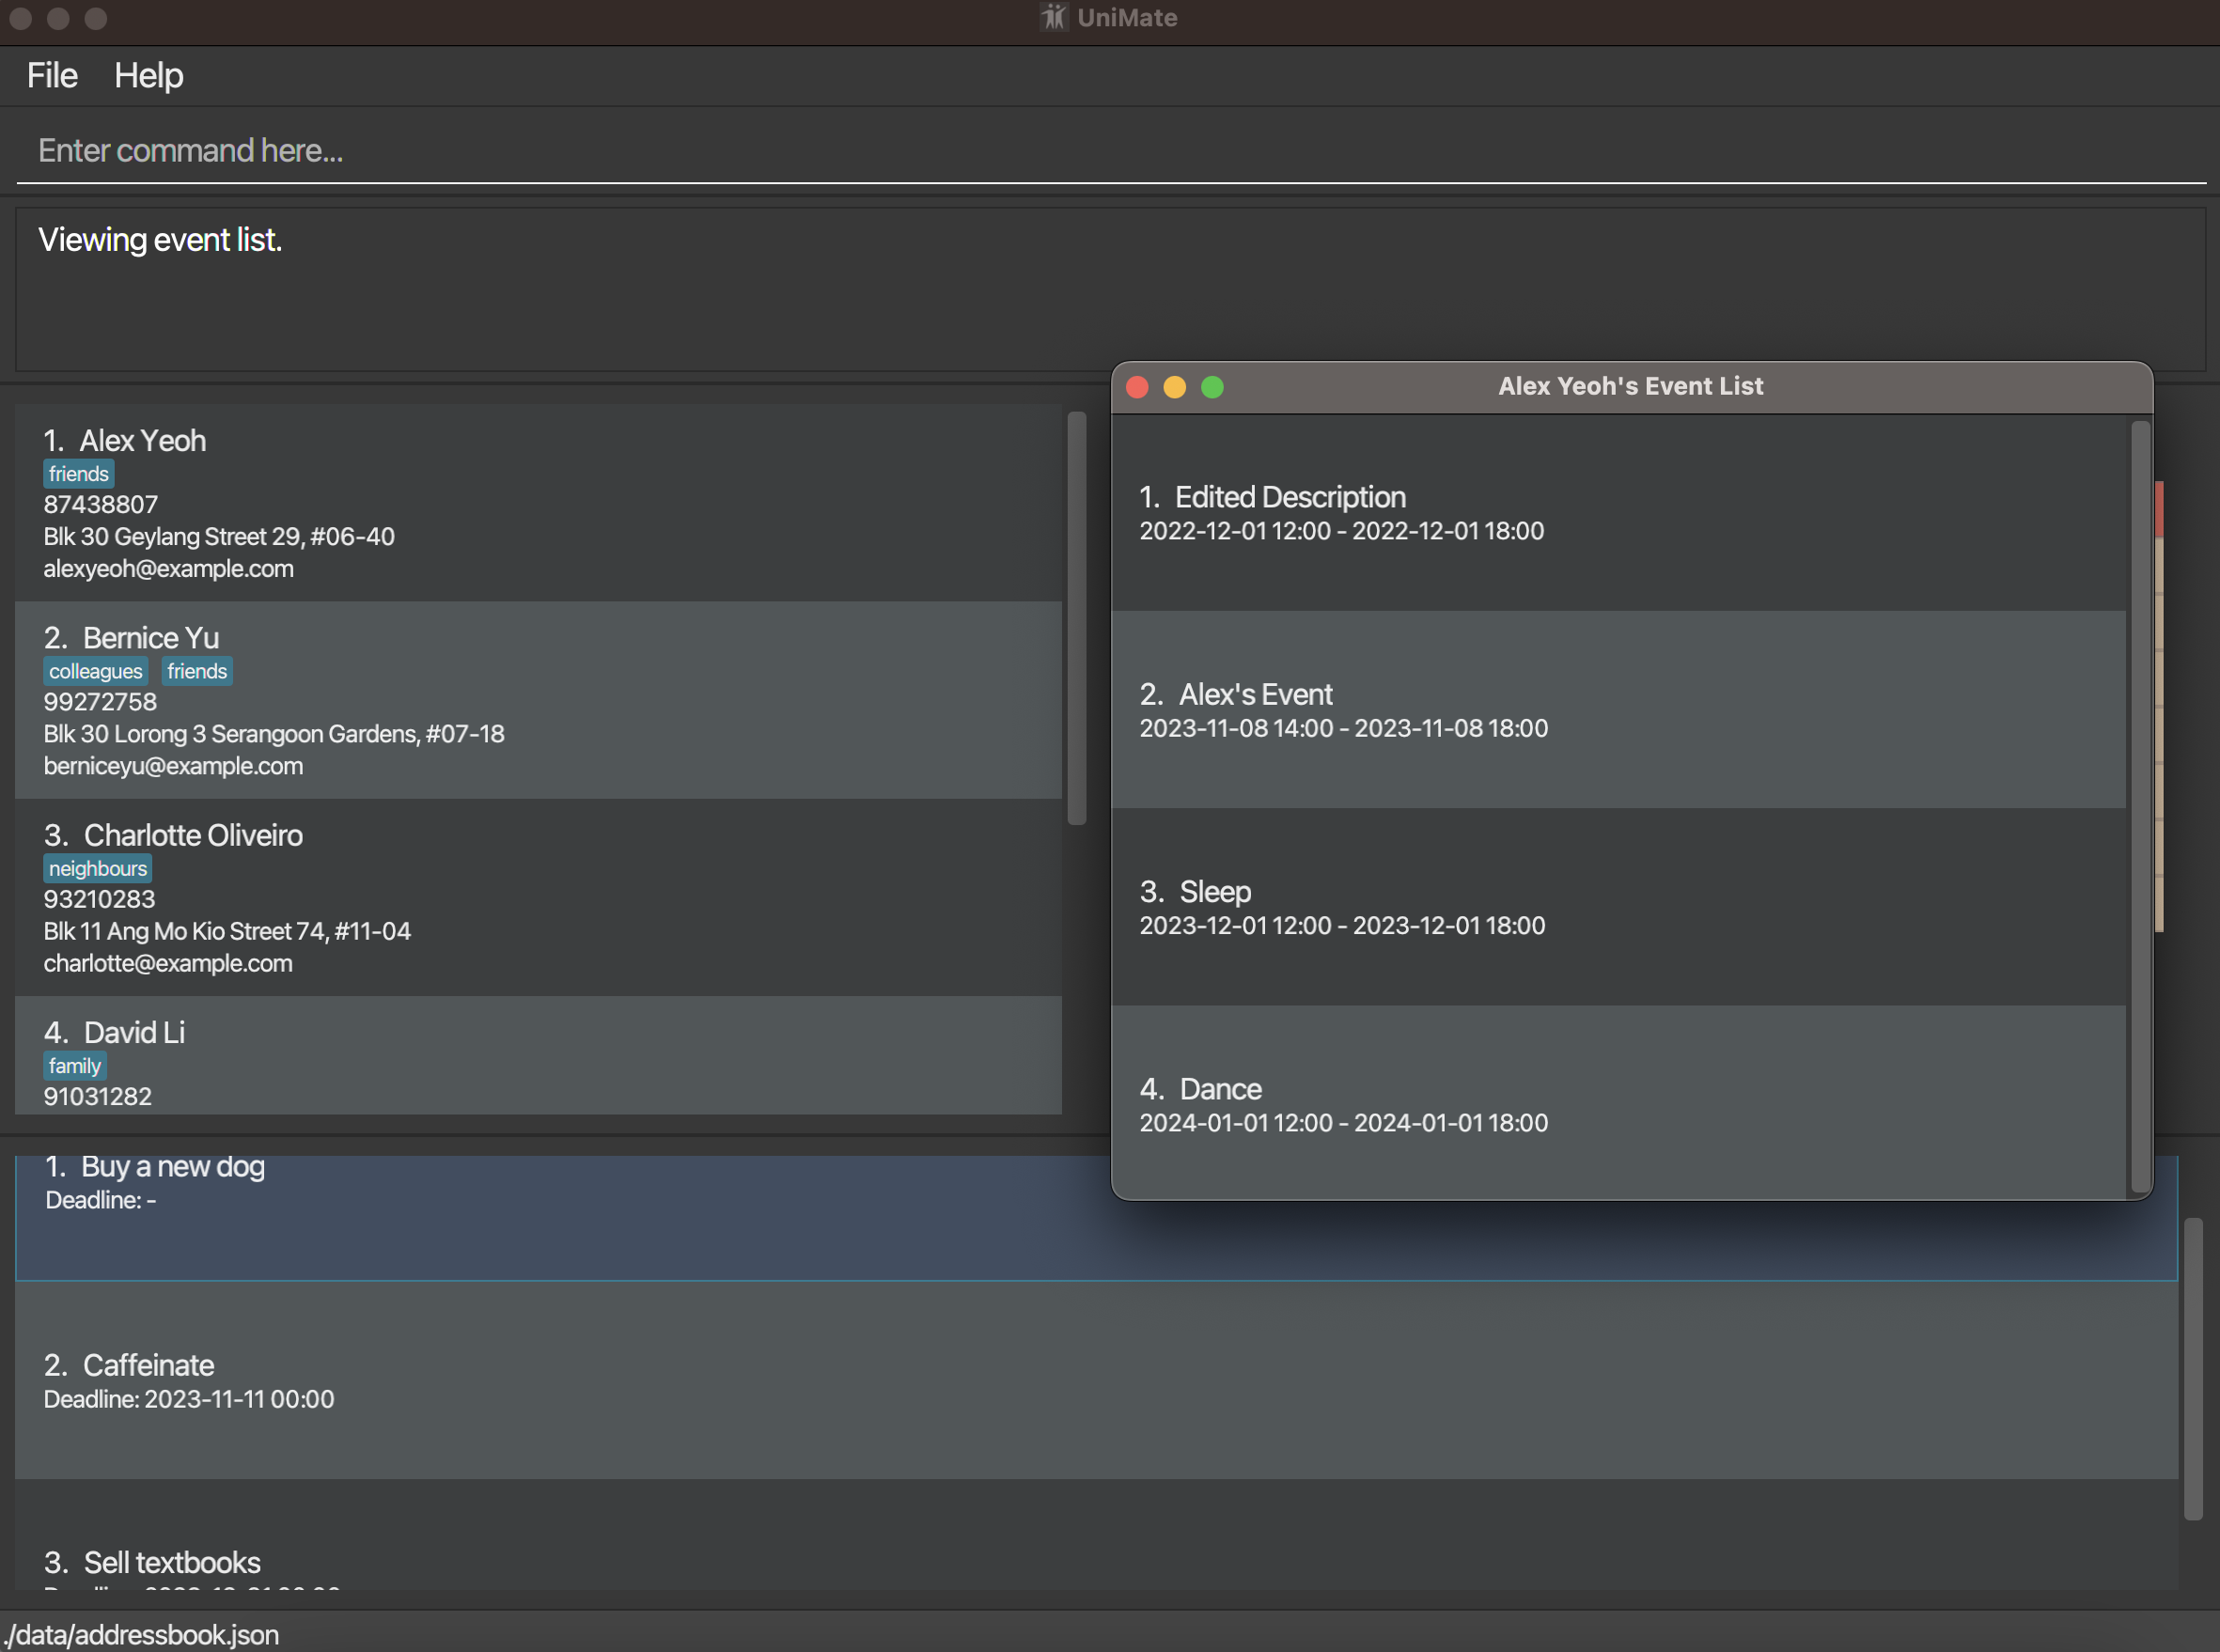
In this example, after execute viewContactEvents 1, a pop-up with the list of events of the person
with index 1 in the AddressBook, which in this case is Alex Yeoh shows up.
Comparing calendars with AddressBook Contacts
There are 2 ways for the user to compare calendars with their AddressBook contacts:
The resulting pop-up calendar will display the time periods where all parties are not available as greyed out sections. The pop-up has to be closed in order for the user to access the main application again.
Note: Arguments for the commands are optional, hence
compareCalendarsandcompareGroupCalendarsare valid commands, but the resulting pop-up will just display the user's calendar.
1. Comparison by index
Format compareCalendars [INDEX]...
- Compare calendar with the contacts at the respective
INDEX INDEXmust be a positive non-zero integer that is smaller or equals to the size of the AddressBook- If the
INDEXnumber provided is invalid, an error will be returned - If no
INDEXis supplied, the resulting pop-up will just display the user's calendar
Example:
compareCalendars 1 3 5

In this example, after executing compareCalendars 1, we see the timings when both the user and
the person with index 1 (Alex Yeoh) are not free is blocked out.
2. Comparison by tag
Format compareGroupCalendars [TAG]...
- Compare calendar with the contacts with the specified
TAG - If some of the
TAGprovided are invalid, the resulting pop-up will ignore the invalidTAG - If all the
TAGprovided are invalid, the resulting pop-up will just display the user's calendar - If no
TAGis supplied, the resulting pop-up will just display the user's calendar
Example:
compareGroupCalendars school friends
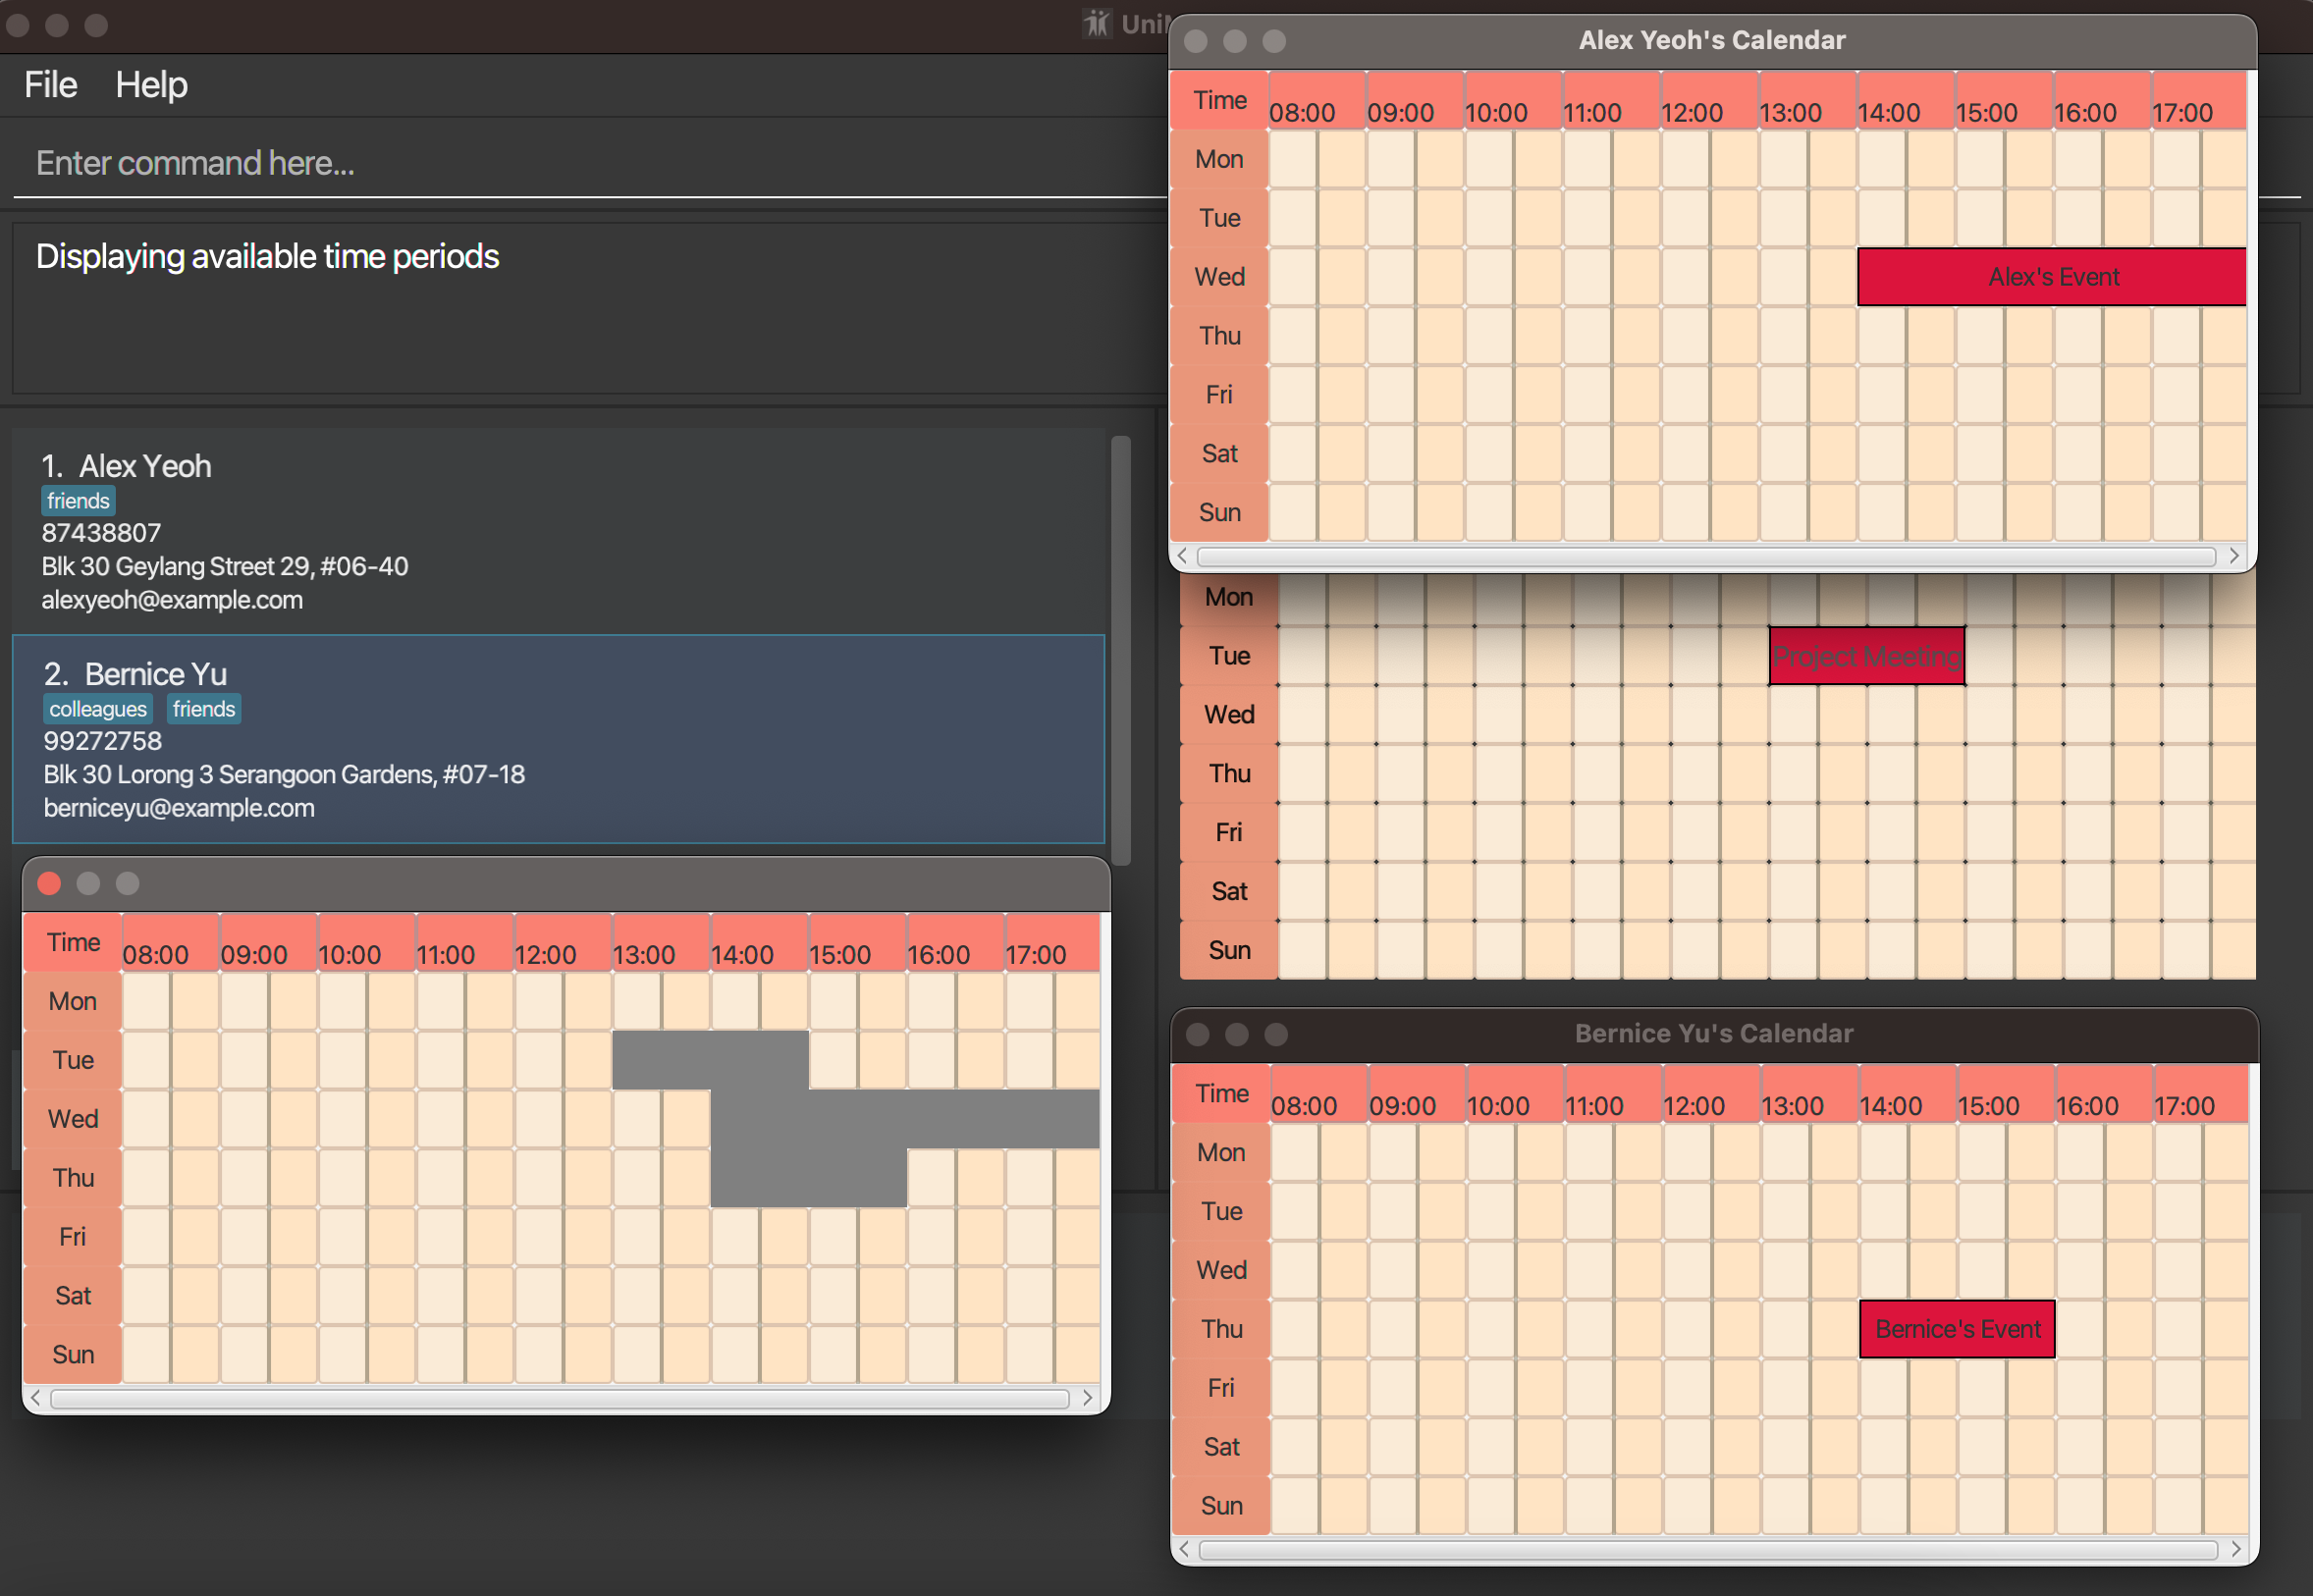
In this example, after executing compareGroupCalendars friends, we see the timings when both the
user and the contacts that have the friends tag are unavailable are blocked out.
Import *.ics files (Coming Soon)
User can import *.ics files, which will automatically be integrated into their UniMate calendars.
Format: import FILE_PATH
View other weeks of Calendar (Coming Soon)
User can view other weeks of their calendar schedule beyond just the current week.
Format: viewWeek DATE
Task Management System
Tasks consist of a DESCRIPTION and an optional DEADLINE.
Note: Tasks can have the same
DESCRIPTIONorDEADLINE, but not both.
Viewing tasks: switchList
Switches the bottom list between the event list and the task list.
Format: switchList
- All input after
switchListwill be ignored. - The bottom list displays the event list by default.
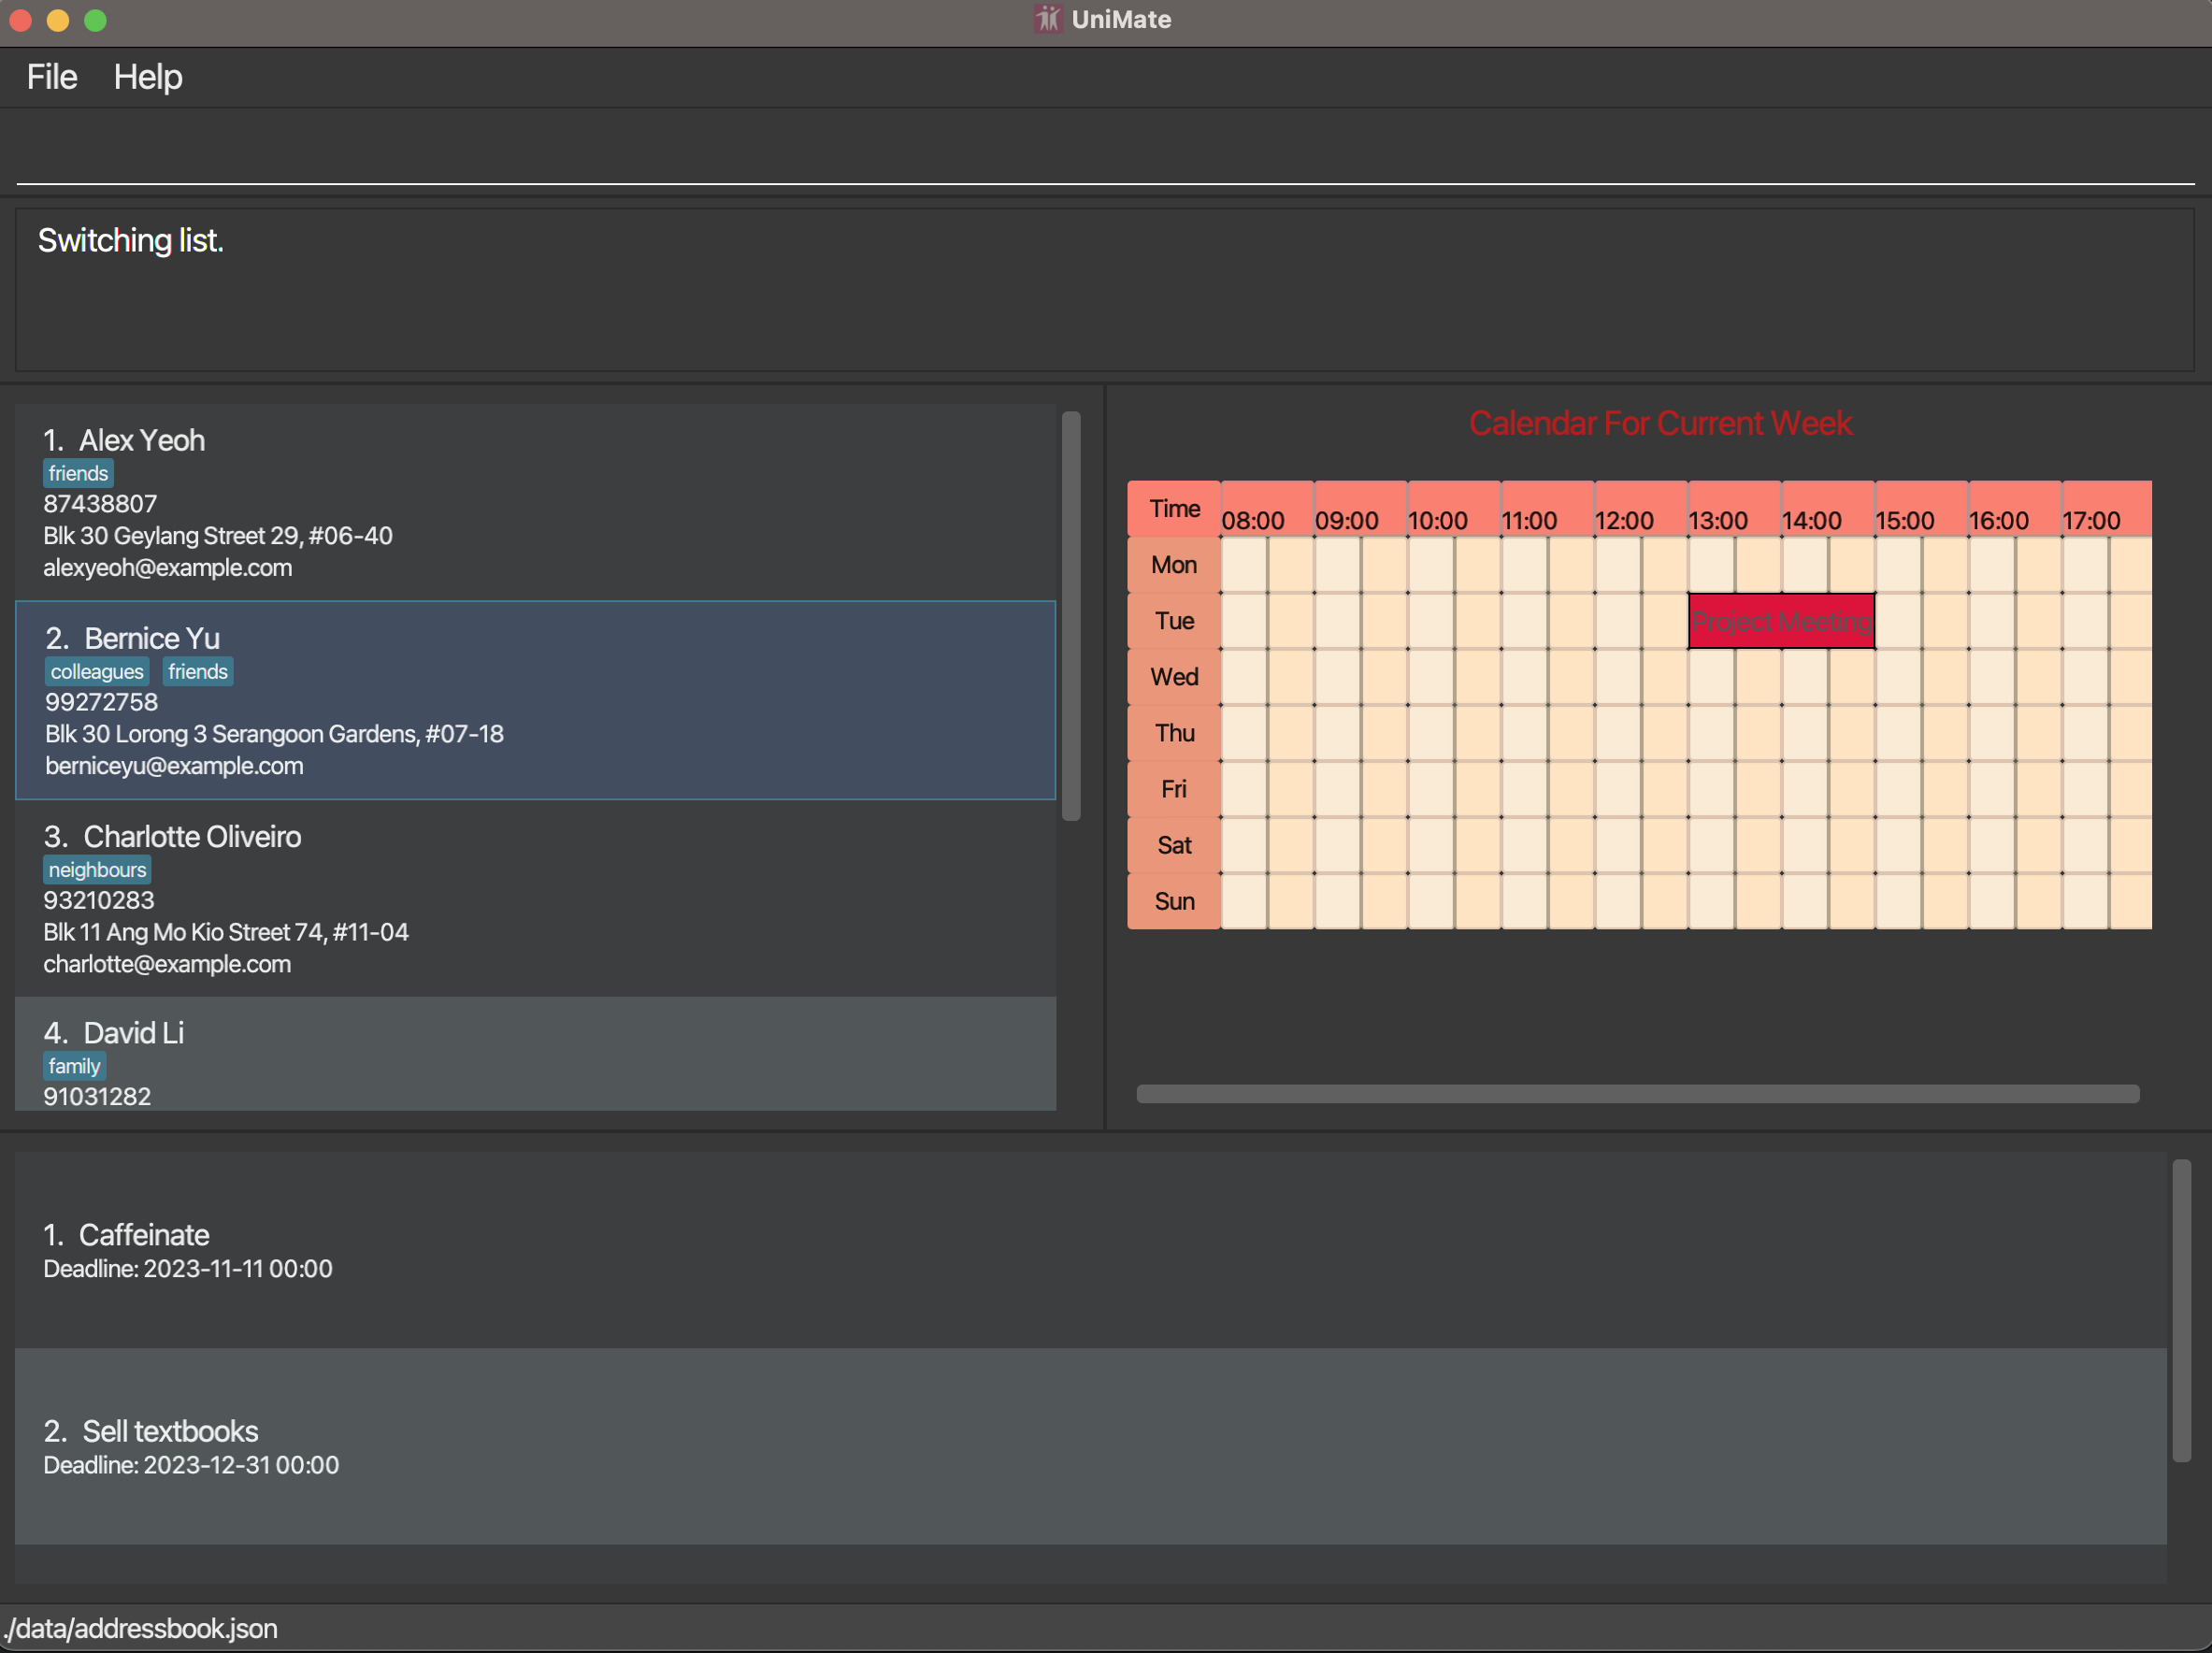
In this example, after executing switchList, we see that the bottom of the GUI has switched from
event list to the task list.
Adding tasks: addTask
Adds a task to the Task Manager.
Format: addTask d/DESCRIPTION [te/DEADLINE]
DESCRIPTIONcannot be empty.DEADLINEmust be in the same format given above for date and time.DEADLINEcan also be omitted to create a task with no specified deadline.- When adding a task with a deadline with a date that is invalid but with a day of 31 or less, instead adds a task with a deadline on the last day of the month.
- While there is no character limit for Task descriptions, descriptions will be truncated if they are too long to display.
Examples:
addTask d/Go for a run te/2023-02-14 19:00addTask d/Hydrate regularly!addTask d/Fix CS2103 Project bug te/2023-02-31 12:00creates the task with deadline2023-02-28 12:00instead.
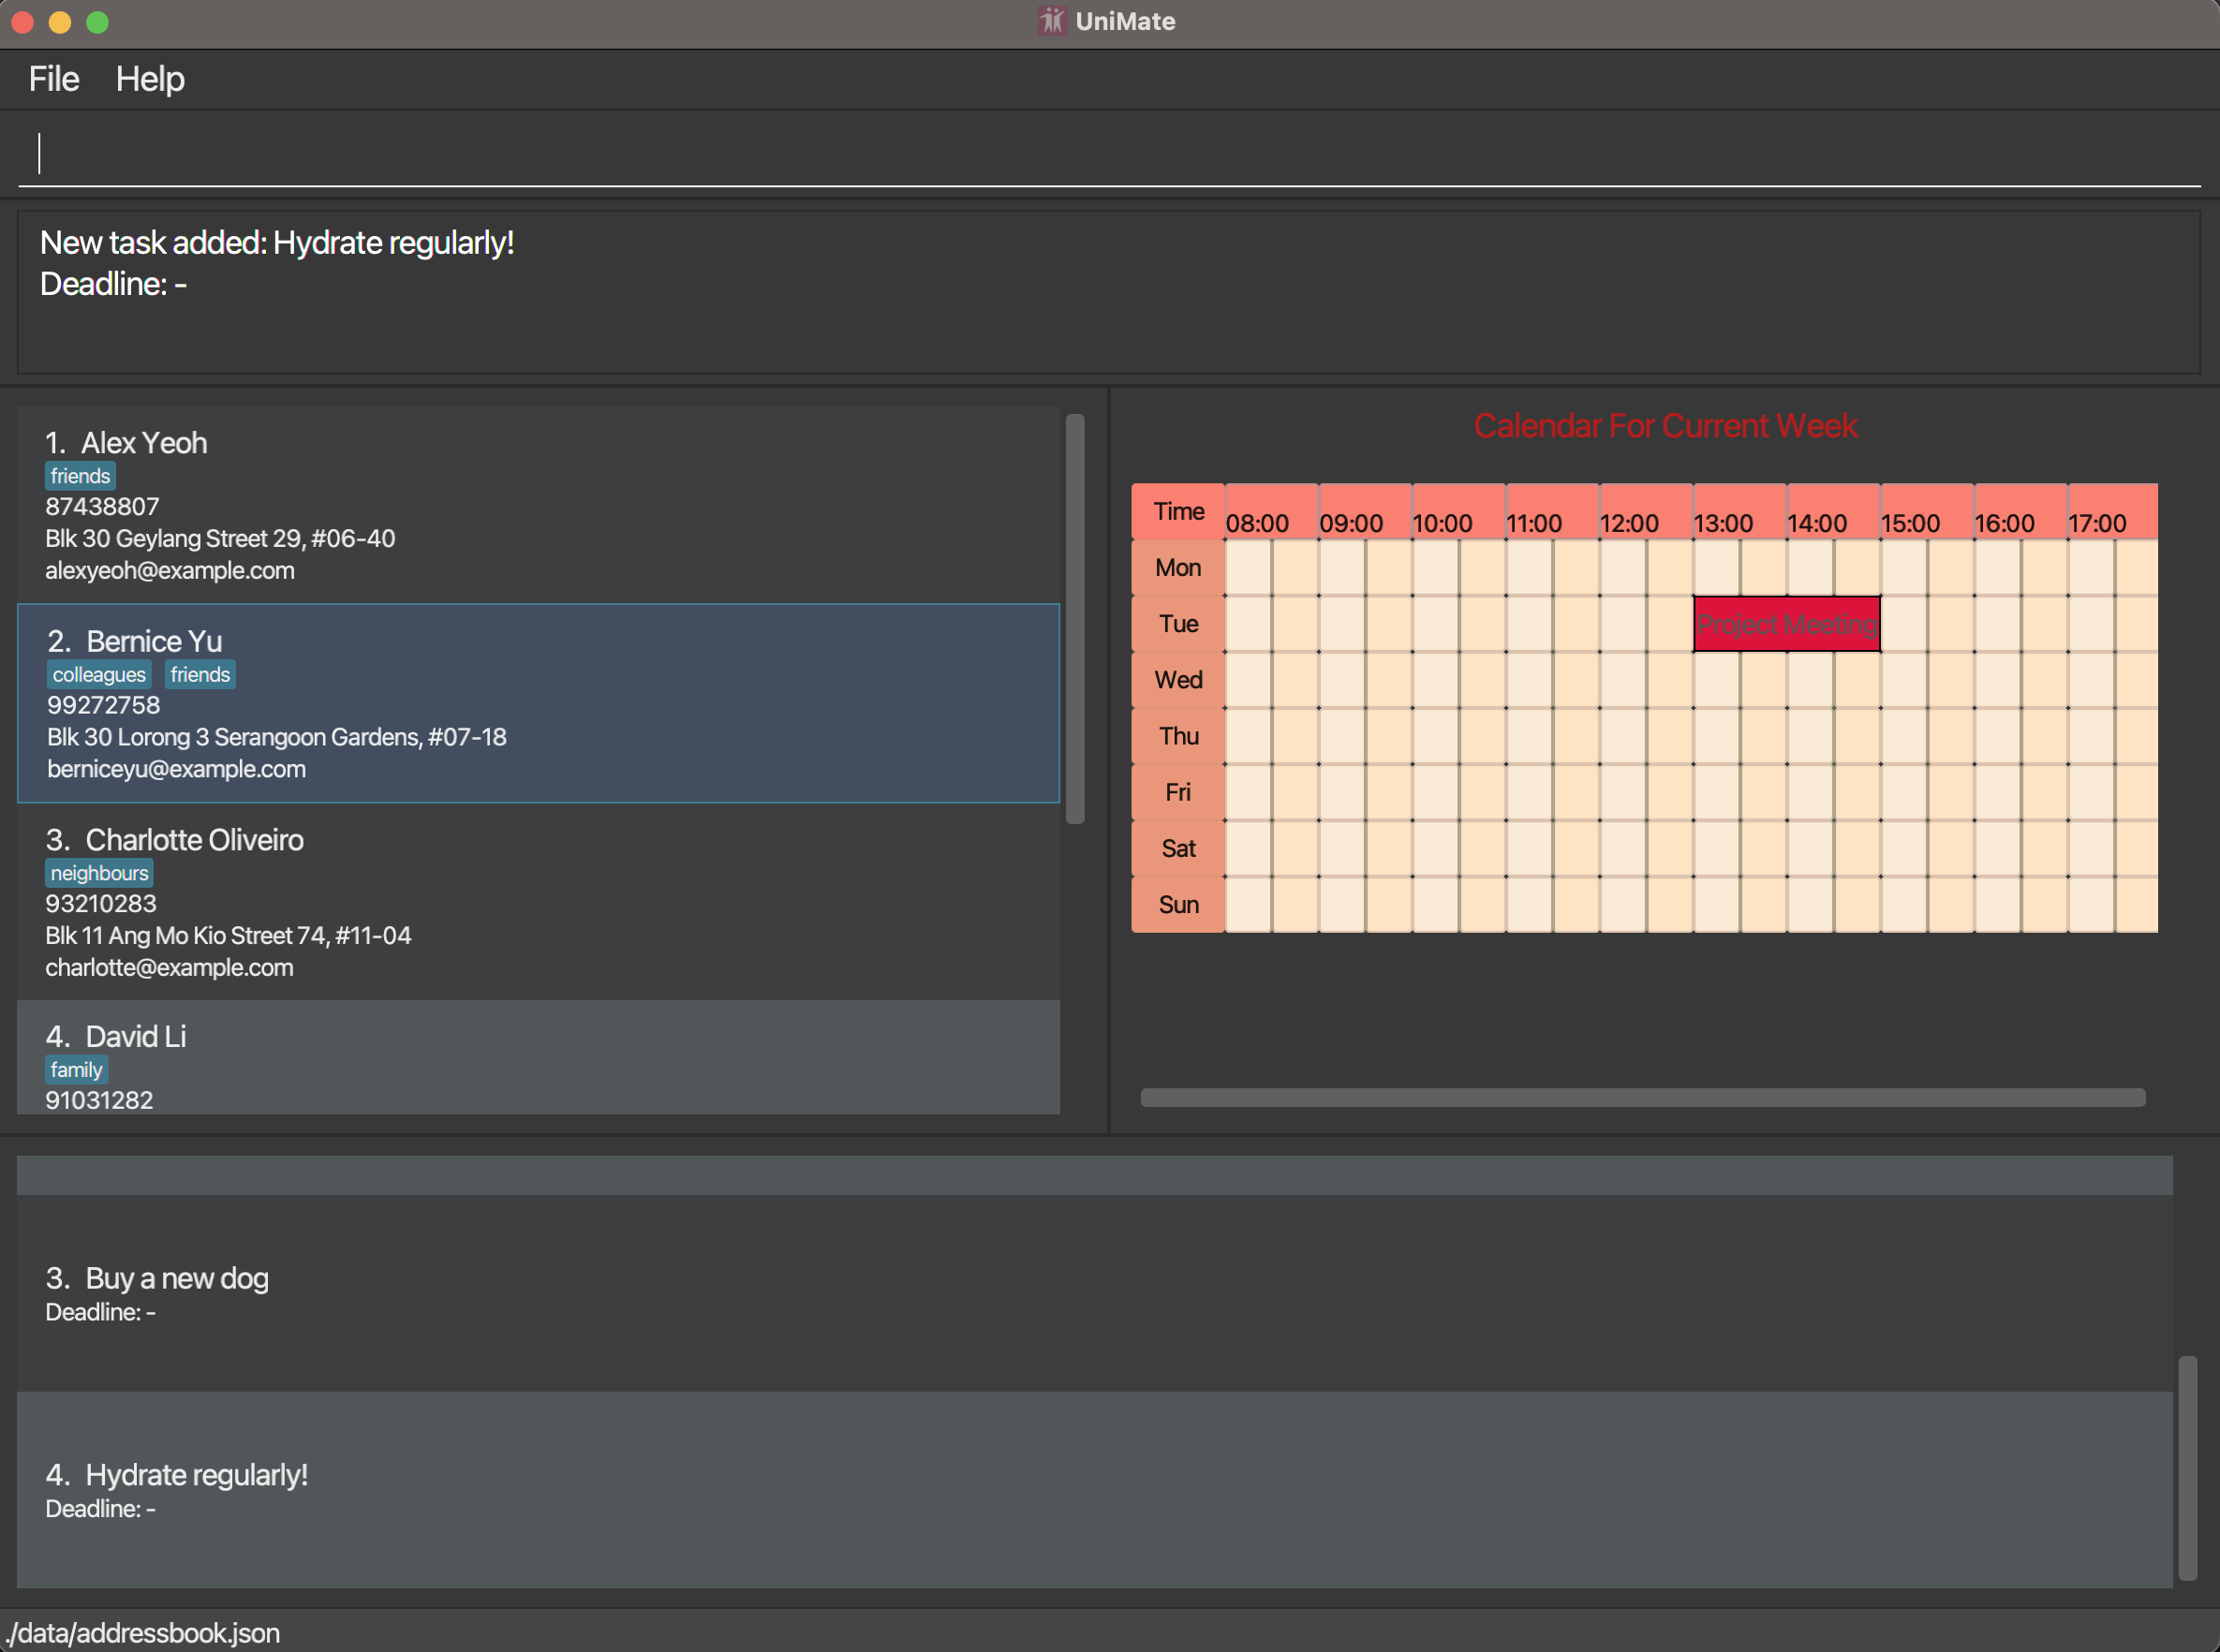
In this example, after executing addTask d/Hydrate regularly!, we see the new Hydrate regularly!
task appearing at the bottom of the task list.
Deleting tasks: deleteTask
Deletes a task from the Task Manager according to the index of the task displayed in the task list.
Format: deleteTask INDEX
- Throws an error if there is no
INDEXpresent or if it exceeds the length of the task list.
Examples:
deleteTask 1

In this example, after executing deleteTask 4, the Hydrate regularly! task added in the
previous example was removed.
Sorting tasks: sortTasks
Changes the way tasks in the Task Manager are displayed in the task list.
Format: sortTasks PARAMETER
PARAMETERcan only beDESCRIPTIONorDEADLINE.
Examples:
sortTasks DESCRIPTIONsorts tasks by theirDESCRIPTIONalphabetically.sortTasks DEADLINEsorts tasks by theirDEADLINE. Tasks with deadlines are prioritised above tasks with no deadline.
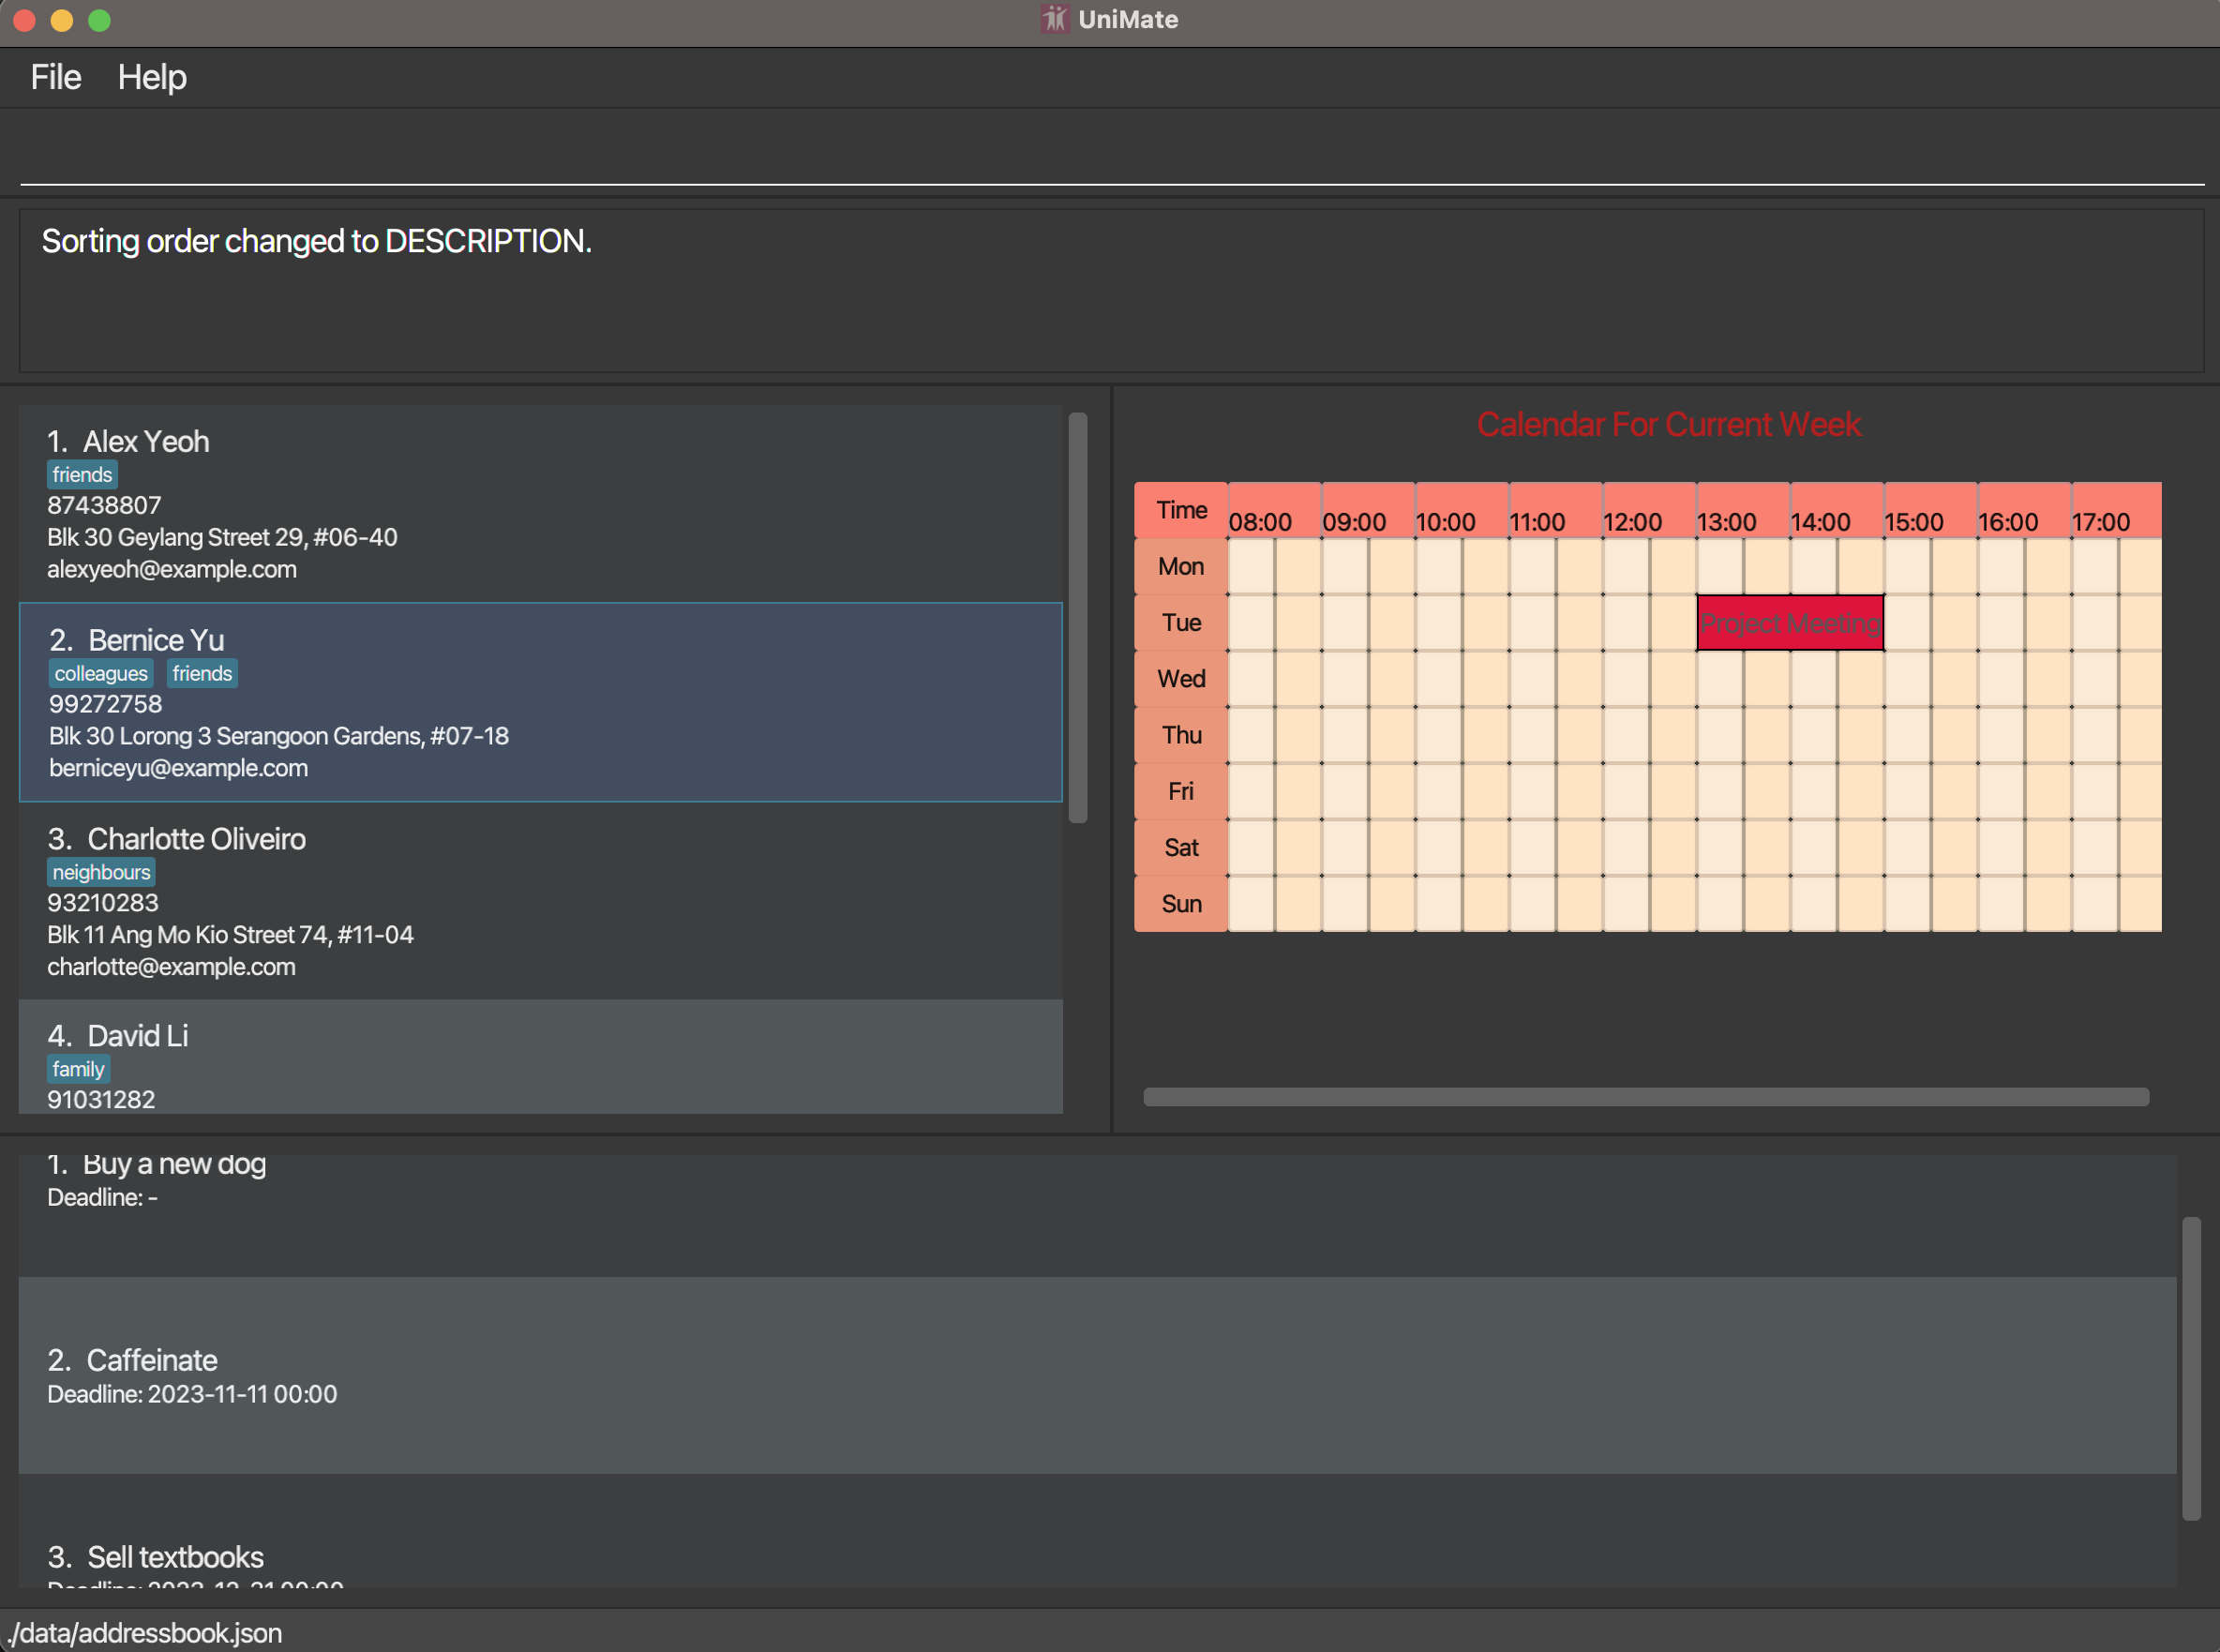
In this example, after executing sortTasks DESCRIPTION, the tasks are now sorted in ascending
alphanumeric order.
Miscellaneous
Saving the data
All data is saved in the hard disk automatically after any command that changes the data. There is no need to save manually.
Editing the data file
AddressBook data is saved automatically as a JSON file [JAR file location]/data/addressbook.json.
Calendar data is saved automatically as a JSON file [JAR file location]/data/calendar.json.
Task-list data is saved automatically as a JSON file [JAR file location]/data/taskmanager.json.
Advanced users are welcome to update data directly by editing the data files.
Caution: If your changes to the data file makes its format invalid, UniMate will discard all data and start with an empty data file at the next run. Hence, it is recommended to take a backup of the file before editing it.
Archiving data files [coming in v2.0]
Details coming soon ...
FAQ
Q: How do I transfer my data to another Computer?
A: Install the app in the other computer and overwrite the empty data file it creates with the file that contains the data of your previous UniMate home folder.
Known issues
- When using multiple screens, if you move the application to a secondary screen, and later switch to using only the primary screen, the GUI will open off-screen. The remedy is to delete the
preferences.jsonfile created by the application before running the application again. - If the zoom setting of the operating system is not set to 100%, it might cause inconsistencies in the UI which may cause the event cards displayed in the Calendar GUI to be lined up incorrectly.
Command summary
| Action | Format, Examples |
|---|---|
| Help | help |
| Exit | exit |
| Add | add n/NAME p/PHONE_NUMBER e/EMAIL a/ADDRESS [t/TAG]… e.g. add n/James Ho p/22224444 e/jamesho@example.com a/123, Clementi Rd, 1234665 t/friend t/colleague |
| Delete | delete INDEXe.g. delete 3 |
| Edit | edit INDEX [n/NAME] [p/PHONE_NUMBER] [e/EMAIL] [a/ADDRESS] [t/TAG]…e.g. edit 2 n/James Lee e/jameslee@example.com |
| Find | find KEYWORD [MORE_KEYWORDS]e.g. find James Jake |
| Filter | filter [n/NAME] [p/PHONE] [e/EMAIL] [a/ADDRESS] [t/TAG]… e.g. filter n/John Doe |
| List | list |
| Sort | sort /COMPARATOR e.g. sort /byname |
| Clear | clear |
| addEvent | addEvent d/DESCRIPTION ts/START_DATE_TIME te/END_DATE_TIME e.g. addEvent d/Cry about deadlines ts/2023-01-01 00:01 te/2023-12-31 23:59 |
| deleteEvent | deleteEvent DATE_TIME e.g. deleteEvent 2023-02-03 12:00 |
| clearEvents | clearEvents ts/START_DATE_TIME te/END_DATE_TIME c/CONFIRMATION e.g. clearEvents ts/2023-02-03 12:00 te/2023-02-03 14:00 c/CONFIRMED |
| switchList | switchList |
| addContactEvent | addContactEvent INDEX d/DESCRIPTION ts/START_DATE_TIME te/END_DATE_TIME e.g. addContactEvent 1 d/Cry about deadlines ts/2023-01-01 00:01 te/2023-12-31 23:59 |
| deleteContactEvent | deleteContactEvent INDEX ts/DATE_TIME e.g. deleteContactEvent 1 ts/2023-02-03 12:00 |
| editContactEvent | editContactEvent PERSON_INDEX EVENT_INDEX [d/DESCRIPTION] [ts/NEW_START_DATE_TIME] [te/NEW_END_DATE_TIME] e.g. editContactEvent 1 1 d/Edited Description |
| viewContactEvents | viewContactEvents INDEX e.g. viewContactEvents 1 |
| compareCalendars | compareCalendars [INDEX]... e.g. compareCalendars 1 3 5 |
| compareGroupCalendars | compareGroupCalendars [TAG]... e.g. compareGroupCalendars school friend |
| addTask | addTask d/DESCRIPTION [te/DEADLINE] e.g. addTask d/Go for a run te/2023-02-14 19:00 |
| deleteTask | deleteTask INDEX e.g. deleteTask 1 |
| sortTasks | sortTasks PARAMETER e.g. sortTasks DESCRIPTION e.g. sortTasks DEADLINE |